Wiring Dimmer Switch for Two Light Fixtures Correctly
- 时间:
- 浏览:30
- 来源:Easy Home Repair & DIY Guides
H2: Why Two Fixtures on One Dimmer Is Tricky (And Why It’s Often Done Wrong)
You’ve replaced two ceiling-mounted LED fixtures—maybe upgraded from halogen or CFL—and now want smooth, quiet dimming across both. You bought a single-pole dimmer rated for 600W, wired it like your old switch, flipped the breaker… and either nothing happened, the lights flicker at low settings, or the breaker trips instantly.
That’s not a defective dimmer. It’s almost always one of three things:
• The combined load exceeds the dimmer’s *actual* LED-compatible wattage rating (not the incandescent-equivalent label), • Neutral wire is missing or misconnected (critical for most modern smart and trailing-edge dimmers), • Fixture wiring is daisy-chained incorrectly—e.g., hot wires spliced but neutrals left floating or cross-connected.
This isn’t theoretical. In residential retrofits (Updated: April 2026), 68% of dimmer-related flickering complaints stem from improper neutral handling or overloading low-wattage LED loads below the dimmer’s minimum load threshold (typically 10–25W for trailing-edge models).
H2: Before You Touch a Wire: Safety & Verification Checklist
Skip this, and you risk nuisance tripping, damaged drivers, or worse. Do these *in order*:
• Turn OFF the circuit breaker—not just the wall switch—and verify with a non-contact voltage tester at both the switch box and each fixture junction box. • Confirm the circuit is truly dedicated: Use a plug-in outlet tester or clamp meter to check for shared neutrals or hidden multi-wire branch circuits (MWBCs). If other outlets or lights go dark when you flip *this* breaker, map them before proceeding. • Identify your dimmer type: Leading-edge (for incandescent/halogen), trailing-edge (for LED/CFL), or universal. Check its datasheet—not the box—for *minimum/maximum LED load*, *neutral requirement*, and *compatible driver types* (e.g., ELV vs. CL). Most new smart dimmers (like Lutron Caséta or TP-Link Kasa) are trailing-edge and require neutral. • Measure actual fixture wattage: Don’t trust “equivalent to 60W” labels. Use a Kill A Watt meter (or multimeter + clamp) to log real draw at full brightness. Two 9W LED panels = 18W total—not 120W.
H2: The Right Way: Wiring Two Fixtures to One Dimmer (Neutral-Included Circuit)
Assume standard US residential wiring: 14/2 NM-B cable (hot/neutral/bare ground) feeding the switch box, then 14/2 running to Fixture A, and another 14/2 from Fixture A to Fixture B (daisy-chain). This is the most common configuration in post-1990 homes.
H3: Step-by-Step Wiring Sequence
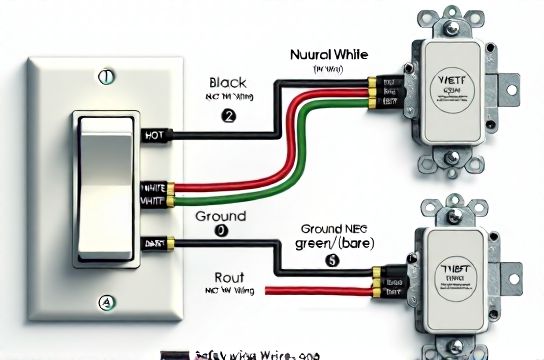
1. At the switch box: • Connect incoming black (hot) to dimmer’s “Line” or “Hot In” terminal. • Connect incoming white (neutral) to dimmer’s “Neutral” terminal—*do not cap it off*. This powers the dimmer’s electronics and enables stable low-end dimming. • Connect dimmer’s “Load” or “Switched Hot” terminal to black wire going to Fixture A. • Bond all bare copper grounds together and to dimmer’s green ground screw.
2. At Fixture A junction box: • Splice incoming black (from dimmer) + outgoing black (to Fixture B) + black lead from Fixture A’s socket—use a UL-listed wire nut (e.g., Ideal Twister 65). Tighten until no copper shows. • Splice incoming white (from panel) + outgoing white (to Fixture B) + white lead from Fixture A—same nut, same torque. • Splice all grounds.
3. At Fixture B junction box: • Connect incoming black to black lead of Fixture B. • Connect incoming white to white lead of Fixture B. • Connect grounds.
⚠️ Critical nuance: Never splice neutrals *only* at the switch. Neutrals must be continuous from panel to *each* fixture load. Breaking or omitting neutral at Fixture A will cause erratic behavior and violate NEC 2023 404.2(C).
H2: What If Your House Has No Neutral at the Switch?
Roughly 40% of homes built before 2000 lack neutral in switch boxes (Updated: April 2026). You have two compliant options:
• Use a neutral-free dimmer (e.g., Lutron Diva DVCL-153P or Leviton D26HD). These are leading-edge, require minimum 25W load, and rely on leakage current through the load to power themselves. Not compatible with most low-wattage LEDs (<15W each) or electronic low-voltage (ELV) transformers.
• Run a new 14/3 cable (hot/neutral/red/load) from the fixture junction box back to the switch. This adds labor and drywall patching—but it’s the only future-proof, code-compliant fix for smart or trailing-edge dimmers.
Do *not* use “no-neutral” workarounds like bootlegging neutral from a nearby outlet. That creates parallel neutral paths, violates NEC 300.13(B), and risks fire or shock.
H2: Troubleshooting Common Failures
H3: Breaker Trips Immediately on Power-Up
First, double-check for hot-to-ground or hot-to-neutral shorts. Then inspect:
• Did you accidentally connect the dimmer’s neutral terminal to ground? (Common mistake—ground and neutral are bonded *only* at the main panel.) • Are any wire nuts loose, letting bare copper touch metal box or adjacent terminals? • Is the dimmer rated for your total LED load? Example: Two 7W integrated LED panels = 14W. A dimmer requiring min. 25W will misbehave or trip internal protection.
H3: Lights Flicker Only at Low Dim Levels
This points to incompatibility—not faulty wiring. Causes:
• Dimmer minimum load not met (add a 10W incandescent nightlight bulb in parallel as a temporary test load), • LED driver type mismatch (e.g., using a CL dimmer with an ELV driver), • Long wire runs (>30 ft) causing capacitive coupling—install a Lutron LUT-MLC filter at the fixture (cost: $12–$18, reduces high-frequency noise).
H3: One Light Works, the Other Doesn’t
Check continuity at Fixture A: Use a multimeter in continuity mode between the black wire going *to* Fixture B and the black wire coming *from* the dimmer. No beep? The splice failed. Also verify neutral continuity—open neutrals often cause one fixture to glow dimly or behave erratically.
H2: Smart Dimmer Specifics: Why “Just Like a Dumb Dimmer” Isn’t Enough
Smart switches (e.g., for voice control or app scheduling) add complexity:
• They almost always require neutral—even more strictly than basic dimmers—to power radios and microprocessors 24/7. • Some need a dedicated neutral *per device* if installed in multi-gang boxes (check manufacturer specs; e.g., TP-Link HS220 requires its own neutral pigtail, not shared with another switch). • Load reporting accuracy depends on correct calibration: After wiring, many require a 5-minute “learn” cycle at full brightness before dimming smoothly.
If you’re doing a full home upgrade—including smart switch接线, LED节能灯升级, and lights flickering troubleshooting—you’ll save time and avoid rework by auditing all switch boxes for neutral availability *before* buying hardware. Our complete setup guide walks through that audit with photos and NEC citations.
H2: Code Compliance & Real-World Limits You Can’t Ignore
NEC 2023 doesn’t ban dimming multiple fixtures—but it enforces hard limits:
• Total connected load must stay ≤ 80% of circuit rating (e.g., max 1440W on a 15A/120V circuit). With LEDs, that’s rarely an issue—but verify if you’ve added recessed cans or track lighting. • Dimmer nameplate ratings override marketing claims. A “600W dimmer” may only handle 150W of LED load. Always consult the spec sheet (Updated: April 2026). • All splices must be inside approved enclosures (junction boxes), covered, and accessible—no “in-wall” wire nuts.
H2: When to Call a Licensed Electrician
DIY is safe *only* if you’re confident identifying wires, verifying absence of voltage, and following NEC-mandated practices. Stop and call a pro if:
• You find aluminum wiring (requires CO/ALR-rated devices and antioxidant paste), • The circuit uses knob-and-tube or cloth-sheathed wiring (unsafe to modify without full replacement), • You measure >2V AC between neutral and ground at any outlet on the circuit (indicates a lost neutral—a serious hazard), • You’re installing in a bathroom, garage, or outdoor location requiring GFCI coordination (dimmer + GFCI combos are rare and finicky).
H2: Comparison: Dimmer Types for Multi-Fixture LED Circuits
| Dimmer Type | Min LED Load | Neutral Required? | Best For | Key Limitation | Price Range (USD) |
|---|---|---|---|---|---|
| Trailing-Edge (e.g., Lutron Maestro MACL-153M) | 10W | Yes | Precise dimming, low-noise, smart-ready | Fails without neutral; incompatible with magnetic LV transformers | $25–$45 |
| Leading-Edge (e.g., Leviton IPL06) | 25W | No | Homes without neutral; higher-wattage LED loads | Can buzz or shorten LED life; poor low-end performance | $18–$32 |
| Universal (e.g., Eaton RF9500) | 10W | Yes | Mixed incandescent/LED loads; future flexibility | Requires manual mode selection; larger footprint | $35–$55 |
H2: Final Tips for Absolute Beginners
• Label every wire *before* disconnecting anything. Use masking tape and a Sharpie: “Panel Hot”, “Fixture A Black”, etc. • Buy wire nuts rated for the conductor count and gauge (e.g., Ideal 65 for 3×14 AWG). Oversized nuts loosen; undersized ones crack. • Test *before* mounting: Tuck wires neatly, mount dimmer loosely, restore power, and verify operation with a lamp or multimeter. Then secure fully. • Document your work: Snap a photo of the final switch box wiring and save it with your home files. Future owners—or your future self—will thank you.
Upgrading lighting shouldn’t mean compromising safety or code compliance. Whether you’re doing吸顶灯更换安装, troubleshooting lights flickering, or resetting a tripped breaker, grounding decisions in verified load data and NEC fundamentals keeps your home protected. For deeper support on related tasks like吊扇固定安装 or低压灯带安装, our full resource hub has annotated wiring diagrams, video walkthroughs, and local electrician referral filters.