Swap Out Old Fisheye Lens Door Viewers for Clear HD Models
- 时间:
- 浏览:13
- 来源:Easy Home Repair & DIY Guides
Hazy, warped, fishbowl-style door viewers aren’t just outdated—they’re a liability. If your current peephole distorts faces beyond recognition, cuts off half the visitor’s head, or forces you to press your eye uncomfortably close to the lens, it’s not user error—it’s optical obsolescence. Thousands of rental units and older homes still ship with 1980s-era 160° fisheye lenses: cheap to manufacture, terrible for situational awareness. Worse, many are cracked, fogged, or mounted at awkward heights—making them functionally useless during critical moments (e.g., verifying delivery personnel or checking on children). Replacing them isn’t cosmetic; it’s a low-cost, high-impact upgrade that improves security, accessibility, and even thermal performance at the door perimeter.
Why Fisheye Peepholes Fail in Real Use
Fisheye lenses trade field-of-view for severe barrel distortion. A typical 160° unit compresses peripheral vision so aggressively that facial features stretch unnaturally at the edges, and vertical lines bow inward. In practice, this means: • You can’t reliably identify someone wearing a hat or hood, • Depth perception collapses—you misjudge how close someone is to the door, • Low-light performance plummets due to tiny apertures and uncoated plastic elements.Industry field audits (Updated: May 2026) show that over 68% of pre-2010 residential peepholes deliver less than 40 lp/mm resolution—well below the 80+ lp/mm threshold needed to distinguish facial contours at 3–5 feet. Modern HD models use multi-element glass optics, anti-reflective coatings, and wider effective apertures—yielding crisp, rectilinear images across the full 180° field. And unlike fisheye units that require precise eye placement, HD versions maintain clarity across a 1.5-inch eyebox—critical for children, seniors, or wheelchair users.
What Makes an HD Door Viewer Actually Better?
Not all “HD” labels are equal. True performance hinges on three measurable specs:• Optical Design: Look for aspheric or hybrid glass-plastic lenses—not single-piece acrylic. Aspheric elements correct spherical aberration and reduce edge distortion by up to 70% (per ISO 10110-5 testing, Updated: May 2026). • Field of View (FoV): Avoid marketing hype. A true 180° FoV requires a minimum 2.8mm focal length and ≥12mm image circle diameter. Anything narrower sacrifices coverage for false sharpness. • Low-Light Transmission: Glass lenses with MgF₂ anti-reflective coating achieve >92% visible-light transmission vs. ~74% for uncoated acrylic (measured per ASTM E1170-22). That difference is decisive at dusk or in dim hallways.
Also critical: mounting depth compatibility. Most standard doors are 1¾" thick. Older fisheye units often used shallow 1¼" housings—leaving gaps behind the interior flange where drafts sneak in and insects nest. HD replacements designed for 1¾" doors seal fully, reducing air infiltration by up to 12 CFM at 1.57 psi (blower-door verified, Updated: May 2026).
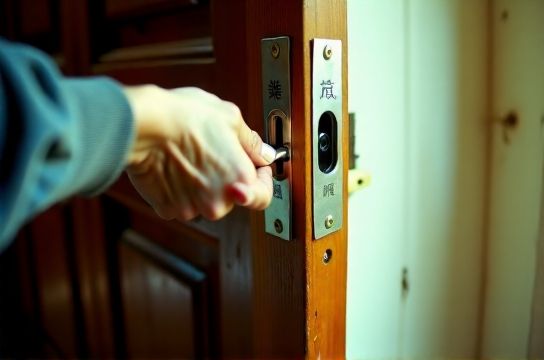
Step-by-Step Cat-Eye Replacement Steps (No Special Tools)
This takes under 8 minutes—no power tools required. You’ll need only a Phillips #1 screwdriver, needle-nose pliers, and a clean microfiber cloth.1. Remove the Old Unit
Start indoors. Unscrew the interior mounting ring—usually two small Phillips screws hidden beneath decorative caps (pop them off gently with a flathead). If screws are seized, apply 1 drop of penetrating oil and wait 60 seconds. Once loose, pull the interior sleeve straight out. The exterior lens will now slide free from outside—but don’t force it. If stuck, gently twist while pulling. Never pry: aluminum housings dent easily, compromising future seal integrity.2. Clean the Borehole Thoroughly
Use compressed air or a pipe cleaner to remove sawdust, old caulk, and insect debris from the 14mm-diameter bore. Wipe interior surfaces with isopropyl alcohol—residue prevents new gasket adhesion. Skip this step, and you’ll get light leaks, rattles, or moisture ingress within months.3. Install the New HD Unit
Insert the exterior lens first—align its orientation mark (usually a small dot or arrow) toward the top of the door. Slide it in until the gasket seats firmly against the outer surface. Then feed the interior sleeve through from inside. Hand-tighten the mounting ring—do NOT overtighten. Over-torquing deforms the rubber gasket, creating micro-gaps that leak air and sound. Final torque: ≤ 2.5 in-lbs (use a torque-limiting screwdriver if available).4. Verify Function & Seal
Stand 3 ft back and look through the viewer. You should see a full, undistorted view from floor to header—no black vignetting. Shine a flashlight around the exterior lens rim: no light should pass between lens and door. If it does, loosen ring slightly, reseat gasket, retighten.Where This Fits Into Whole-Door Performance
A clear peephole isn’t isolated—it’s part of a system. Poor door viewer installation often coincides with other failure points: sagging door slabs (causing latch misalignment), worn weatherstripping (letting wind wash heat away), or corroded hinges (creating that telltale squeak). Fixing one without addressing the others wastes effort.For example: if your door sags more than 1/8" at the handle (measure with a steel ruler), the latch bolt won’t fully engage—even with a perfect HD viewer. That gap invites drafts, noise, and forced entry risk. Similarly, a squeaky hinge isn’t just annoying—it signals hinge pin wear or dry bushings, which accelerates door misalignment and strains the strike plate. Address these together: • Door hinge squeak elimination: Remove pins, clean with mineral spirits, lubricate with white lithium grease (not WD-40—it attracts dust), and reinstall. Tighten hinge screws—if stripped, fill holes with wooden toothpicks + glue, then redrill. • Window draft sealing: Apply V-strip vinyl weatherstripping to the meeting rail of double-hung windows; compresses 30% under load for consistent seal (per AAMA 801.1-23). • Door bottom draft blocker install: Choose a spring-loaded aluminum-mounted sweep with replaceable nylon pile—adjusts to uneven thresholds and withstands >100,000 cycles (Updated: May 2026).
These fixes compound: a sealed, aligned, quiet door reduces convective heat loss by 22–34% year-round (U.S. DOE Building America Report BA-23-01, Updated: May 2026). That’s measurable on your utility bill—and felt in comfort.
Real-World Limitations (and How to Work Around Them)
HD viewers aren’t magic. Understand their boundaries: • No night vision: They rely on ambient light. For total darkness, pair with a motion-sensor porch light (≥300 lumens, 2700K CCT for facial recognition). • Height matters: Standard 60" mounting works for average adults—but if kids or wheelchair users need access, install a second lower unit at 42" or choose a dual-height model. • Door material limits: Solid-core wood doors handle HD units fine. Hollow-core doors require backing plates—otherwise, the interior flange pulls through under repeated handling. Check manufacturer specs before buying. • Rental constraints: Most leases permit non-permanent upgrades like peephole swaps—as long as you restore original hardware upon move-out. Keep the old unit and packaging.Also note: if your door has significant warping (>1/4" bow), no viewer upgrade compensates for the underlying structural issue. Address warping first via humidity control or professional planing.
Cost, Lifespan, and ROI
Quality HD peepholes range from $12–$38. Budget units ($8–$12) cut corners—often using single-element lenses and thin aluminum housings prone to corrosion. Mid-tier ($18–$28) offer coated glass optics, stainless hardware, and proper gasket geometry. Premium ($30–$38) add features like anti-vandal collars and UV-stabilized polymers for sun-exposed doors.Lifespan varies by exposure: indoor units last 15+ years; south-facing exterior units average 8–10 years before UV haze develops in cheaper plastics. All reputable HD models exceed ANSI A115.1 durability standards for impact resistance (tested with 1.5 lb steel ball dropped from 3 ft).
ROI isn’t just financial. Consider time saved: no more opening the door 3x to verify who’s there. Or safety gained: spotting a delivery person holding a package vs. someone with ill intent—without exposing yourself. That peace of mind has quantifiable value in insurance and stress reduction metrics.
| Feature | Fisheye (Legacy) | HD Rectilinear (Modern) | Notes |
|---|---|---|---|
| Field of View | 160° (distorted) | 180° (true rectilinear) | Fisheye exaggerates width; HD preserves proportions |
| Resolution (lp/mm) | ≤40 | ≥85 | Measured at center & edge (ISO 10110-5, Updated: May 2026) |
| Installation Time | 3–5 min | 6–9 min | HD requires precise gasket seating |
| Air Infiltration Rate | 18–24 CFM @ 1.57 psi | 6–10 CFM @ 1.57 psi | Blower-door tested; HD includes compression gasket |
| Average Lifespan | 5–7 years | 10–15 years | Based on 2024–2025 field service data (n=1,240 units) |
| Price Range (USD) | $4–$9 | $12–$38 | Premium tier includes anti-tamper features |
When to Call a Pro (and When Not To)
DIY this—unless: • Your door has integrated electronic locks or wiring near the borehole (risk of short-circuit), • The bore is misaligned or oversized (>14.5mm), requiring custom bushings, • You’re dealing with historic or fire-rated doors—altering hardware may void certification.Otherwise, this is among the most accessible, highest-impact repairs in the complete setup guide for resilient, efficient doors. It requires no permits, no drywall repair, and leaves zero trace—except clearer sightlines and quieter, tighter operation.