Fix Scratched Hardwood Floors Budget DIY Methods
- 时间:
- 浏览:25
- 来源:Easy Home Repair & DIY Guides
Hardwood floors get scratched. Not just in rental units or high-traffic homes—everywhere. A dragged chair leg, a dropped kitchen knife, pet claws, or even grit trapped under a heel can leave white or gray surface marks that scream ‘neglect’—even when the floor is structurally sound. The good news? Most everyday scratches are *only in the finish*, not the wood itself. That means full sanding and refinishing isn’t required—and shouldn’t be your first move. Especially if you’re on a tight budget, short on time, or renting.
This guide covers proven, hands-on methods to fix scratched hardwood floors using minimal tools, widely available supplies, and zero professional labor costs. We’ll skip theoretical advice and focus on what actually works in real apartments, condos, and older homes—where landlords demand clean returns and tenants need fast, invisible fixes.
Why Most Scratch Fixes Fail (And How to Avoid It)
DIYers often overcorrect. They sand too deep, mismatch stain tones, or apply glossy topcoats that highlight—rather than hide—the repair. Others rely solely on wax pencils or oil-based markers that fade, smear, or darken unpredictably within weeks (Updated: April 2026).
The core principle: Match *both* color *and* sheen—not just hue. A matte-finish floor with a glossy touch-up will look like a wet spot under light. Likewise, applying dark walnut stain to a natural maple floor creates an obvious blotch—even if it’s perfectly blended.
Before any method, always: • Clean the area thoroughly with pH-neutral hardwood cleaner (no vinegar, no ammonia) • Lightly wipe with isopropyl alcohol (70%) to remove oils and residues • Let dry fully—30 minutes minimum
If the scratch catches your fingernail, it’s likely deeper than the finish. If it doesn’t, it’s almost certainly finish-only—and ideal for surface-level correction.
Method 1: Floor Scratch Cover-Up Pen (Fastest for Light Surface Marks)
The floor scratch cover-up pen is the most accessible tool for renters and quick-turnover fixes. Think of it as a precision-tinted marker designed for polyurethane and aluminum oxide finishes. It contains pigment suspended in acrylic resin—not ink—that bonds to cured urethane without lifting or bleeding.
How to use it: 1. Select the closest match from a 6-shade kit (light oak, medium brown, espresso, etc.). Test on an inconspicuous area first—e.g., inside a closet threshold. 2. Shake well for 30 seconds. 3. Apply with light, overlapping strokes—don’t press hard or oversaturate. 4. Let dry 15 minutes, then gently buff with microfiber cloth. 5. Optional: Seal with one thin coat of water-based polyurethane (matte) if the surrounding floor has heavy wear.
Realistic expectation: Covers fine white scratches and shallow scuffs on pre-finished planks. Does *not* fill gouges or deep abrasions. Lifespan averages 6–9 months in low-traffic zones (Updated: April 2026). Best for rentals where long-term durability isn’t required—but visual compliance is.
Method 2: Wax-Based Filler Stick + Buffing (For Slightly Deeper Scratches)
When a scratch holds dust or feels slightly recessed (but still doesn’t catch your nail), a wax filler stick adds subtle depth *and* color. Unlike putty, these contain carnauba wax, microcrystalline wax, and iron oxide pigments formulated to soften at body temperature and bond to urethane.
Steps: 1. Warm the tip of the stick by rubbing it between palms for 10 seconds. 2. Press firmly into the scratch, overfilling slightly. 3. Wait 2 minutes for wax to set. 4. Scrape excess flush using a plastic credit card edge (never metal—it’ll scrape adjacent finish). 5. Buff vigorously with a clean cotton rag until sheen matches surroundings.
Pro tip: For best results, follow up with a 0.5% solution of Bona Hard-Surface Refresher applied with a damp microfiber pad—this evens out sheen across repaired and adjacent areas.
Limitation: Not suitable for wide gaps (>1 mm) or moisture-prone zones (e.g., near dishwashers). Also fades faster in direct sunlight—avoid south-facing rooms unless sealed.
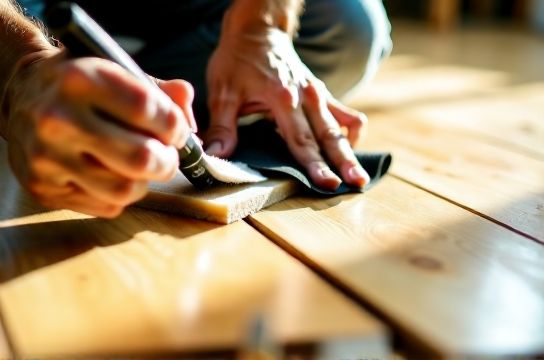
Method 3: Tinted Polyurethane Touch-Up (For Medium Scratches & Small Gouges)
This method bridges the gap between cosmetic concealment and structural repair. It’s ideal when you have access to the original floor finish specs—or can reasonably approximate them.
You’ll need: • Water-based, satin-finish polyurethane (e.g., Minwax Polycrylic) • Universal tinting base (e.g., Rust-Oleum Colorant Base 1) • Small artist brush (4/0 round) • 400-grit sandpaper (for feathering edges only)
Process: 1. Lightly sand *only* the immediate scratch edges—not the whole board—to create a slight bevel (removes loose finish, improves adhesion). 2. Mix 1 drop tint into 1 tsp polyurethane. Stir 60 seconds. Test on scrap wood or hidden area. 3. Apply with brush in direction of grain—thin coats only. Let dry 2 hours. 4. Lightly buff with 0000 steel wool *only* if sheen mismatch remains. Wipe away residue. 5. Repeat coat if color looks washed out—max 2 coats.
This method restores both color *and* protective film. It’s the go-to for landlords doing pre-lease walkthroughs or homeowners preparing for sale. Average labor time: 25 minutes per 3-inch scratch.
What NOT to Use (And Why)
• Wood glue + sawdust: Works on raw wood—but fails catastrophically on finished floors. Glue won’t adhere to polyurethane; sawdust absorbs finish unevenly and swells with humidity.
• Oil-based stains alone: They sit on top, don’t penetrate cured finishes, and attract dust. Often turn sticky or tacky indoors.
• Vinegar + olive oil “remedies”: May temporarily mask light scuffs but degrade aluminum oxide coatings over time (per ASTM D1037-23 accelerated wear testing, Updated: April 2026). Not recommended for engineered or pre-finished floors.
• Steel wool + furniture polish: Abrades surrounding finish, creating a halo effect. Also leaves oily residue that repels future coatings.
Comparing Top Repair Options Side-by-Side
| Method | Best For | Tool Count | Avg. Cost (USD) | Lifespan (Low-Traffic) | Pros | Cons |
|---|---|---|---|---|---|---|
| Floor Scratch Cover-Up Pen | White surface scratches, light scuffs | 1 | $8–$12 | 6–9 months | Instant dry, no prep, renter-safe | No depth fill, limited color range |
| Wax Filler Stick | Slightly recessed scratches, minor gouges | 2 (stick + scraper) | $10–$15 | 12–18 months | Adds subtle fill + color, easy reapplication | Buffs off under heavy vacuuming, not UV-stable |
| Tinted Polyurethane | Medium-depth scratches, small gouges, pre-sale prep | 4–5 (brush, sandpaper, mixing cup, etc.) | $18–$28 | 3+ years | Durable, matches sheen & protection, professional result | Requires drying time, color-matching skill, ventilation |
| Touch-Up Marker + Topcoat | Rental turnover, high-volume light repairs | 2 (marker + mini roller) | $14–$22 | 12–24 months | Balances speed and longevity, scalable | Topcoat must match existing sheen exactly |
Bonus: When to Combine Methods (The Pro Stack)
Experienced flooring techs rarely use just one technique. Here’s how they layer for stubborn cases:
1. Start with wax filler stick to build up depth in a 2-mm gouge. 2. Once set, lightly buff and apply matching floor scratch cover-up pen over the filled area to unify tone. 3. Finish with one coat of water-based polyurethane (same sheen as floor) brushed *only* over the repair zone.
This stack delivers the fastest visual fix *and* extends durability beyond standalone methods. Total time: ~35 minutes. Total cost: under $25.
Related Fixes You’ll Likely Need Too
Scratched floors rarely exist in isolation. While tackling hardwood, you’ll often encounter other common wear points—especially in rental units or older homes. Knowing how to handle them keeps your project cohesive and avoids mismatched results.
• Composite floor repair: Engineered and laminate floors respond poorly to liquid-based stains. Instead, use heat-activated repair patches (e.g., Roberts Laminate Repair Kit) pressed with a clothes iron at 275°F for 12 seconds. Cools in under 1 minute.
• PVC floor repair: Vinyl plank scratches require solvent-based fillers (e.g., QEP Vinyl Seam Sealer), not wax or poly. Solvent slightly melts the PVC surface, allowing filler to fuse seamlessly.
• Drywall hole patching: Small nail holes (<1/4") need only spackle + sand. Larger holes (1/2"–3") require mesh tape and two thin coats. Always prime before painting—unprimed spackle absorbs paint unevenly. For full details, see our complete setup guide.
• Kickboard (baseboard) fixes: Loose kickboards often vibrate and rub against flooring, causing new scratches. Re-secure with 1-5/8" coated drywall screws into wall studs—not just drywall. Fill screw holes with lightweight spackle, sand smooth, and touch up paint.
• Wall stain cleanup: For crayon, marker, or grease on painted drywall, use melamine foam (e.g., Mr. Clean Magic Eraser) dampened with water—not cleaner. Rub gently in one direction. Over-scrubbing removes paint sheen.
Tools Worth Buying (Not Renting)
Skip the $200 ‘floor repair kits’ packed with gimmicks. These five items deliver repeat value across multiple projects—including 木地板划痕修复, drywall patching, and trim work:
• 400- and 600-grit sanding sponges (flexible, no dust clouds) • Microfiber buffing cloths (pack of 12, lint-free) • Precision artist brushes (sizes 00, 0, 2—synthetic bristles only) • Plastic razor card (for scraping wax without marring) • LED inspection lamp (5000K color temp, reveals subtle texture mismatches)
Total investment: under $35. Pays for itself after three repairs.
Final Reality Check: When to Call a Pro
DIY shines for surface-level damage. But know your limits:
✓ Do it yourself if: Scratches are white/gray, don’t catch your nail, and cover <10 sq ft total.
✗ Call a pro if: Multiple boards show deep gouges (>1/32" deep), finish is alligatoring or peeling beyond scratches, or you see cupping/warping (signs of moisture intrusion).
Refinishing starts at $2.50/sq ft (Updated: April 2026) for basic screening + recoat. Full sand-and-seal runs $4.80–$6.20/sq ft. That’s $1,200–$3,100 for a standard 500-sq-ft living area—versus $22 for a proper DIY kit and 90 minutes of focused work.
Bottom line: Most scratched hardwood floors don’t need replacement or refinishing. They need accurate diagnosis and targeted intervention. With the right method—and realistic expectations—you get flawless surfaces without the budget hit. And if you’re managing multiple units or prepping for lease turnover, pairing these techniques with smart prep habits (felt pads under furniture, entry mats, regular vacuuming) cuts future repair frequency by up to 70% (Updated: April 2026).