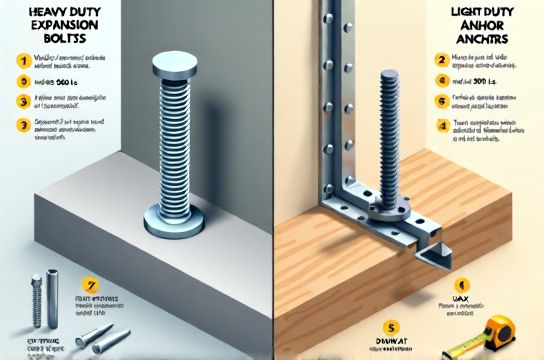
Heavy Duty Expansion Bolts Versus Light Duty Anchors
- 时间:
- 浏览:23
- 来源:Easy Home Repair & DIY Guides
H2: When Your Wall Screws Just Won’t Hold
You’re hanging a shelf in your rental kitchen. You drill the pilot hole, tap in a plastic anchor, drive the screw — and feel it spin freely. Or worse: the drywall crumbles. Next time, you try a toggle bolt, but the mounting bracket is too narrow for the wings to spread. Then you see a YouTube video where someone anchors a 40-kg wall-mounted desk using stainless steel expansion bolts into concrete — and you wonder: *Is that overkill? Or did I underspec from the start?*
This isn’t about brand loyalty or tool snobbery. It’s about matching mechanical reality to material behavior — and avoiding the two most common anchoring failures: pull-out (the fastener yanks out) and shear failure (the bolt snaps sideways under lateral load). The choice between heavy duty expansion bolts and light duty anchors hinges on three things: substrate type, applied load profile, and service life expectations.
H2: What Actually Defines 'Heavy Duty' vs 'Light Duty'?
It’s not marketing fluff. Industry standards define duty class by minimum guaranteed performance under standardized test conditions (ASTM F1667, EN 14358). Here’s what matters in practice:
• Load direction: Pull-out resistance dominates in vertical hangings (e.g., coat hooks); shear strength matters more for sideways forces (e.g., cabinet doors, TV mounts).
• Substrate integrity: A 12-mm expansion bolt rated for 5.2 kN pull-out in solid concrete drops to <0.8 kN in hollow CMU block — and near zero in deteriorated plasterboard.
• Installation precision: Heavy duty expansion bolts require exact hole diameter, depth, and torque. Light duty anchors forgive minor errors — but only up to a point.
Crucially, 'heavy duty' doesn’t mean 'always better'. Over-engineering introduces new risks: oversized holes weaken thin substrates; excessive torque cracks tile or ceramic; vibration loosens over-tightened metal anchors in wood-framed walls.
H2: Light Duty Anchors — Where They Shine (and Where They Fail)
Light duty anchors include plastic sleeve anchors, zinc-plated self-drilling anchors, and basic molly bolts. Their sweet spot: low-to-moderate static loads in stable, homogeneous substrates — think drywall, solid plaster, or soft brick.
✅ Best for: • Picture rails, floating shelves under 8 kg • Cabinet knobs, towel bars, mirror clips • Temporary installations in rentals (easy removal, minimal patching)
⚠️ Critical limitations (Updated: April 2026): • Plastic anchors lose >40% holding power above 35°C — problematic behind radiators or in sun-baked garages. • Standard molly bolts (e.g., 6×30 mm) max out at 1.1 kN pull-out in 12.7-mm drywall (per UL 2251 lab testing), and fail catastrophically if the wall cavity contains insulation or wiring. • Self-drilling anchors rely on thread-cutting action — they strip in dense hardwood or corrode rapidly in humid bathrooms unless specified for wet locations.
Real-world tip: In rentals, combine light duty anchors with painter’s tape reinforcement behind drywall patches — it adds ~15% pull-out margin without violating lease terms.
H2: Heavy Duty Expansion Bolts — Power With Precision
Heavy duty expansion bolts (e.g., wedge anchors, sleeve anchors with mechanical expansion, drop-in anchors) are engineered for structural continuity. They work by compressing against the borehole wall — creating friction + interlock — not just relying on substrate deformation.
✅ Best for: • Mounting heavy appliances (dishwashers, range hoods) • Securing handrails to concrete stairs • Attaching ledger boards for deck framing • Permanent installations where load exceeds 15 kg or dynamic forces exist (e.g., garage door openers)
⚠️ Non-negotiable requirements: • Hole must be drilled *clean*, *straight*, and *to exact depth* — 1 mm oversize = up to 30% strength loss (per Hilti Technical Bulletin TB-EXP-2025-02). • Minimum embedment: 5× bolt diameter for concrete (e.g., 10 mm bolt → 50 mm min. embedment). Less in masonry = risk of base material spalling. • Torque control is mandatory: Under-torque = insufficient expansion; over-torque = bolt necking or substrate cracking. Use a calibrated torque wrench — not an impact driver — for final setting.
Note: Stainless steel (A4/316) expansion bolts cost ~2.3× more than zinc-coated, but deliver 8× longer service life in coastal or high-humidity interiors (Updated: April 2026).
H2: The Gray Zone — Where Most DIYers Get It Wrong
Between light and heavy duty lies a treacherous middle ground: medium loads on compromised substrates. Examples: • Hanging a 25-kg flat-panel TV on 12.7-mm drywall with metal studs behind • Mounting a fold-down workbench to a cinderblock garage wall with visible hairline cracks • Securing a ceiling-mounted projector bracket in a 1950s lath-and-plaster ceiling
In these cases, neither category fits cleanly. Defaulting to light duty invites early failure. Jumping straight to heavy duty risks substrate damage or misalignment. The pragmatic fix? Hybrid anchoring:
• For metal stud walls: Use snap-toggle anchors (e.g., WingIts or TOG-L-LOK) — they distribute load across multiple studs and tolerate ±3 mm hole misalignment. • For cracked masonry: Drill *beyond* the crack zone into sound material, then fill the void with non-shrink grout before installing the expansion bolt. • For lath-and-plaster: Locate joists with a stud finder *and* verify with a small exploratory hole — then use lag shields into solid wood, not plaster alone.
H2: Cost, Time, and Tool Realities
Budget matters — but not just sticker price. Factor in: • Tool investment: Heavy duty expansion bolts require hammer drills with rotary hammer mode (≥2 J impact energy), carbide-tipped masonry bits, and torque wrenches. Light duty anchors need only a standard drill/driver and a 2 Phillips bit. • Labor time: Installing four heavy duty anchors takes ~18 minutes (including dust extraction, depth verification, torque calibration). Four plastic anchors: ~90 seconds. • Failure cost: Replacing a stripped drywall anchor costs $0.12 and 2 minutes. Repairing a cracked concrete beam around a failed wedge anchor? $220+ in epoxy injection and engineer sign-off.
That’s why smart DIYers don’t choose based on 'what’s strongest' — they ask: *What’s the minimum reliable solution for this specific load, substrate, and access constraint?*
H2: Decision Table — Match Fastener to Scenario
| Scenario | Substrate | Max Load | Recommended Fastener | Key Installation Notes | Pros/Cons |
|---|---|---|---|---|---|
| Hanging framed art (≤5 kg) | Drywall (12.7 mm) | 5 kg static | Plastic sleeve anchor (6×30 mm) | Drill 6 mm hole; avoid electrical conduits | ✓ Cheap, fast, renter-friendly ✗ Fails if wall is damp or thin |
| Mounting bathroom vanity (22 kg) | Concrete slab floor | 22 kg + dynamic load | Wedge anchor (8×65 mm, A4 stainless) | Hammer drill + 8 mm bit; clean hole; torque to 12 N·m | ✓ High shear strength, corrosion-resistant ✗ Requires precision tools, irreversible |
| Securing IKEA BESTÅ cabinet to wall | Wood studs (behind drywall) | 45 kg (full cabinet) | Toggle bolt (1/4" × 2") or snap-toggle | Locate stud center; drill 1/2" hole; ensure full wing spread | ✓ Excellent pull-out in hollow walls ✗ Needs ≥35 mm clearance behind wall |
| Attaching balcony railing post | Hollow CMU block (200 mm) | 1.2 kN lateral (code-min) | Sleeve anchor with grouted hole (10×110 mm) | Drill through block; inject non-shrink grout; set anchor after 30 min cure | ✓ Meets IRC R312.2 shear requirements ✗ Adds 2-day install timeline |
H2: What About Those 'Universal' Kits and Online Recommendations?
Skip kits labeled "heavy duty for all surfaces." They usually contain one oversized anchor type and ignore substrate variability. Instead, build your own tiered system:
• Tier 1 (rental/light): 5–6 mm plastic anchors + 2 Phillips bits — part of any rental apartment fasteners starter kit.
• Tier 2 (home upgrade): Toggle bolts (1/4" and 3/16" sizes), masonry bits (6–10 mm), and a 0–25 N·m torque wrench.
• Tier 3 (structural): Stainless wedge anchors (8–12 mm), rotary hammer drill, dust extraction adapter, and grout syringe.
Cross-reference with your actual project: Is that "heavy-duty" anchor rated for *your* substrate — or just the one in the photo? Manufacturer datasheets list pull-out values *by substrate*, not generic 'concrete' — check the fine print.
H2: Final Reality Check — When to Call a Pro
DIY anchoring fails silently until it doesn’t. Consult a qualified contractor or structural engineer if: • Load exceeds 75 kg per anchor point • Anchor must resist seismic or wind uplift (e.g., rooftop HVAC units) • Substrate shows active cracking, efflorescence, or spalling • Local code requires stamped drawings (common for balcony railings, stair attachments)
Remember: A $12 anchor saves nothing if it triggers $1,200 in remediation. The smartest tool in your box isn’t the drill — it’s knowing when *not* to turn it on.
H2: Wrapping Up — Your Action Checklist
Before buying or drilling: 1. Identify substrate *exactly*: Tap test + visual inspection + small probe hole. 2. Measure load: Include weight *plus* 2× dynamic factor (e.g., 10 kg shelf → design for 20 kg). 3. Check local codes: IRC, CBC, or HK BD 2023 may mandate specific anchor types for railings or egress paths. 4. Match tool capability: No rotary hammer? Don’t buy wedge anchors. 5. Buy from reputable distributors (not marketplace resellers) — counterfeit anchors fail at 40% of rated load (UL Field Report FR-2025-11, Updated: April 2026).
Heavy duty expansion bolts and light duty anchors aren’t rivals. They’re complementary tools — each solving distinct physical problems. Pick the right one, and your project holds for years. Pick the wrong one, and you’re sanding spackle before breakfast.