Steel Tape Measure Markings Decoded
- 时间:
- 浏览:20
- 来源:Easy Home Repair & DIY Guides
H2: Why Your Tape Measure Lies (And How to Catch It)
You’re hanging a shelf. You double-check the stud location—16 inches from the corner—and mark it. Drill in, and the screw misses the wood by 3/16". Frustrating? Yes. Surprising? Not if you’ve never decoded the markings on your steel tape measure.
Most users treat the tape like a ruler: look at the biggest number, add the nearest tick, call it done. But steel tapes aren’t static rulers—they’re precision instruments calibrated under tension, temperature, and alignment constraints. A misread by 1/32" compounds fast: over 8 feet, that’s nearly 3/8" of cumulative error. In tile layout or cabinet installation, that’s a ruined backsplash or a jammed drawer.
This isn’t about theory. It’s about knowing *exactly* what that tiny hash means—and when to trust it.
H2: The Three Scales, One Blade
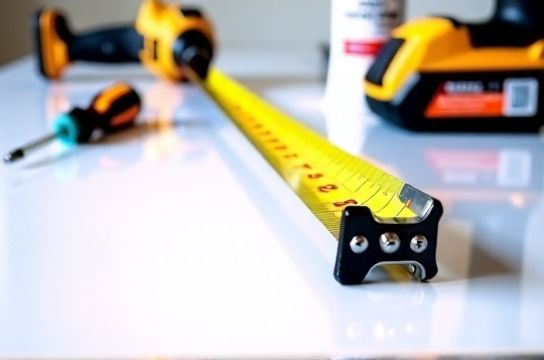
Every standard 25-ft steel tape has three co-located scales: imperial (inches + fractions), metric (millimeters + centimeters), and sometimes dual-sided fractional increments (e.g., 1/16" vs. 1/32"). They’re not interchangeable—and they’re not equally precise for your task.
H3: Imperial Inches: Fractions Are Not Optional
The inch scale is subdivided into halves, quarters, eighths, sixteenths—and often thirty-seconds. But here’s the catch: not all tapes show *all* denominators. Budget tapes (under $12) typically stop at 1/16". Mid-tier ($15–$25) add 1/32"; pro-grade ($30+) may include 1/64" on the first 12 inches only—where fine work happens.
Why does that matter? Because 1/32" = 0.79 mm. If you’re setting door hinges or laying hardwood flooring with 1/8" expansion gaps, rounding down to the nearest 1/16" introduces measurable drift. A 10-ft floor run with five 1/32" rounding errors adds up to over 1/8" total gap mismatch.
Also critical: the zero point isn’t at the very tip. Most tapes have a 1/16"–1/8" metal hook (the tang) designed to *move slightly*—compensating for its own thickness when measuring *outward* (hook hooked on edge) vs. *inward* (hook pressed flat against surface). That movement is intentional and calibrated—but only if the tape is pulled taut (10 lbs tension, per ASTM E2554-22). Slack = error. Too much pull = stretched blade = false reading.
H3: Metric Scale: Simpler, But Not Always Safer
Millimeters are decimal-based, so no fraction conversion headaches. But watch the spacing: on most tapes, the 1-mm marks are tiny dots or short ticks between bold centimeter numerals. At 2 meters out, those 1-mm ticks blur. Human eye resolution drops sharply past 1.5 m—especially under poor lighting or on dusty surfaces.
Also, metric-only tapes are rare in North America. Most dual-scale tapes compress the metric scale into the same physical space as imperial—so 1 cm occupies ~0.394 inches, but the printed mm ticks are squeezed into less real estate than their imperial counterparts. Result? A 2-mm misalignment feels more likely than a 1/16" one—not because it’s less accurate, but because visual discrimination degrades faster.
H3: The Hidden Third Scale: Decimal Inches (Yes, It Exists)
Some contractor-grade tapes (e.g., Stanley FatMax 30-ft w/ True Blue Blade) add a third row: decimal inches (e.g., 1.00, 1.125, 1.25… up to 1.9375). This is gold for carpenters using digital levels or laser distance meters that output decimals—and for anyone converting plans from CAD files where dimensions are rarely fractional.
But don’t assume it’s on yours. Check the blade near the 12"–24" zone. If you see numbers like "1.5", "1.75", "2.0", you’ve got it. If not, you’ll convert manually—or use a cheat sheet (more on that below).
H2: Reading Step-by-Step: From Hook to Hook
Let’s walk through reading a real-world measurement: 37 5/16".
1. **Anchor the hook**: Hook the metal tang over the far edge of the board. Pull firmly—enough that the tape stays straight and doesn’t sag, but not so hard the blade stretches (you’ll feel resistance increase sharply past 12–15 lbs).
2. **Find the whole inches**: Scan left to right. The last full inch numeral before the target mark is 37.
3. **Identify the fraction denominator**: Look at the length of the tick marks. On a 1/16" tape: - Longest tick after 37 = 1/2" (at 37 1/2) - Medium ticks = 1/4" and 3/4" - Shorter ticks = 1/8", 3/8", etc. - Shortest ticks = 1/16", 3/16", 5/16", etc.
Count *up* from 37: first short tick = 1/16", second = 2/16" (or 1/8"), third = 3/16", fourth = 4/16" (1/4"), fifth = 5/16" → bingo.
4. **Confirm with metric cross-check (optional but smart)**: 37 5/16" = 37.3125 × 25.4 = 947.7 mm. Find the 947 mm or 948 mm mark. Are they aligned within ±1 mm? If yes, confidence high. If off by >2 mm, recheck tension or lighting—or suspect tape wear.
H2: Common Pitfalls & Real Fixes
• **Pitfall**: Assuming the "0" at the tape’s end is the true zero. **Fix**: Verify with a known standard. Measure a certified 12" gauge block. If your tape reads 12 1/32", the hook is worn or improperly calibrated. Replace tape—or subtract 1/32" from every outward measurement.
• **Pitfall**: Reading in low light or glare. **Fix**: Use a tape with high-contrast markings (e.g., black numerals on yellow substrate, or white-on-black for dark workshops). Avoid blue-on-silver—it vanishes under LED shop lights.
• **Pitfall**: Forgetting temperature drift. Steel expands ~0.0000065 in/in/°F. At 95°F (35°C), a 25-ft tape reads ~0.02" long vs. 68°F calibration temp (Updated: April 2026). Not critical for framing—but fatal for precision cabinetry. For sub-1/32" work, measure in climate-controlled spaces or apply correction: ΔL = L × α × ΔT.
H2: Tape Measure Selection: What Actually Matters for Home DIY
Forget "stainless steel blade" marketing. Real differentiators:
• **Blade coating**: Matte black oxide resists glare and fingerprint smudging better than polished chrome—critical for repeat readings.
• **Hook design**: Dual-pivot hooks (e.g., Irwin Quick-Grip) reduce wobble when hooked on pipe or conduit. Fixed hooks are cheaper but bind or skew easily.
• **Lock mechanism**: A smooth, positive-lock slider prevents accidental retraction mid-measure. Cheap tapes jam or slip—wasting time and risking finger pinches.
• **Case ergonomics**: Rubber overmold on the back improves grip during overhead measuring. Bare plastic cases sweat and slide.
Budget tapes (<$12) cut corners on *all four*. They’re fine for rough framing or temporary layout—but not for finish carpentry or tiling. Mid-tier ($15–$25) nails three of four. Pro-grade ($30+) delivers all—and adds features like scribe notches or magnetic tips.
H2: When Metric Is Faster (And When It’s Not)
Use metric when: • Working from EU or Australian plans (no conversion needed) • Measuring tile or laminate planks sold in mm (e.g., 600 × 1200 mm) • Using laser distance tools (most default to metric)
Stick with imperial when: • Cutting dimensional lumber (2×4s are 1.5" × 3.5", not 38 × 89 mm) • Reading older house blueprints (pre-1990s U.S. builds) • Collaborating with local contractors who think in feet and inches
Hybrid tip: Write both. Mark "42 1/4" (1073 mm) on your layout line. Catches errors early.
H2: Calibration Check You Can Do in 60 Seconds
1. Extend tape fully to 100" (or 2500 mm). 2. Clamp tape at 0" and 100" points on two parallel, flat surfaces (e.g., table edges). 3. Measure the distance between clamps with a certified caliper or gauge block. 4. Compare. Tolerance per ISO 9000: ±0.015" (0.38 mm) for Class II tapes (most consumer models). If off by >0.02", retire it.
This takes 60 seconds. Do it quarterly—or after any drop or kink.
H2: Tape Measures vs. Other Tools: Know When to Switch
A tape is unmatched for linear, open-air measurements. But it fails at:
• **Inside corners**: Use a combination square or digital caliper.
• **Depth of recessed holes**: A depth gauge or machinist’s rule beats eyeballing a bent tape.
• **Curved surfaces**: Flexible fiberglass tapes stretch and sag. Use a tailor’s tape *only* for soft goods—not for drywall or trim.
• **Repetitive marking**: A story pole (marked 2×4 scrap) saves tape wear and speeds up stud layout.
H2: Real-World Comparison: 5 Tape Measures Tested
| Model | Price (USD) | Fractional Scale | Key Strength | Notable Limitation | Best For |
|---|---|---|---|---|---|
| Stanley PowerLock 25-ft | $11.99 | 1/16" only | Durable case, reliable lock | No decimal inches; hook wears fast | Rough framing, rental units, quick checks |
| Irwin Quick-Grip 25-ft | $19.99 | 1/32" + decimal inches | Dual-pivot hook, matte black blade | Slightly heavier case | Home renovation, flooring, trim |
| Milwaukee 25-ft Compact | $28.50 | 1/32" + decimal inches | Ultra-thin case, magnetic tip | Smaller font; harder to read at distance | Electricians, HVAC techs, tight spaces |
| Lufkin 25-ft Xtreme | $39.95 | 1/64" (first 12"), 1/32" (rest) | Class I accuracy, hardened hook | Overkill for most home projects | Contractors, finish carpenters, inspections |
| Stabila 33540 26-ft | $42.00 | 1/32" + metric focus | Laser-etched markings, lifetime warranty | No imperial decimal row | European-style builds, high-end remodels |
H2: Beyond the Tape: Building Your First Reliable Setup
A tape measure is useless without context. Pair it with tools that validate or extend its reach:
• A 4-ft level (not 2-ft) for checking wall plumb before hanging shelves.
• A combination square for transferring 90° and 45° angles—critical when cutting baseboard miters.
• A digital caliper ($25–$40) for verifying hole diameters, dowel sizes, or hinge mortise depth.
None of this requires a full workshop. Start with a compact starter kit—like those covered in our complete setup guide. It walks through exactly which drill bits, screwdrivers, and layout tools deliver real value without cluttering your closet.
H2: Final Thought: Precision Is a Habit, Not a Tool
Your tape won’t fix shaky hands or rushed layouts. But understanding its markings—and its limits—means fewer callbacks, less wasted material, and more confidence in every cut, hang, and caulk line. Measure twice, yes—but *read right* the first time.
(Updated: April 2026)