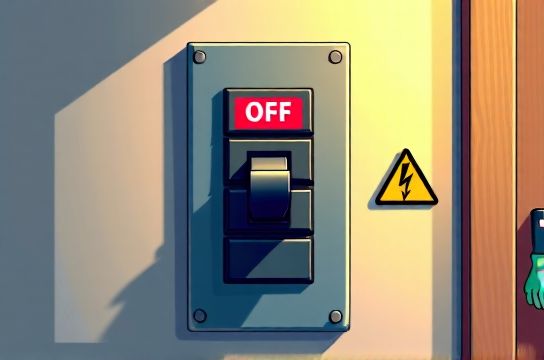
Tripped Breaker Keeps Resetting: How to Troubleshoot
- 时间:
- 浏览:28
- 来源:Easy Home Repair & DIY Guides
H2: Tripped Breaker Keeps Resetting — What It Really Means
When you flip a breaker back on only to hear the *click-thunk* of it tripping again seconds later—sometimes instantly—it’s not just an annoyance. It’s your panel shouting: "Something is wrong here." This isn’t a glitch. It’s physics enforcing safety. Circuit breakers trip to prevent overheating wires, insulation meltdown, and fire. If yours keeps resetting only to trip again, there’s an active fault—not a fluke.
This guide walks you through real-world troubleshooting steps that licensed electricians use on service calls. No theory dumps. Just what to check, in order, with clear thresholds for when to stop and call a professional. We’ll focus specifically on lighting circuits—because that’s where most repeat trips happen during DIY upgrades like 吸顶灯更换安装, 智能开关接线, or LED节能灯升级.
H2: Why Your Breaker Won’t Stay On (The 4 Most Common Causes)
Breakers don’t misbehave. They respond. Here’s what’s likely happening:
1. **Dead Short (Most Urgent)** A direct hot-to-neutral or hot-to-ground contact—like a stripped wire touching a metal box, or a screw piercing insulation during 吸顶灯更换安装. Current spikes instantly (often >30A), triggering instantaneous magnetic trip. You’ll usually hear a *snap*, smell ozone or burnt plastic, and see discoloration on terminals or wire nuts.
2. **Ground Fault (Especially in Damp Areas)** Moisture ingress in outdoor fixtures, bathroom vanity lights, or poorly sealed junction boxes can create a path from hot to ground. GFCI-protected breakers (or outlets upstream) will trip—but standard breakers may hold until sustained load triggers thermal overload. This is why kitchens and bathrooms now require AFCI/GFCI combo breakers per NEC 2023 (Updated: April 2026).
3. **Overloaded Circuit (Often Misdiagnosed)** Not just “too many lamps.” It’s about *continuous load*. A 15A circuit shouldn’t carry more than 12A (80%) for 3+ hours. Example: Replacing six 60W incandescents (360W ≈ 3A) with six 12W LEDs (72W ≈ 0.6A) *reduces* load—but adding a smart switch with a neutral wire + always-on radio + built-in relay *adds ~0.5–1.2W standby draw per device*. Multiply across five smart switches on one circuit? That’s 2.5–6W *just idling*. Not dangerous alone—but combine with aging wiring resistance, undersized conductors (common in pre-1980 homes using 14 AWG on 15A), and a dusty dimmer running at 70%—and thermal trip becomes predictable.
4. **Failing Breaker (Rare—but Real)** Breakers wear out. After ~10,000 operations (Updated: April 2026, UL 489 data), internal bimetallic strips fatigue. Symptoms: trips at 90% load, inconsistent reset feel, or warm-to-touch breaker body. But—crucially—this is the *last* thing to suspect. Rule out wiring and devices first.
H2: Step-by-Step Troubleshooting — Start Here, Stop When Safe
⚠️ Safety First: Never work on live panels unless qualified. Turn OFF main breaker before removing cover. Verify dead with a non-contact voltage tester *and* multimeter across terminals. Use insulated tools. Wear safety glasses.
Step 1: Unplug Everything & Turn Off All Switches Go room-by-room. Unplug lamps, chargers, power strips—even things you think aren’t on the circuit. Flip every light switch to OFF. This isolates the branch.
Step 2: Reset the Breaker — Then Listen & Watch With all loads disconnected, reset the breaker. If it trips *immediately* (no delay), you have a dead short or ground fault in the wiring itself—not a device. Do NOT proceed further without a meter or licensed help.
If it holds, move to Step 3.
Step 3: Bring Loads Back—One at a Time Start with the simplest: plug in one lamp. Wait 30 seconds. If stable, add another. Keep notes. When it trips, the *last item added* is your prime suspect—or its circuit path.
But here’s the catch: many modern lighting faults are *intermittent*. A loose neutral in a ceiling box might only arc when vibration occurs (e.g., slamming a door). So if nothing trips immediately, test under load: turn on all lights, run a hair dryer on high for 2 minutes, then listen for buzzing or watch for flickering.
Step 4: Inspect Junction Boxes & Fixtures Focus on locations where recent work happened—especially 吸顶灯更换安装 or 智能开关接线. Look for: • Pinched or nicked insulation on wires inside boxes • Loose wire nuts (shake gently—no movement) • Ground wires touching hot screws or device terminals • Aluminum-to-copper connections without antioxidant paste (a known fire risk in homes built 1965–1973) • Dimmer switches installed on non-dimmable LEDs (causes capacitive kickback, stressing breakers over time)
Pro tip: Use a $20 outlet tester (like the Klein Tools RT210) at every receptacle on the circuit. It won’t find hidden shorts—but it *will* flag reversed hot/neutral or open grounds that compromise safety margins.
Step 5: Check Smart Switch & Dimmer Compatibility This is where 70% of repeat trips happen post-upgrade. Smart switches (e.g., Lutron Caseta, TP-Link Kasa) need a neutral wire to power their radios. If wired without one—or sharing neutrals across circuits—you create parallel paths and phantom loads. Likewise, 调光开关布线 for LEDs requires matching driver type: ELV (electronic low-voltage) dimmers for trailing-edge drivers; MLV (magnetic low-voltage) for older toroidal transformers. Mismatches cause harmonic distortion and breaker nuisance tripping.
H2: When to Stop — And Who to Call
Stop immediately and call a licensed electrician if: • You smell burning, see charring, or notice warm outlets/switches • The breaker feels hot to touch (>113°F / 45°C surface temp) • You find aluminum wiring without COPALUM crimps or AlumiConn connectors • Voltage readings between hot-ground and hot-neutral differ by >2V under load (indicates loose neutral) • You’re in a rental and haven’t confirmed landlord approval for modifications like 吸顶灯更换安装 or 插座面板替换
Licensed pros carry clamp meters ($150–$400), insulation resistance testers (meggers), and thermal imagers—tools that spot issues invisible to the eye. Don’t gamble with family safety.
H2: Prevention Tactics for Future Upgrades
Preventing repeat trips starts *before* the first screwdriver turns:
• Map Your Circuits First: Label every breaker using a lamp + helper (or a $30 circuit tracer like the Southwire 40040S). Know which outlets, lights, and HVAC components share a leg.
• Respect Wire Gauge Limits: 15A circuits = 14 AWG max. 20A = 12 AWG. Never extend a 15A circuit with 14 wire downstream of a 20A breaker—that’s a code violation and fire hazard.
• Use AFCI Protection: As of NEC 2023, all 120V, single-phase, 15- and 20-amp branch circuits supplying dwelling unit outlets *must* be protected by Arc-Fault Circuit Interrupters (Updated: April 2026). These detect dangerous arcing—exactly the kind caused by damaged insulation during LED节能灯升级 or 调光开关布线.
• Match Load Types: Incandescent-rated dimmers ≠ LED-compatible. Check manufacturer compatibility charts (e.g., Lutron’s LED Compatibility Tool) *before* buying. When in doubt, choose universal dimmers rated for ≥150W LED (not just “works with LED”).
H2: Quick-Reference Diagnostic Table
| Issue Symptom | Likely Cause | DIY Check | Professional Action Needed? |
|---|---|---|---|
| Trips instantly on reset, no load | Dead short in wiring or junction box | Visual inspection of all accessible boxes; continuity test hot-to-ground with power OFF | Yes — requires megger testing & fault isolation |
| Trips after 2–5 min under load | Overload or failing breaker | Measure actual load with clamp meter; verify breaker rating vs. wire gauge | No — if load <80% rating and wires match; yes if breaker tests weak |
| Trips only when specific light is turned on | Fixture short, bad driver, or incompatible dimmer | Swap bulb/LED module; bypass dimmer temporarily; inspect fixture wiring | No — unless internal fixture damage or aluminum wiring involved |
| Trips randomly, no pattern | Loose neutral, shared neutral, or AFCI nuisance trip | Check neutral bar tightness; verify no neutrals tied across breakers | Yes — shared neutrals violate NEC 210.4(B); requires panel rework |
H2: Real-World Example: The Rental Kitchen Upgrade Gone Wrong
A tenant attempted 吸顶灯更换安装 and 智能开关接线 in their rental kitchen—installing a Lutron Caseta switch and new LED recessed lights. Within 48 hours, the 15A lighting breaker kept resetting.
Diagnosis revealed: • Neutral wire from the smart switch was landed on the *ground* bar (not neutral bar)—creating a parallel path • Two recessed fixtures had damaged insulation where housing clips pierced the cable sheath • The existing circuit also powered the garbage disposal (a motor load), pushing continuous draw to 13.8A
Fix: Licensed electrician relocated the neutral, replaced damaged cables, and moved the disposal to a dedicated 20A circuit. Total cost: $220. Attempting this without training risked shock, fire, and lease violation.
H2: Final Thoughts — Safety Isn’t Optional
“Tripped breaker keeps resetting” isn’t a puzzle to solve with YouTube hacks. It’s a hard boundary set by physics and code. Every second you ignore it—or try workarounds like taping the lever up or swapping in a higher-amp breaker—increases risk exponentially.
If you’re upgrading lights, installing smart switches, or tackling LED节能灯升级, start with a solid foundation: know your panel, respect wire limits, and verify compatibility *before* power goes off. When in doubt, pause. Consult the full resource hub for wiring diagrams, code references, and certified contractor lookup tools.
Remember: Good electrical work is invisible. It hums quietly, stays cool, and never trips. Anything less isn’t DIY—it’s deferred risk. (Updated: April 2026)