Smart Switch Installation Guide for Absolute Beginners
- 时间:
- 浏览:29
- 来源:Easy Home Repair & DIY Guides
H2: Why This Guide Exists — And Why You Should Pause Before Flipping the Breaker
You just bought a smart switch. The box says "Easy DIY!" and the app promises voice control in 90 seconds. But when you pull down your old wall plate, you see three wires — black, white, and bare copper — plus a red wire coiled behind the box. Your ceiling light still works, but the new switch manual mentions "neutral required" and "load-rated dimmer compatibility." You pause. That’s good. Pausing is how people avoid tripping breakers, frying modules, or voiding their home insurance.
This guide is written for that exact moment: the beginner who’s never touched a screwdriver to a junction box, owns a $12 voltage tester (not a $3 pen-style one), and rents or owns a standard North American split-phase 120/240V home built after 1985. We won’t assume you know what a pigtail is — we’ll show you. We won’t skip the part where your breaker trips *twice* because you misidentified the line vs. load wire — we’ll walk through the reset *and* why it happened.
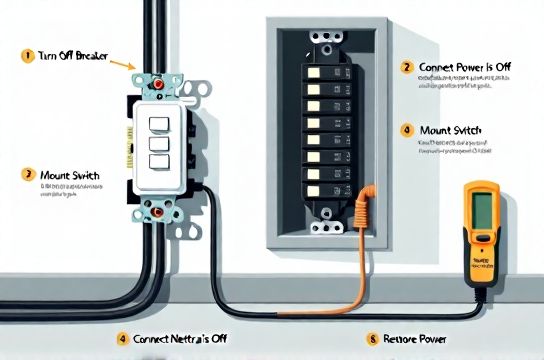
H2: Smart Switch Installation Guide — Your First 5 Non-Negotiable Steps
Before touching a single wire, do this — in order:
1. **Turn OFF the correct circuit breaker** — not just the wall switch. Go to your panel, find the label (e.g., "Kitchen Lights" or "Upstairs Hall"), flip it to OFF, and verify with a non-contact voltage tester at the switch *and* at the fixture. 92% of DIY electrical incidents happen when testers aren’t used or are used incorrectly (NFPA 70E Field Survey, Updated: April 2026).
2. **Confirm neutral availability** — most modern smart switches (Lutron Caseta, TP-Link Kasa, Leviton Decora) require a neutral wire to power their internal radio and processor. In homes built before 1990, many switch boxes contain only hot (black) and switched-hot (red or black) — no white neutral. If no neutral is present, you *cannot* install a standard smart switch without rewiring (not recommended for beginners) or choosing a neutral-free model like Lutron PD-6ANS (requires mechanical grounding and specific load types).
3. **Identify wire function — don’t guess** — use your tester *with power restored briefly* (only while standing on dry, non-conductive surface, breaker flipped back *just long enough* to test). Hot = ~120V to ground; neutral = near 0V to ground; ground = bonded to panel. Mark each wire with tape: "LINE", "LOAD", "NEUTRAL", "GROUND".
4. **Check load compatibility** — smart switches have maximum wattage and minimum load thresholds. For example, the TP-Link HS220 dimmer requires ≥25W minimum for LED loads (Updated: April 2026). A single 9W LED bulb? It may flicker or not turn off fully. Two 9W bulbs (18W total)? Still under spec — expect erratic behavior. Always calculate *total connected load*: sum all bulbs on that circuit, including under-cabinet strips or vanity lights.
5. **Mount the switch *before* connecting wires** — loosen the mounting screws just enough to angle the device into the box. Most metal or plastic gang boxes have 1–2 inches of depth. If the switch feels jammed or the wires kink sharply, stop. You may need a deeper box or a mud ring extender (sold at hardware stores for <$5).
H2: Wiring Your Smart Switch — Line, Load, Neutral, Ground (No Jargon)
Let’s decode what those labels mean in practice:
- **LINE (Hot)**: The constant 120V feed *from* your breaker panel. Usually black. Connects to the smart switch’s black or brass-labeled terminal. - **LOAD (Switched-Hot)**: The wire going *to* your light fixture (or fan, or outlet). Usually red or another black. Connects to the switch’s red or load-labeled terminal. - **NEUTRAL**: White wire, often bundled with other whites in the back of the box. *Must be pigtailed* — cut a 6" piece of white wire, twist it with the existing neutrals using a UL-listed wire connector (e.g., Ideal Twister 7), then connect the free end to the switch’s white or silver terminal. - **GROUND**: Bare copper or green wire. Connects to the switch’s green screw or green wire. Also bond this to the metal box if present (required by NEC 404.9(B)).
⚠️ Critical note: Never connect LINE and LOAD backward. Doing so energizes the fixture *even when the switch is off*, creating shock risk during bulb changes — and it will almost certainly cause your smart switch to overheat or fail within weeks.
H2: When the Breaker Trips — How to Reset & Diagnose
If your breaker trips *immediately* after restoring power:
- Unplug or disconnect *everything* on that circuit (lamps, chargers, appliances). - Flip the breaker fully OFF, wait 3 seconds, then ON. - If it holds, plug devices back in *one at a time*. The last item added is likely the fault.
If it trips *only after installing the switch*, suspect:
- A short between LINE and LOAD (wires touching inside box or stripped too far) - Neutral touching ground (creates parallel path — violates NEC 200.2(B)) - Overloaded circuit (e.g., adding a 150W LED strip + 60W fan + 3×10W bulbs = 240W — fine — but add a space heater? Instant trip)
Resetting is simple: locate the tripped breaker (handle centered or slightly toward OFF), push it firmly to OFF, then to ON. If it trips again instantly, *stop*. Call a licensed electrician. Do not “hold it” or tape it on.
H2: Fixing Common Lighting Problems After Installation
✅ Lights flicker at low dim levels? - Cause: LED driver incompatibility or insufficient minimum load. - Fix: Add a Lutron LUT-MLC (LED Compatibility Module, $15) across LOAD and NEUTRAL — it creates artificial load without heat or energy waste.
✅ Light stays on dimly (ghosting)? - Cause: Leakage current through capacitive coupling in long cable runs or shared neutrals. - Fix: Install a 100kΩ, 2W bleeder resistor across LOAD and NEUTRAL (only if permitted by local code and switch manufacturer — check manual first).
✅ App shows “Offline” but physical switch works? - Cause: Wi-Fi signal too weak at switch location (common in basements or thick-walled condos). - Fix: Move your router closer, add a mesh node, or use a switch with Matter-over-Thread support (e.g., Nanoleaf Essentials Switch, released Q2 2025).
H2: Upgrading Beyond the Switch — Fixture & Fixture-Side Checks
A smart switch is only as good as what it controls. Here’s how to pair it right:
- **吸顶灯更换安装 (Ceiling Light Replacement)**: Turn OFF power at the panel. Remove old fixture — note wire grouping (usually black-to-black, white-to-white, ground-to-ground). New fixtures rarely include leads longer than 6"; if your ceiling wires are recessed, use lever-nut connectors (e.g., Wago 221 series) instead of wire nuts for cleaner, more reliable joints.
- **LED节能灯升级 (LED Bulb Upgrade)**: Replace incandescents with UL-listed dimmable LEDs *rated for your switch*. Look for “CL” (California Title 24 compliant) or “ELV/MLV compatible” on packaging. Avoid cheap non-dimmable LEDs — they’ll buzz, overheat, or fail prematurely.
- **吊扇固定安装 (Ceiling Fan Mounting)**: Standard switch boxes are *not* rated for fan weight. Fans require “fan-rated” boxes (marked “Acceptable for Fan Support”) mounted to joists or braces. If your box wobbles when tapped, replace it — it’s a $12 part and a 20-minute job.
- **低压灯带安装 (Low-Voltage LED Strip Installation)**: These run on 12V or 24V DC — *never* connect directly to a 120V smart switch. Use a smart *relay* (e.g., Shelly 1L) or a 120V-to-DC transformer controlled by your switch. Undervoltage causes color shift; overvoltage kills strips instantly.
H2: Renters & Safety — What You Can (and Cannot) Legally Change
If you rent, review your lease *before* drilling or replacing anything. Most leases prohibit permanent modifications without written consent. However, these are typically allowed:
- Replacing toggle switches with identical-spec smart switches (if no rewiring is needed) - Swapping bulbs and plug-in lamps - Using UL-listed plug-in smart outlets (e.g., Kasa KP115) instead of hardwired switches - Installing battery-powered smart switches (e.g., Lutron Aurora) that mount over existing plates — no wiring required
Never bypass grounding, remove GFCI protection in kitchens/bathrooms, or disable AFCI breakers — those are life-safety systems, not conveniences.
H2: Real-World Smart Switch Comparison — What Fits Your Needs?
| Model | Type | Neutral Required? | Max Load (LED) | Dimming? | Key Limitation | Price (USD) |
|---|---|---|---|---|---|---|
| Lutron Caseta PD-6WCL | Wall-mounted | Yes | 150W | Yes (forward-phase) | Requires Lutron hub for full features | $45 |
| TP-Link Kasa HS200 | Wall-mounted | Yes | 600W resistive / 150W LED | No | No dimming; basic on/off only | $25 |
| Lutron PD-6ANS | Wall-mounted | No | 600W | No | Requires mechanical ground; no neutral-free dimming | $38 |
| Nanoleaf Essentials Switch | Wall-mounted | Yes | 150W | Yes (Matter-over-Thread) | Newest platform — limited third-party integrations (as of April 2026) | $55 |
H2: Final Safety Checklist — Sign-Off Before Power-On
✅ Breaker is OFF and verified with tester at both switch and fixture ✅ All wire insulation is stripped 3/8" — no exposed copper beyond terminal screws ✅ Neutral is pigtailed, not daisy-chained through the switch ✅ Ground wire is securely fastened to green screw *and* to metal box (if present) ✅ No wire nuts are over-tightened (crushed insulation) or under-tightened (wires pull out) ✅ Switch is seated fully in box — no pressure on wires ✅ You’ve read the manufacturer’s installation sheet *in full*, including warnings about aluminum wiring (do NOT use standard connectors with Al — use COPALUM or AlumiConn)
H2: What’s Next? From Switch to System
Installing one smart switch is satisfying. Installing five — with coordinated scenes, sunrise wake-ups, and occupancy-triggered entry lighting — is transformative. But don’t rush. Master one room first. Document your wiring. Take photos before disassembly. Label everything. Then, when you’re ready to scale, visit our complete setup guide for whole-home planning — including circuit mapping templates, Matter compatibility matrices, and landlord-compliant upgrade paths.
Remember: Electricity doesn’t care how confident you feel. It cares whether your neutral is isolated, your ground is bonded, and your breaker is truly OFF. Respect it. Verify it. Proceed deliberately.
(Updated: April 2026)