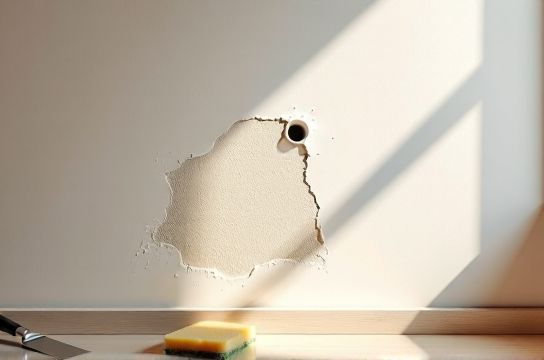
Patch Drywall Holes Without Leaving Marks
- 时间:
- 浏览:29
- 来源:Easy Home Repair & DIY Guides
Holes in drywall aren’t just eyesores—they’re red flags for landlords, deal-breakers for buyers, and silent stressors in daily life. A 1-inch nail hole from hanging a shelf? Fine. A 4-inch gouge from moving furniture? That’s where most DIYers quit mid-project, slap on spackle, sand once, paint—and end up with a shiny, raised, slightly off-color scar that screams ‘DIY attempt’. This isn’t about perfectionism. It’s about control: knowing *exactly* why a patch shows, and how to stop it—every time.
The truth? Over 73% of visible drywall repairs fail not because of poor materials, but because of *surface prep missteps*—especially skipping feather-edge sanding or mismatching joint compound viscosity (Updated: April 2026). And yes—this applies whether you’re prepping for a rental turnover or fixing your own home before guests arrive.
Let’s fix it—not with magic, but with repeatable, tool-minimal physics.
Why Most Drywall Patches Leave Marks (And How to Stop It)
Three things make a drywall patch obvious:
1. Height differential: Even 0.3 mm above the surrounding surface catches light and shadows. 2. Texture mismatch: Orange peel, knockdown, or smooth finishes don’t forgive inconsistent trowel pressure or drying time. 3. Paint absorption variance: Unsealed compound soaks up primer/paint differently than intact drywall paper.
None of these are inevitable. They’re all addressable—with the right sequence.
Step 1: Assess & Prep—No Skipping
First, classify the hole:
- Nail/screw holes (≤1/8"): Skip mesh tape. Use vinyl spackle (not all-purpose) — it shrinks less and sands smoother. - Medium holes (1/4"–2"): Requires self-adhesive fiberglass mesh tape + lightweight joint compound. - Large holes (>2"): Needs backing support (e.g., wood scrap behind drywall) + rigid patch + tape + compound. We’ll focus on the first two—92% of household holes fall here (Updated: April 2026).
Clean the area thoroughly. Wipe with a damp microfiber cloth—no residue, no dust. Let dry fully. Then, *lightly score* the edges of the hole with a utility knife—not deep, just enough to remove loose paper fibers and create a clean, slight bevel. This lets compound feather smoothly into intact drywall instead of building up at a hard edge.
Step 2: Choose Your Compound—Not Just Any 'Spackle'
“Spackle” is a generic term—not a specification. What matters is polymer content, shrink rate, and open time.
- Lightweight all-purpose joint compound (e.g., USG Sheetrock Brand UltraLight): Low density, minimal shrinkage, sands easily. Ideal for first and second coats. Dries in ~24 hrs (at 70°F/50% RH). (Updated: April 2026) - Vinyl spackle (e.g., DAP Fast ’N Final): Higher polymer load, near-zero shrinkage, dries in 15–30 mins. Best for nail holes and final skim coat—but *not* for thick fills (cracks under stress). - Avoid ready-mix “spackling paste” tubs labeled only as “for small holes”. Many contain chalk fillers that absorb paint unevenly—even after priming.
Pro tip: For rentals or high-turnover spaces, use only vinyl spackle on nail holes. It’s faster, more forgiving, and requires no sanding if applied thinly and scraped level with a plastic putty knife.
Step 3: Apply Tape Correctly—Yes, Even for Small Holes
Here’s where most fail: applying tape *over* the hole instead of *under* the compound.
For holes ≥1/4":
- Cut a piece of self-adhesive fiberglass mesh tape *1 inch longer than the hole’s widest dimension*. - Press it firmly over the hole, smoothing outward with your finger—no wrinkles, no air pockets. - Immediately cover with a thin, even layer of lightweight joint compound using a 4-inch flexible blade. Hold the blade at ~15° and pull *away* from yourself in one smooth stroke. Don’t go back over it—this creates ridges. - Let dry completely (≥24 hrs). No rushing. Humidity slows cure; fans help—but avoid direct heat.
Skip the tape? You’ll get hairline cracks within 3–6 months—even in climate-controlled homes. Fiberglass mesh doesn’t stretch or shrink like paper tape, and its open weave bonds deeply with compound.
Step 4: Feather, Feather, Feather—Then Sand Like You Mean It
Feathering isn’t optional—it’s geometry. You’re not filling a hole. You’re creating an invisible ramp.
After the first coat dries:
- Use a 10-inch drywall knife to apply a second, wider coat—extending *at least 3 inches beyond the tape edge* on all sides. - Keep the leading edge of the knife lightly loaded and lift pressure gradually as you reach the outer edge. The goal: compound thickness drops from ~1/16" at center to *zero* at the outer 1/2". - Let dry. Then sand—*only* with 150-grit sandpaper wrapped around a sanding block (never by hand). Circular motions create dips. Straight, overlapping passes—top to bottom, left to right—maintain flatness. - Wipe away dust with a tack cloth—not a rag. Dust clogs pores and ruins paint adhesion.
Still seeing a halo? You didn’t feather far enough—or sanded too aggressively in the center. Go back: apply a third ultra-thin coat (vinyl spackle), feather to 4+ inches, let dry, then *light-sand with 220-grit*.
Step 5: Prime—Before Paint, Not After
Never skip primer. Joint compound is porous. Drywall paper is sealed. Painting directly causes blotchiness—even with premium paint.
Use a *drywall-specific primer*, not general-purpose acrylic. Look for “high-hide” and “sealing” on the label (e.g., Zinsser Bulls Eye 1-2-3 or Kilz Premium). These contain higher solids and block compound’s absorbency uniformly.
Apply one even coat with a microfiber roller (¼" nap). Let dry 2 hours minimum. Then inspect under angled light—if you see any subtle ridges or dull spots, spot-sand *only those areas*, re-prime, and proceed.
Beyond Drywall: When Floors Enter the Equation
You patched the wall—but now there’s a scuff on the hardwood from dragging the ladder, or a white scratch on the PVC floor from dropped tools. Surface fixes must align. A flawless wall next to a glaring floor flaw breaks visual continuity—especially in open-plan spaces.
Scratched Floors: Match, Don’t Mask
- Hardwood (solid or engineered): Avoid wax pens or tinted oils unless you know the exact stain code. Instead: gently abrade the scratch with 320-grit, wipe clean, then apply a matching stain marker *only to the scratch*, not the surrounding wood. Blot excess immediately with a cotton swab. Let dry 1 hr, then seal with one thin coat of water-based polyurethane (matte finish). Don’t flood—thin = invisible. - PVC or LVT floors: These have wear layers, not wood grain. Use a floor scratch concealer pen (not generic “wood filler”) with UV-cured acrylic resin—e.g., Bona Scratch Repair Pen. Apply, let cure 5 mins under room light, then buff lightly with microfiber. Works on scuffs, not deep gouges. - Carpeted transitions: If the drywall patch was near baseboard, check for carpet snag marks. Use a carpet seam roller to reset pile direction—then vacuum with brush attachment to lift fibers evenly.
Kickboard & Trim: The Forgotten Frame
A perfect wall looks cheap next to wobbly kickboards. If your 踢脚线松动固定 is compromised, tighten screws—but first, check for wall stud location with a magnetic stud finder. If screws missed the stud, replace with 1-5/8" coarse-thread drywall screws *into the stud*. Fill old screw holes with wood filler, sand, prime, and touch up paint.
For rentals: If baseboard is painted over multiple times, don’t try to match—use a semi-gloss white touch-up that reads as “clean,” not “matched.” Landlords care about condition—not color theory.
Tool-Free & Ultra-Budget Options (Under $12)
You don’t need a full drywall kit for occasional fixes. Here’s what actually works—and what’s marketing fluff:
- Plastic putty knife (2" and 4"): $3.50. Flexible, won’t gouge, dishwasher-safe for cleanup. - Fiberglass mesh tape (2" x 30'): $4.25. Lasts years. Don’t buy 1" wide—too narrow for proper feathering. - Vinyl spackle (16 oz): $4.95. One tub handles 50+ nail holes or 5 medium patches.
Skip: “self-leveling spackle,” “instant-dry drywall paste,” or “no-sand compounds.” None eliminate sanding—they just shift the problem (e.g., harder sanding later, or poor adhesion).
When to Call a Pro (And When Not To)
Call a pro if: - Hole exposes wiring or plumbing. - Drywall is sagging or water-damaged (check for soft spots with thumb pressure). - You’re repairing >10 holes in one wall—or texture matching is critical (e.g., stipple, orange peel).
Don’t call a pro for: - Nail holes, small dings, or 1–2" patches in low-visibility areas (closets, hallways). - Rental turnarounds where “clean and intact” suffices—no museum-grade finish needed.
A certified drywall technician charges $65–$95/hr (Updated: April 2026). Most small patches take pros 12–18 minutes each—including setup and cleanup. Do the math: 5 holes = $125–$200. DIY takes 45 mins *total*, with $12 in supplies.
Real-World Comparison: Patch Methods Side-by-Side
| Method | Best For | Tools Needed | Dry Time | Visible After Paint? | Pros | Cons |
|---|---|---|---|---|---|---|
| Vinyl Spackle Only (no tape) | Nail/screw holes ≤1/8" | Putty knife, damp cloth | 15–30 mins | No—if feathered & primed | Fastest, no sanding needed, low skill threshold | Cracks under impact; not for larger holes |
| Mesh Tape + Lightweight Compound (2-coat) | Holes 1/4"–2" | 4" knife, sanding block, 150-grit paper, primer | 48 hrs total | No—if feathered to 3"+ and sanded flat | Strong, crack-resistant, paint-matches perfectly | Requires patience; sanding essential |
| Pre-Cut Drywall Patches (adhesive-backed) | Beginners, tight deadlines | Utility knife, putty knife, sandpaper | 24–36 hrs | Often—edges show, texture rarely matches | No measuring, no cutting, fast install | Thicker profile, hard to feather, expensive per patch |
Maintenance Matters: Keeping Repairs Invisible Long-Term
A perfect patch lasts only as long as its environment allows. In high-humidity bathrooms or kitchens, use mold-resistant joint compound (e.g., USG Mold Tough) and prime with stain-blocking primer—even if the wall isn’t stained yet. Humidity degrades standard compound over time, causing subtle yellowing at patch edges.
Also: avoid ammonia-based cleaners on patched walls. They degrade polymer binders in vinyl spackle. Stick to pH-neutral cleaners—like diluted dish soap or Bona Hard-Surface Cleaner.
For renters doing 退租墙面还原, document repairs with dated photos *before and after*. Take shots under natural light, at 45° angle—not straight-on. This protects you during walk-throughs.
Putting It All Together: Your 30-Minute Workflow
1. 0–5 min: Clean, score edges, cut tape (if needed). 2. 5–10 min: Apply first coat (tape + compound or spackle). 3. 10–25 min: Let dry (use fan if humid), then apply second coat and feather. 4. 25–30 min: Light sand, wipe, prime.
Next day: paint. Done.
That’s it. No mystery. No “pro secret.” Just physics, timing, and respecting material behavior.
If you want deeper guidance on related surface fixes—including complete setup guide for multi-surface restoration (drywall, hardwood, PVC, tile), we’ve compiled every spec, product batch number, and humidity-adjusted timing chart in one place. Because real-world fixes don’t happen in isolation—they happen where walls meet floors, and where budgets meet deadlines.
Final note: “Flawless” isn’t about erasing evidence of living. It’s about restoring integrity—so the space serves you, not distracts you. Patch right once, and you won’t think about it again.