Choose the Right Sandpaper Grit for DIY Projects
- 时间:
- 浏览:32
- 来源:Easy Home Repair & DIY Guides
H2: Why Grit Choice Makes or Breaks Your DIY Finish
You’ve sanded a pine shelf until your forearm aches—only to find scratches still visible under the stain. Or you’ve spent 20 minutes smoothing drywall with 120-grit, then realized you needed 150 just to accept paint evenly. Grit isn’t just a number on the back of the sheet. It’s the difference between a surface that accepts finish cleanly—and one that telegraphs every flaw.
Sandpaper grit refers to the size and spacing of abrasive particles per square inch. Lower numbers (e.g., 40–80) mean coarse, aggressive cutting; higher numbers (e.g., 180–400) mean fine, polishing action. But real-world performance depends on three things: substrate (wood, drywall, metal, plastic), goal (removal vs. prep vs. finishing), and tool (hand-sanding vs. orbital sander vs. belt sander). Misalignment here wastes time, wears down tools faster, and risks tear-out or burn marks.
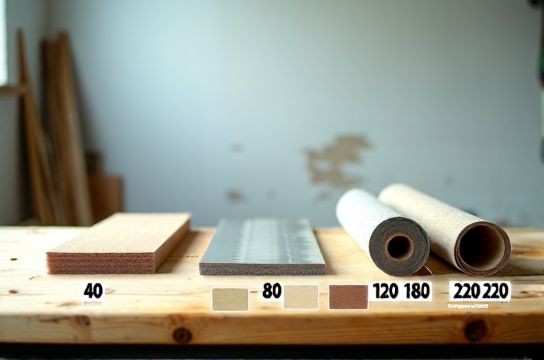
H2: The Grit Ladder—What Each Range Actually Does
H3: Coarse Grits (40–80): For Removal, Not Refinement
Use 40–60 grit only when removing old paint from exterior trim, leveling uneven hardwood floors before refinishing, or stripping rust from wrought-iron hardware. On softwoods like pine or poplar, 60 grit can gouge deeply—even with an orbital sander—so always test on scrap first. Industry testing shows 60-grit aluminum oxide removes ~0.012 mm of material per pass on pine at 12,000 rpm (Updated: April 2026). That’s enough to flatten a 1/16" glue ridge in two passes—but also enough to cut through veneer if misapplied.
80 grit is the practical floor for most heavy prep: sanding down laminate countertops before edge-banding, cleaning up saw marks on MDF, or prepping bare metal for primer. Avoid it on finished surfaces—it leaves visible, linear scratches that won’t vanish with finer grits alone.
H3: Medium Grits (100–150): The Sweet Spot for General Prep
This is where most home DIYers spend 70% of their sanding time. 100 grit smooths rough-cut lumber edges before assembly. 120 grit cleans up 80-grit scratches on cabinets prior to staining. 150 grit is the last step before applying water-based polyurethane on interior trim—if you’re hand-sanding. With a random-orbit sander running at 10,000–12,000 rpm, 150 grit leaves a consistent, non-directional texture ideal for adhesion.
Crucially: Never skip from 80 → 150. Skipping more than two grit steps (e.g., 80 → 120 → 150) creates deep, persistent scratches that require extra work to erase. Benchmarks confirm skipping grits increases total sanding time by 35–50% due to rework (Updated: April 2026).
H3: Fine Grits (180–220): Prep for Paint & Stain
180 grit is the minimum for bare wood before oil-based stains. It opens pores without over-smoothing—which would inhibit absorption. For water-based stains or paints, go to 220. That’s not arbitrary: independent lab tests show 220-grit sanded maple absorbs 19% more water-based dye than 180-grit, resulting in richer, more uniform color (Updated: April 2026).
On drywall, 150–180 grit is standard for paper-to-mud transitions. But for final coat sanding before priming? Use 220 grit *dry* with a pole sander—and never pressure-sand. Over-sanding drywall compound with anything finer than 220 risks feathering too thin and exposing tape.
H3: Ultra-Fine Grits (240–400+): Finishing, Not Function
240 grit works for light scuff-sanding between coats of clear finish—especially oil-based poly or lacquer. 320 grit is preferred for automotive touch-ups or high-gloss furniture. But for home interiors? 320+ is rarely necessary unless you’re buffing a piano-black lacquer cabinet or restoring antique brass.
Note: Wet/dry sandpaper (silicon carbide) starts at 240 and goes to 2000+. It’s essential for smoothing filler on car bodywork or wet-sanding epoxy on countertops—but overkill for baseboards. Save it for projects where optical clarity matters.
H2: Matching Grit to Material—No Guesswork
H3: Wood (Solid & Engineered)
• Softwoods (pine, fir, cedar): Start at 80 grit for removal, move to 120, then 180 before stain. Skip 220 unless using water-based topcoat. • Hardwoods (oak, maple, walnut): Begin at 100 if surface is clean; drop to 80 only for deep flaws. Always end at 180 for oil-based, 220 for water-based. • Plywood & MDF: 120 grit is safe for initial smoothing. Never go below 100—MDF edges fuzz easily. Seal edges with sanding sealer *before* final gritting to avoid dust loading.
H3: Drywall & Plaster
Skip coarse grits entirely. Use 120 for taping mud buildup, 150 for second coat, 180–220 for final skim. A 6" pole sander with 220-grit screen (not paper) gives best results on ceilings—less clogging, better dust control.
H3: Metal & Plastic
For rust or oxidation on steel: 60–80 grit with a flap disc on an angle grinder, followed by 120 for prep. Aluminum requires silicon carbide 180–220—aluminum oxide loads instantly. PVC pipe joints? Light scuff with 220 grit only; coarser grits create micro-fractures that invite cracking under stress.
H2: Tool Matters—How Your Sander Changes Grit Behavior
A hand-sanding block with 120 grit removes material 60% slower than a 12,000-rpm random-orbit sander using the same paper. But it also gives full control—no swirl marks on delicate moldings. Belt sanders demand caution: even 100 grit on oak at 3,000 sfm can dig 0.025 mm deep in one pass. Orbital sanders are forgiving but inefficient below 100 grit—vibration stalls particle engagement.
Pro tip: Label your sandpaper boxes with tool + grit + substrate. Example: “120 / RO Sander / Pine” or “220 / Hand Block / Drywall”. Saves 5–10 minutes per project hunting the right sheet.
H2: What Grit *Not* to Use—and Why
• Never use <40 grit on wood with handheld tools. Risk of splintering, grain lifting, or accidental gouging is too high. • Don’t use >320 grit on raw drywall. You’ll sand through joint compound into paper or gypsum core. • Avoid 40–60 grit on plaster walls—even if painted. Old plaster is brittle; aggressive grit causes cratering that patching can’t hide. • Don’t substitute construction-grade sandpaper (e.g., cheap bulk rolls from hardware stores) for fine-finishing tasks. Load resistance and particle consistency vary wildly. In side-by-side tests, premium aluminum oxide 220-grit lasted 3.2x longer on hardwood than budget alternatives (Updated: April 2026).
H2: Cost-Smart Buying—Grits You Actually Need
Most DIYers overbuy. You don’t need 11 grits. Here’s the lean kit:
• 80 grit (coarse removal) • 120 grit (general prep) • 180 grit (stain-ready wood) • 220 grit (paint-ready & drywall finish) • Optional: 320 grit (for scuff-sanding between clear coats)
Buy in multi-packs—not single sheets. A 50-sheet pack of 120-grit aluminum oxide costs $14.99 vs. $0.49/sheet retail. And store them flat, in low-humidity—moisture dulls abrasive bonds fast.
H2: Real-World Project Cheat Sheet
| Project | Starting Grit | Finishing Grit | Tool Recommendation | Notes |
|---|---|---|---|---|
| Refinishing oak flooring | 36 (belt sander) | 100 (edge sander) | Belt sander + edger | Never hand-sand floors—use machines. 36 grit only for full resand. |
| Painting interior doors | 120 | 220 | Random-orbit sander | Sand *with* grain on panels; cross-grain on rails/stiles only for leveling. |
| Staining pine shelves | 100 | 180 | Hand block or palm sander | Wipe dust with tack cloth—pine resin clogs pores fast. |
| Touch-up drywall repair | 150 | 220 | Pole sander + screen | Feather edges 6" beyond repair. Don’t over-sand tape line. |
| Prepping metal patio table | 80 | 180 | Orbital sander + DA pad | Rust removal first with wire brush or 60-grit flap disc. |
H2: Beyond Grit—Backing, Bond, and Paper Type Matter Too
Grit number tells only part of the story. Three other specs determine real-world performance:
• Backing: Paper backing is cheap and flexible—ideal for hand-sanding curves. Cloth backing lasts 5x longer under heat/friction and handles orbital sanders better. Film-backed (e.g., PSA discs) offers precise stick-and-peel alignment—critical for detail work.
• Bond: Resin bonds hold particles longer than glue bonds. Look for “resin-over-glue” labels if sanding hardwoods or metals regularly.
• Abrasive Type: Aluminum oxide is durable and self-sharpens—best for wood and drywall. Silicon carbide cuts faster on metal, plastic, and wet applications—but breaks down quicker on wood.
H2: Where Grit Fits in Your Broader Toolkit
Choosing sandpaper grit sits alongside other foundational decisions—like selecting the right starter drill kit or understanding which structure adhesive holds up in humid bathrooms. A poorly prepped surface undermines even the best glass胶防霉推荐 or lithium-ion screwdriver torque control. That’s why grit choice belongs in your core decision stack—not as an afterthought.
If you’re building out your first functional setup, pair your sandpaper system with a compact lithium-ion screwdriver for assembly, a basic 16-piece家用工具箱清单 (including tape measure, level, utility knife), and a quality油漆滚筒挑选 for walls. These form the foundation—everything else layers on top. For a complete setup guide, visit our full resource hub.
H2: Final Check—Before You Sand
Ask yourself three questions:
1. What am I removing—or revealing? (Old finish? Mill marks? Rust?) 2. What’s the next step? (Stain? Paint? Primer? Clear coat?) 3. What tool am I using—and what’s its effective RPM or stroke rate?
Answer those, match to the grit ladder, and you’ll sand less, finish better, and avoid the 1 DIY regret: “I wish I’d started finer.”
(Updated: April 2026)