Sandpaper Grit Numbers Explained: What Each Range Is Actu...
- 时间:
- 浏览:23
- 来源:Easy Home Repair & DIY Guides
H2: Sandpaper Grit Numbers Aren’t Just Labels — They’re Your First Line of Control
You’ve held a sheet of sandpaper, flipped it over, and squinted at that tiny number stamped in the corner: 60, 120, 220. Maybe you grabbed whatever was cheapest at the hardware store — or worse, reused a worn-out sheet because "it still feels scratchy." That’s how you end up with swirl marks in a fresh coat of paint, burn-through on thin veneer, or hours spent sanding metal only to discover you’re still stuck on rust pitting.
Grit numbers aren’t arbitrary. They’re standardized (per ISO 6344 and ANSI B74.18), calibrated to particle size — measured in microns — and validated across global abrasives labs. But calibration means nothing if you don’t know *what* that number delivers *in practice*. This isn’t about theory. It’s about which grit saves you 20 minutes on drywall patching, which one prevents clogging when sanding pine resin, and which one actually cuts through cured epoxy without glazing over.
H2: How Grit Numbers Actually Work (No Jargon, Just Physics)
The grit number tells you *how many openings per linear inch* there are in the sieve used to sort abrasive particles. A higher number = smaller particles = finer cut. But here’s what manuals won’t tell you: grit isn’t linear. Going from 80 to 120 isn’t a 50% jump in fineness — it’s a ~35% reduction in average particle diameter. And that changes everything: cutting speed, heat buildup, dust volume, and surface finish.
Real-world benchmark: On softwood like pine, 80-grit removes ~0.012 mm per pass under moderate pressure (Updated: April 2026). At 180-grit? That drops to ~0.003 mm — four times less material removed, but with dramatically lower risk of tear-out. That’s why pros don’t skip grits — they *strategically compress* them. You rarely need every step from 60 → 80 → 100 → 120 → 150 → 180 → 220. You need the *right pair* for your substrate and goal.
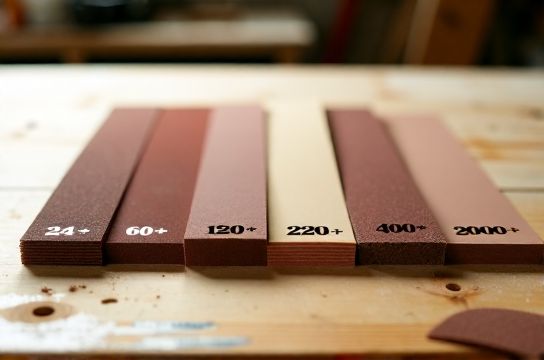
H2: The Five Practical Grit Ranges — And Exactly When to Use Them
H3: Coarse Grits (24–80): For Aggressive Removal, Not Refinement
This is demolition-grade sandpaper. Think: stripping old paint from a deck, leveling glue squeeze-out on hardwood joints, or knocking down high spots on drywall mud before taping.
- 24–36 grit: Reserved for metal grinding (e.g., removing weld splatter) or heavy stock removal on thick lumber. Not for hand-sanding — use with a belt sander only. Clogs instantly on softwoods and finishes. - 40–60 grit: Ideal for rough shaping of raw MDF or plywood edges, or prepping heavily rusted steel before wire-wheeling. Removes ~0.02 mm per pass on mild steel (Updated: April 2026). - 80 grit: The workhorse for initial wood prep. Removes mill glaze, flattens uneven stain absorption, and levels filler. Use *only* before moving to 120 — skipping 80 for 120 on oak will leave visible scratches under clear finish.
Skip coarse grits entirely on veneer, laminate, or any finished surface. You’ll sand through it before you realize.
H3: Medium Grits (100–150): Where Most DIY Projects Live
This is the sweet spot for 80% of home repairs and upgrades — not too slow, not too aggressive. If you own one sanding block and three sheets of paper, make them 120, 150, and 180.
- 100 grit: Best for smoothing bare drywall joint compound. Less aggressive than 80, so it won’t gouge paper tape, but cuts fast enough to avoid overheating compound (which causes cracking). - 120 grit: The universal starting point for painted surfaces. Removes light oxidation on aluminum trim, scuffs glossy paint for repainting, and sands primer without cutting through to bare drywall. Also the finest grit safe for hand-sanding soft metals like brass or aluminum without marring. - 140–150 grit: The quiet MVP for wood finishing. On maple or birch, this grit opens pores just enough for even stain uptake while leaving a surface smooth enough that 180 won’t feel redundant. On pine, it’s often the *final* grit before water-popping and staining — especially if you’re using a penetrating oil-based finish.
Note: 150 grit clogs *fast* on resinous woods like cedar or Douglas fir. Keep a spare sheet and switch early.
H3: Fine Grits (180–220): The Prep Before the Finish
These don’t remove much — they refine. And refinement matters more than most DIYers realize. A poorly prepped surface makes even premium paint look cheap.
- 180 grit: The last grit before applying water-based polyurethane or acrylic enamel. It leaves a matte, uniform tooth — enough for adhesion, not enough to show under gloss. Also ideal for final smoothing of spackle patches on walls before painting. - 220 grit: Required before spray-can lacquers or automotive clear coats. Removes micro-scratches from 180 and creates a surface so smooth, dust nibs become the limiting factor — not sanding marks. Not needed for flat or eggshell wall paint.
Don’t use 220 on raw wood before oil-based stains — it closes pores too tightly, causing blotchy absorption. Save it for *after* the first coat dries and you’re sanding between coats.
H3: Very Fine & Ultra-Fine (240–600+): Specialized Roles, Not General Purpose
These are niche tools — valuable, but misused often.
- 240–320 grit: Used *between coats* of film-building finishes (poly, lacquer, conversion varnish). Never on bare wood. Goal: de-nib, not reshape. - 400 grit: Standard for wet-sanding automotive basecoats or smoothing filled grain on high-end cabinets. Requires lubrication (water or mineral spirits) to prevent loading. - 600+ grit: Almost exclusively for polishing — not sanding. Used with rubbing compounds on cured finishes, or for prepping metal for mirror polish. Not for DIY paint prep. Using 600 on drywall joint compound is like using a scalpel to peel an orange.
H3: Material-Specific Realities You Can’t Ignore
Grit performance shifts drastically by substrate:
- Wood: Softwoods (pine, fir) load faster above 120 grit. Stick with open-coat aluminum oxide paper. Hardwoods (oak, maple) handle closed-coat silicon carbide better at 180+. - Metal: Aluminum needs non-loading silicon carbide — aluminum oxide gums up instantly. Stainless steel requires 80–120 to break passive oxide layer before polishing. - Plastic: Acrylic and PVC scratch easily. Use 220+ *wet* with light pressure — dry-sanding creates static and melts micro-edges. - Drywall: Always use dry sanding with 100–150 grit on setting-type compounds (e.g., Durabond). Premixed joint compound? Switch to 120–180 — it’s softer and loads slower.
H2: What the Packaging Doesn’t Tell You (But Should)
Not all "120 grit" is equal. Here’s why:
- Mineral type matters: Aluminum oxide lasts 3× longer than garnet on wood (Updated: April 2026), but garnet gives warmer, more even scratch patterns on antique furniture restoration. - Backing weight: Light-duty paper backing tears on aggressive orbital sanders. Look for "Y-weight" (heavy-duty) or "J-weight" (jumbo, for belt sanders) if you’re power-sanding. - Coating: "Closed coat" means 100% abrasive coverage — best for hard, dense materials. "Open coat" has 30–40% gaps — essential for softwoods and drywall to shed dust. - Shape & form: Sheets wear unevenly. Discs (5" or 6") run cooler and last longer on random orbitals. Detail sanders need narrow belts or triangular pads — and those demand specific grit ranges (e.g., 120–180 only — no 60 on a detail sander).
H2: A Realistic Grit Progression Flowchart (For Home Projects)
Forget rigid sequences. Follow this decision tree instead:
1. What’s the goal? - Removing material? → Start at lowest grit that gets the job done in ≤3 passes. - Prepping for paint? → Match grit to paint type: flat/eggshell = 150; satin/gloss = 180; spray lacquer = 220. - Restoring furniture? → 120 to remove old finish, 150 to level, 180 before stain — *unless* using gel stain (then go straight to 220 after 150).
2. What’s the substrate? - Pine or drywall? → Skip 60. Start at 80 or 100. - Maple or MDF? → 120 is safe for first pass. - Aluminum window frame? → 120 dry, then 220 wet before painting.
3. What tool are you using? - Hand block: Max 150 grit for control. Anything finer wears fingers out. - Random orbital (DA): 80–220 works, but 120–180 is 90% of use cases. - Belt sander: Never go finer than 100 — you’ll burn the wood or warp the belt.
H2: Budget vs. Performance — Where to Spend (and Skip)
You don’t need premium sandpaper for every job. Here’s where value meets function:
- For drywall, spackle, and primer: Mid-tier aluminum oxide (e.g., Norton ProSand or 3M Imperial) at 100–180 grit. No need for ceramic or zirconia. - For hardwood floors or cabinet refinishing: Step up to silicon carbide (e.g., Mirka Abranet) at 120–220. It cuts cooler, lasts longer, and produces less airborne dust. - For rental tools or infrequent use: Avoid ultra-cheap bulk packs — inconsistent coating leads to patchy results and wasted time.
And skip these entirely: - “Assorted grit” multi-packs — you’ll use 120 and 180 90% of the time. The rest gather dust. - “Self-adhesive” discs unless your sander uses them — standard PSA backing delaminates fast under heat. - Any grit labeled “for all surfaces” — physics doesn’t work that way.
H2: Common Mistakes — And How to Fix Them Fast
- Mistake: Sanding with the grain *only* on the final pass. Reality: Always sand with the grain — even at 80 grit. Cross-grain at coarse grits creates deep, unfixable scratches. - Mistake: Reusing clogged paper. Fix: Tap it firmly on a bench edge every 30 seconds. If it doesn’t recover, replace it — not later. - Mistake: Assuming “higher grit = better.” Reality: 320 on bare pine before staining guarantees blotchiness. 80 on drywall before taping guarantees torn tape. - Mistake: Not cleaning dust before moving up a grit. Fix: Wipe with a tack cloth *or* slightly damp microfiber — never dry rag (spreads dust).
H2: Quick-Reference Comparison Table
| Grit Range | Best For | Avoid On | Tool Recommendation | Typical Lifespan (Hand Sanding) | Pro Tip |
|---|---|---|---|---|---|
| 24–60 | Heavy stock removal, rust, thick paint | Veneer, drywall paper, soft metals | Belt sander only | 1–2 passes per sheet | Use with dust collection — airborne particles are hazardous |
| 80–100 | Drywall mud, raw wood shaping, primer scuffing | Fine finishes, laminates, plastic | Orbital or hand block | 3–5 min per sheet | Wipe surface with damp cloth before switching to 120 |
| 120–150 | Paint prep, wood finishing, metal scuffing | Unsealed softwoods before staining | Random orbital or hand block | 5–10 min per sheet | Most versatile range — keep 120 and 150 stocked at all times |
| 180–220 | Final prep before gloss paint, lacquer, poly | Bare wood before oil-based stain | Hand block or orbital (low speed) | 8–12 min per sheet | Always use with a dust mask — fine particles penetrate deeper |
| 240–400+ | Between-coat smoothing, polishing, auto body | Any structural prep — not for removal | Wet/dry sanding with lubricant | 10–20 min per sheet (wet) | Never dry-sand above 220 — heat buildup damages finish |
H2: Wrapping Up — Your Next Move
Sandpaper isn’t filler. It’s precision control disguised as a consumable. Choosing the right grit isn’t about memorizing numbers — it’s about matching removal rate, surface integrity, and finish requirements. Start simple: buy 120, 150, and 180 in aluminum oxide, open-coat, Y-weight sheets. Use them intentionally. Track what works — and what wastes time — on your next project.
If you're building out your first functional setup — whether for touch-ups, full-room repaints, or furniture rescue — check our complete setup guide for tested, budget-conscious picks across categories like entry-level drill kits, reliable sealants, and starter toolboxes that actually cover real home repair needs without bloat or guesswork.