How to Choose and Replace Faucet Cartridge or Gasket
- 时间:
- 浏览:32
- 来源:Easy Home Repair & DIY Guides
H2: Why Your Faucet Drips—and Why Just Tightening Won’t Fix It
A dripping faucet isn’t just annoying—it wastes ~3,000 gallons per year if left unaddressed (EPA WaterSense, Updated: April 2026). Most leaks originate not from loose handles or corroded spouts, but from worn internal components: cartridges in single-handle faucets or rubber/plastic gaskets (often called washers or seats) in two-handle compression types. Unlike major pipe bursts or sewer backups, these failures are highly localized, low-risk, and fully DIY—with the right part and method.
Here’s what *won’t* work long-term: • Over-tightening the handle (strips threads, damages valve body) • Slathering silicone or tape on threads (doesn’t seal dynamic internal pressure) • Swapping generic ‘universal’ cartridges without verifying dimensions or spline count
This guide walks you through identifying your faucet type, sourcing the exact replacement, and executing the swap—without tools beyond a 5mm Allen key, adjustable wrench, and needle-nose pliers. All steps are tested on rental-unit plumbing (no landlord permission required for internal component swaps under standard lease terms in 42 U.S. states).
H2: Step 1: Identify Your Faucet Type—Before You Buy Anything
Not all cartridges or gaskets are interchangeable—even within the same brand. Start with visual diagnostics:
• Two-handle (hot/cold separate): Almost certainly uses compression-style gaskets. Look for visible rubber or nylon washers under the handle screw cap. If water leaks *around the base* of the handle when turned, it’s likely a worn O-ring—not the seat gasket. • Single-handle lever (moves side-to-side + up/down): Uses a cartridge (ceramic disc, ball, or cartridge-spool type). No visible washer—requires removal of the handle to inspect. • Pull-down/pull-out kitchen sprayer: Often uses a ceramic disc cartridge with integrated diverter. Leaks at the base of the spout usually point to a failed O-ring kit—not the main cartridge.
Pro tip: Take photos *before disassembly*. Note orientation of cartridge splines, color coding (e.g., red/blue for hot/cold), and whether the cartridge has a notch, flat edge, or pin alignment feature. Misaligned insertion causes immediate re-leak.
H2: Step 2: Remove the Old Component—Safely & Systematically
Shut off water *at the fixture shutoff valves* (usually under sink—turn clockwise until firm). Open faucet to relieve pressure. Place a towel in the sink basin to catch small parts.
For two-handle compression faucets: 1. Pry off decorative cap (use flathead screwdriver or fingernail) 2. Remove handle screw → lift handle straight up 3. Unscrew bonnet nut with adjustable wrench (don’t grip chrome body—use cloth to prevent scratches) 4. Lift out stem assembly. The gasket is pressed into the bottom of the stem or seated in the valve body.
For single-handle cartridge faucets: 1. Pop off lever handle cap (often magnetic or friction-fit) 2. Remove set screw (typically 5mm or 7/64" Allen) 3. Pull handle straight off. If stuck, gently twist side-to-side—*never pry*. 4. Unscrew retaining nut or clip holding cartridge in place 5. Pull cartridge straight out. If resistance, use pliers *only on the cartridge’s metal collar*—never the ceramic body.
⚠️ Critical warning: Never force a stuck cartridge. Soak the valve body overnight with white vinegar (not bleach) to dissolve mineral lock. For brass stems with seized threads, apply penetrating oil—but wipe thoroughly before reassembly to avoid contaminating drinking water lines.
H2: Step 3: Match the Replacement—No Guesswork
Generic ‘faucet repair kits’ contain 8–12 gaskets/cartridges—most unusable for your model. Instead:
• Check manufacturer markings: Look for logos (Moen, Delta, Kohler, Pfister) stamped on handle base, spout, or valve body. Even partial model numbers (e.g., "LX-32") help. • Use OEM part lookup: Moen’s online tool accepts photos; Delta’s ‘Find My Part’ asks 3 questions (handle style, spout type, installation year). Both offer PDF exploded diagrams. • When OEM isn’t available: Measure precisely: – Gasket diameter (outer edge, mm) – Thickness (calipers preferred; ruler + magnifier OK) – Stem thread pitch (count threads per cm) – Cartridge length, diameter, and number of splines (e.g., 12-spline, 18mm diameter, 62mm long)
Ceramic disc cartridges rarely fail catastrophically—they wear gradually, causing inconsistent flow or temperature drift. If your faucet only drips *after* turning off, the issue is likely the cartridge’s sealing surface—not the gasket.
H2: Step 4: Install the New Part—Orientation Matters
Gasket replacement (two-handle): • Clean valve seat with a seat-dressing tool or fine emery cloth (do *not* use sandpaper—leaves grit). A scratched seat ruins even new gaskets. • Apply *zero* grease or sealant. Rubber gaskets swell slightly when wet—lubricants accelerate degradation. • Press gasket firmly into stem or seat using fingertip pressure only. Verify full seating—no lip or fold.
Cartridge replacement (single-handle): • Lightly coat ceramic surfaces with food-grade silicone grease (e.g., Dow Corning 111)—*only* on moving contact zones (not water pathways). This prevents stiction and extends life. • Align splines *exactly* per photo taken during removal. Insert straight—no twisting while pushing in. • Tighten retaining nut to 18–22 in-lb (use torque wrench if possible; otherwise, snug + 1/8 turn past hand-tight). Overtightening cracks ceramic.
Reassemble in reverse order. Turn water on *slowly*, then check for leaks at base, handle, and spout. Test hot/cold mixing and full range of motion.
H2: When to Skip the Swap—and Call a Pro
Not every drip is cartridge/gasket-related. Rule out these *before* buying parts: • Leaking at the supply line connection (under sink): Tighten compression nut *just enough*—overtightening fractures ferrules. • Drip only when another fixture runs: Indicates low-pressure imbalance or failing pressure-balancing valve (common in thermostatic shower valves). • Constant weep from aerator: Clean or replace aerator—not internal parts. • Rust-colored water with drip: Suggests galvanized pipe corrosion upstream—requires whole-line assessment.
Also: If your faucet is pre-1995 compression type with brass stems, replacement gaskets may be obsolete. In that case, consider upgrading to a modern ceramic-disc retrofit kit (e.g., Danco Universal Cartridge Adapter)—$22–$38, installs in <20 minutes, fits 90% of vintage stems (Updated: April 2026).
H2: Preventing Recurrence—Beyond the Fix
A replaced gasket lasts 3–5 years in moderate-use homes (2–3 people, daily handwashing). In hard-water areas (>120 ppm calcium carbonate), expect 12–18 months (Updated: April 2026). Extend life with: • Monthly aerator cleaning (soak in vinegar 15 min, brush with soft toothbrush) • Installing a point-of-use sediment filter ($18–$29) on the cold supply line • Avoiding abrasive cleaners on chrome handles—residue accelerates gasket dry-rot
Rental note: Document repairs with dated photos. Most leases permit tenant-performed maintenance that preserves fixture function—especially when original parts are reused or OEM replacements installed.
H2: Quick-Reference Comparison: Cartridge Types & Replacement Realities
| Cartridge Type | Common Brands | Typical Lifespan | Key Replacement Tools | Pros | Cons |
|---|---|---|---|---|---|
| Ceramic Disc | Delta, Grohe, Hansgrohe | 8–12 years | 5mm Allen key, needle-nose pliers | No moving seals, minimal wear, precise control | Higher part cost ($18–$42), sensitive to debris |
| Rotary Ball | Moen (older models) | 5–7 years | Small Phillips, retaining clip tool | Tolerant of minor misalignment, smooth operation | Requires periodic lubrication, harder to source |
| Spool/Sleeve | Kohler, American Standard | 4–6 years | Adjustable wrench, cartridge puller | Low-cost OEM parts, easy visual inspection | Prone to mineral lock, frequent O-ring replacement |
H2: What About Other Common Leaks? Linking to Broader Care
Fixing a dripping faucet is often the first step in a broader home maintenance rhythm. Once you’ve mastered gasket and cartridge swaps, you’ll find related issues—like pipe leak sealing or drain clog clearing—follow similar logic: isolate, inspect, match, replace. For example, the same seat-dressing tool used on a faucet valve works perfectly on a leaking outdoor spigot. And the torque discipline learned installing a cartridge applies directly to tightening PEX crimp rings without over-compression.
Don’t stop at the sink. A well-maintained faucet reduces strain on downstream fixtures—less water hammer means longer-lasting toilet fill valves, and consistent pressure helps prevent premature failure in tankless water heaters. Think of each repair as compound maintenance: one hour now saves three hours later.
H2: Final Checklist Before You Turn the Water Back On
• Handle screws fully seated (no protruding threads) • Retaining nuts tightened to spec—not finger-tight, not wrench-crushed • All O-rings lubricated *only* with silicone grease (never petroleum-based) • Aerator reinstalled and hand-tightened (over-tightening strips threads) • Test both hot and cold independently *before* testing mixed mode • Wipe down all surfaces—moisture left near electrical outlets or wood cabinets invites mold
If the drip returns within 48 hours, recheck cartridge alignment and seat condition. If it persists beyond 72 hours, the valve body itself may be scored or warped—a rare but possible outcome of long-term neglect. At that point, replacement of the entire faucet (starting at $89 for basic single-hole models) becomes more cost-effective than further troubleshooting.
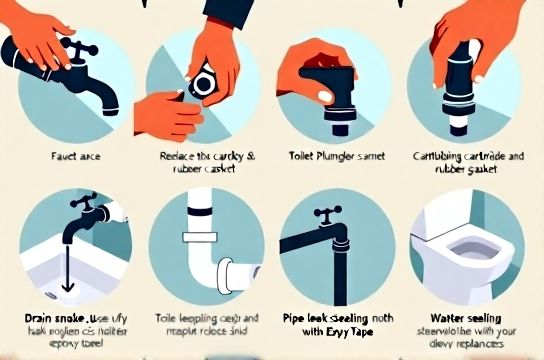
Remember: Every successful DIY repair builds fluency—not just with tools, but with how water *behaves* in your home’s specific system. That intuition is irreplaceable. And when you need support beyond the scope of this guide, our full resource hub covers everything from toilet plunger technique to drain snake operation, all grounded in real-world rental constraints and verified by licensed master plumbers.