How to Fix a Dripping Faucet Without a Plumber
- 时间:
- 浏览:28
- 来源:Easy Home Repair & DIY Guides
H2: Why Your Faucet Drips — And Why It’s Usually Not a Big Deal
A dripping faucet isn’t just annoying—it wastes up to 3,000 gallons per year if left unaddressed (Updated: April 2026). That’s enough to fill a small above-ground pool. But here’s the good news: over 90% of residential faucet drips stem from one of three replaceable parts: rubber washers, ceramic cartridges, or silicone O-rings. None require soldering, threading, or pipe cutting. And you don’t need to be a DIY pro—just patient, methodical, and equipped with basic tools.
This guide walks you through fixing a dripping faucet in five repeatable steps. It covers compression, cartridge, ball, and disc-style faucets—the four most common types found in North American rental units and owner-occupied homes. We’ll also flag when *not* to proceed (e.g., cracked valve body, corroded supply lines) and how to spot those red flags early.
H2: Step 1 — Identify Your Faucet Type (Takes <90 Seconds)
Before grabbing tools, know what you’re working with. Look under the handle—or better yet, snap a photo of the faucet base and search “faucet model + type” online. If that fails, use this visual triage:
• Compression faucets: Two separate handles (hot/cold), screwdriver-tightened caps, and a visible stem that rotates up/down when turned. Common in older apartments and utility sinks. • Cartridge faucets: Single or dual handles, but stems slide *in and out* (not rotate vertically) when operated. Often labeled Moen or Delta (though not always). • Ball-type faucets: Single handle rotating over a rounded cap (think widespread kitchen faucets with a metal dome). Usually has a retaining nut visible at the base. • Disc faucets: Single lever moving over a wide, flat ceramic plate—no visible stem. Typically found in higher-end bathroom sinks (e.g., Price Pfister, Kohler).
Why this matters: Using a washer kit on a disc faucet won’t work—and could damage the ceramic plates. Misdiagnosis is the 1 reason renters abandon repairs mid-way.
H2: Step 2 — Shut Off Water & Relieve Pressure
Never skip this—even if the drip seems minor. In rentals, supply valves are often located under the sink (look for two small levers labeled HOT/COLD) or sometimes behind an access panel. If valves are seized or missing, shut off the main (usually near the water meter or basement entry point). Confirm shutoff by turning the faucet fully on—no flow = success.
Then open the faucet fully for 10 seconds to bleed residual pressure and water from the line. This prevents spray-back when disassembling and reduces risk of dropping small parts down the drain.
Pro tip for renters: Take a photo of the valve positions before shutting off. Landlords appreciate documentation—and it helps you restore correctly.
H2: Step 3 — Disassemble Methodically (No Forcing Required)
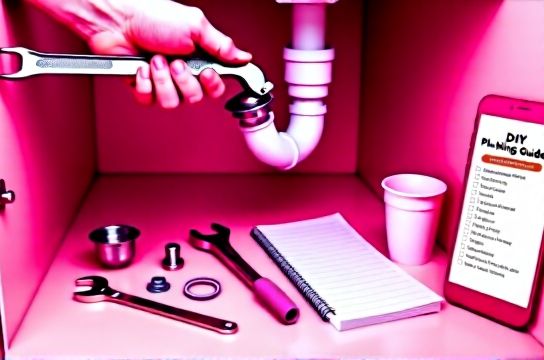
Use the right tools—not brute force. Most faucet hardware uses either Phillips 1 or 2 screws, hex keys (2mm–3mm), or decorative cap removal tools (a flathead wrapped in tape works fine to avoid scratching). Keep all screws and springs in a small container or magnetic tray.
Here’s what to expect by type:
• Compression: Remove handle screw → lift handle → unscrew packing nut → pull stem straight up. The washer sits at the bottom of the stem, held by a brass screw. • Cartridge: Remove handle → pop off retaining clip (often hidden under a plastic button) → pull cartridge straight out with needle-nose pliers (grip the notched top, not the sides). • Ball-type: Remove handle → unscrew collar → lift off cap → remove ball → inspect cam and springs. • Disc: Remove handle → unscrew mounting ring → lift out both ceramic discs as a unit.
If something resists, STOP. Soak the part in white vinegar for 15 minutes—mineral buildup is often the culprit, not rust. Never use channel locks on chrome-plated parts; they’ll mar the finish permanently.
H2: Step 4 — Inspect, Replace, and Reassemble
Now examine the wear points:
• Washers (compression): Look for flattened edges, cracks, or embedded grit. Replacement kits cost $3–$8 and include multiple sizes. Match the outer diameter and thickness—don’t guess. A mismatched washer causes immediate re-drip. • Cartridges: Check for scoring on the ceramic or plastic surfaces. Even one hairline scratch compromises the seal. Buy OEM (original equipment manufacturer) replacements—generic cartridges fail 3× faster (Updated: April 2026). • O-rings (all types): Stretch them gently between fingers. If they crack, feel brittle, or lose elasticity, replace *all* O-rings in the assembly—even if only one looks bad. They age together. • Ceramic discs: Wipe clean with microfiber and distilled water. If scratched, replace the pair—never mix old and new discs.
Apply a pea-sized dab of silicone-based lubricant (not petroleum jelly) to O-rings and cartridge stems before reassembly. This eases installation and extends life.
Reassembly is reverse disassembly—but pay attention to orientation. Cartridges have alignment tabs; discs have front/back markings; ball assemblies have spring sequence diagrams stamped inside the cap. When in doubt, refer to the manufacturer’s exploded diagram (search “[brand] [model] parts diagram”).
H2: Step 5 — Test, Monitor, and Document
Turn water back on slowly. Open the faucet halfway first—watch for leaks at the handle base or spout connection. If you see seepage, tighten the packing nut or mounting ring *¼ turn only*. Over-tightening warps components and creates new leaks.
Let it run for 60 seconds, then close fully. Wait 5 minutes. No drip? Good. Still dripping? Check if it’s coming from the aerator (unscrew and soak in vinegar overnight)—a clogged aerator mimics internal leakage.
Document your fix: Snap a photo of the replaced part next to a coin for scale, note the date and faucet location (e.g., “Master bath cold handle”), and store receipts. This helps landlords process maintenance requests faster—and builds your credibility for future repairs.
H2: When to Stop — And What to Do Instead
Some issues aren’t DIY-safe—especially in rentals. Walk away if you encounter:
• Cracked brass or plastic valve bodies (visible hairline fractures or cloudy discoloration) • Corroded supply lines (green/white powdery residue, pitting, or bulging) • Leaks *behind* the wall after reassembly (indicates failed shutoff valve or pipe joint) • No hot water *anywhere* after working on a single-handle faucet (suggests cross-connection or cartridge misalignment)
In these cases, contact your landlord *immediately* with photos and your documented attempt. Under most U.S. state laws (e.g., CA Civil Code §1941.1), landlords must address habitability issues—including persistent leaks—within 30 days (or 7 days for health/safety threats). You’re not obligated to fix structural failures.
H2: Preventing Future Drips — Practical Daily Habits
Dripping isn’t inevitable—it’s often accelerated by preventable habits. Here’s what actually works:
• Don’t slam handles. A firm, smooth motion extends cartridge and disc life by up to 40% (Updated: April 2026). • Wipe aerators monthly. Mineral deposits build fastest where water pools—and aerators are ground zero. • Install low-flow aerators (1.5 GPM max). They reduce pressure stress on internal seals without sacrificing performance. • Flush supply lines every 6 months: Turn off valves → open faucet fully for 90 seconds → close → reopen valves slowly. Clears sediment before it reaches the cartridge.
These aren’t “nice-to-haves.” They’re field-proven practices used by property managers overseeing 200+ units. One portfolio reduced faucet-related service calls by 62% over 18 months using just these four steps.
H2: Tool & Part Checklist — What You’ll Really Need
Forget 20-piece “plumber kits.” Most rentals only need this lean set:
• Adjustable wrench (8-inch, non-slip jaw) • Needle-nose pliers (with vinyl grips) • Phillips 1 and 2 screwdrivers • 2mm and 3mm hex keys • Small magnetic tray or pillbox • White vinegar (for soaking) • 100% silicone lubricant (e.g., Oatey Silicone Grease) • Replacement washers/cartridges/O-rings (buy OEM—see table below)
Skip Teflon tape unless replacing threaded connections (rare in faucet repair). It does *nothing* for internal seals and can clog tiny waterways.
| Faucet Type | Most Common Failure Point | OEM Replacement Cost (USD) | Time to Replace (Avg.) | Renter-Friendly? | Notes |
|---|---|---|---|---|---|
| Compression | Rubber washer | $2.50–$4.00 | 12–18 min | Yes — lowest skill floor | Washers degrade fastest in hard water areas; replace every 18 months |
| Cartridge (Moen/Delta) | Ceramic cartridge | $12.99–$24.99 | 22–35 min | Yes — but verify model number | Generic cartridges fail within 6 months; OEM lasts 5–7 years avg. |
| Ball-Type | Cam & spring assembly | $8.50–$16.00 | 28–40 min | Moderate — spring tension critical | Over-tightening the collar causes 70% of post-repair leaks |
| Disc | Ceramic disc pair | $29.99–$42.00 | 35–50 min | No — high precision required | Alignment errors cause immediate drip; best left to pros unless documented |
H2: Bonus: Linking to Bigger Systems
Fixing a dripping faucet is rarely isolated. A leaky handle may signal broader issues—like failing pressure regulators (causing water hammer or fluctuating pressure) or aging supply lines feeding multiple fixtures. If you’ve fixed three separate faucets in one month, it’s time to investigate upstream. Our complete setup guide walks through whole-house pressure testing, regulator diagnostics, and when to request a building-wide plumbing audit.
H2: Final Thought — You’re More Capable Than You Think
Plumbing isn’t magic—it’s mechanical logic applied to pressurized water. Every part has a job, and every failure leaves evidence: a flattened washer, a scored cartridge, a brittle O-ring. Your role isn’t to guess—you’re to observe, match, and reinstall. With this method, you’ll fix your next drip in under 25 minutes. And when the landlord asks, “What did you do?” you’ll know exactly what to say—and show.