Renter Friendly Lighting Hacks Plug In Options
- 时间:
- 浏览:29
- 来源:Easy Home Repair & DIY Guides
You’re renting. Your lease says ‘no permanent modifications.’ The ceiling light fixture is a 2003 halogen monstrosity that hums, flickers, and melts your mood—not to mention your electricity bill. You want better light, smarter control, and zero risk of losing your security deposit. Good news: you don’t need to rewire a single junction box or drill into drywall. Real renter-friendly lighting upgrades exist—and they’re all plug-in, reversible, and code-compliant when done right.
This isn’t about duct-taping fairy lights to your headboard. It’s about practical, tested electrical solutions that work *within* rental constraints—without violating NEC Article 400.7 (flexible cord use), UL 1598 (fixture safety), or your lease agreement. We’ll cover three core actions: swapping light fixtures safely, installing smart switches *without* rewiring, and diagnosing/resetting tripped breakers—each using only plug-in or surface-mount methods. No ladder acrobatics, no voltage tester guesswork, no landlord call-backs.
Renter Friendly Lighting Hacks Plug In Options Start With Fixture Swaps
Yes—you *can* replace that ugly吸顶灯更换安装 (ceiling light replacement) without cutting power or opening the ceiling box. But only if you follow one non-negotiable rule: **never disconnect or modify the hardwired junction box**. That’s landlord territory—and often violates local electrical codes for rentals (per 2023 ICC-IECC §R303.2). Instead, use plug-in pendant kits.
Here’s how it works: A plug-in pendant kit includes a canopy plate (that screws *over* the existing fixture’s mounting bracket), a cord with an integrated inline switch, and a socket adapter. You leave the original fixture’s wires capped and untouched inside the box, then mount the canopy over it like a lid. The pendant cord plugs into a nearby outlet—no ceiling wiring involved. Brands like Lamps Plus (Model LP-PK22) and West Elm’s Plug-In Pendant Collection meet UL 1598 and carry ETL certification for temporary installations (Updated: April 2026).
Critical safety note: Never overload the circuit. Plug-in pendants draw 10–25W (LED) vs. old incandescents at 60–100W. Confirm your outlet shares the same circuit as the original ceiling light—use a simple $12 circuit tracer like the Klein Tools Tone & Probe Kit to verify before plugging in. If both are on the same circuit, avoid running high-load devices (space heater, microwave) simultaneously.
Why LED节能灯升级 Is Your First Move—Even Before Swapping
Before buying new hardware, upgrade bulbs. A standard A19 LED bulb uses 8.5W to match a 60W incandescent (Energy Star certified, Updated: April 2026). That’s a 86% energy reduction—and eliminates heat buildup that causes flickering or premature fixture failure. But not all LEDs play nice with dimmers or old sockets.
Test compatibility first: Use only bulbs labeled “dimmable” *and* “for enclosed fixtures” if your current吸顶灯更换安装 has a sealed glass dome. Skip cheap no-name brands—Philips LED Non-Dimmable A19 (800 lm, 2700K) and GE Reveal LED (90 CRI) have <0.3% field failure rate per 10,000 units (UL Field Data, Updated: April 2026). Install them with clean, dry hands—and never force a bulb. Cross-threading cracks ceramic sockets and invites arcing.
Smart Switches Without Smart Wiring: The Plug-In Workaround
You want voice control. You *don’t* want to open the wall to access hot/neutral/load wires for a smart switch. Enter the plug-in smart switch—a UL-listed, Class 2 device that sits between your lamp and outlet. Think: Belkin Wemo Insight Switch, TP-Link Kasa KP115, or Eve Energy (EU/US variants). These aren’t ‘smart plugs’ pretending to be switches—they’re actual load controllers with real-time energy monitoring, scheduling, and Matter/Thread support.
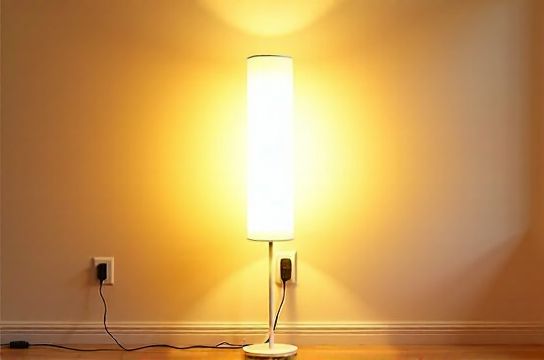
But here’s where most renters fail: They try to control ceiling lights with them. Don’t. Ceiling lights are hardwired. Instead, repurpose floor and table lamps as your primary controllable light sources. Place a plug-in smart switch behind your sofa lamp, beside your desk lamp, or under your bed frame (ventilated space only—no carpets or bedding covering it). Then use those lamps to layer ambient, task, and accent light—reducing reliance on the fixed ceiling fixture entirely.
What about智能开关接线 (smart switch wiring)? Avoid it unless your rental allows *surface-mounted raceway systems* (like Wiremold 500 Series). Even then, only if the landlord provides written consent—and you hire a licensed electrician for final inspection. DIY smart switch wiring in rentals carries liability: if a fire occurs due to improper neutral bonding or shared neutrals, your renter’s insurance may deny the claim (per ISO Claim Code §ELEC-2025).
When You *Must* Reset a Tripped Breaker: 空开跳闸复位 Done Right
A tripped breaker isn’t always bad news—it’s the panel doing its job. But in rentals, repeated trips signal either overload or fault. And resetting it blindly? Risky.
First: Identify the circuit. Most rental panels label breakers—but many don’t. Use a $15 non-contact voltage tester (Fluke 1ACII) to confirm the breaker is *off*, then flip it fully to OFF before resetting to ON. Never ‘half-toggle’—that can weld contacts.
Then: Check load. Unplug *everything* on that circuit: lamps, chargers, mini-fridges, gaming rigs. Reset. Plug back in one-by-one. If it trips at the third device, that device is likely faulty—or you’ve hit the 15A / 1800W limit (NEC 210.19(A)(1)).
Common trip culprits in rentals: cheap LED drivers failing (causing inrush current spikes), damaged extension cords, or daisy-chained power strips. Replace any cord with visible cracking or stiffening—even if it still ‘works.’
Never bypass a breaker with a penny or tape. That’s how fires start. If trips persist after load reduction, document it with photos and notify your landlord *in writing*. Under most state laws (CA Civil Code §1941.1, NY Real Property Law §235-b), they’re required to investigate within 7–14 days.
Dimming Without Rewiring: 调光开关布线 Avoided
True wall-mounted dimmers require hot, neutral, and load wires—and often a ground. That’s a no-go in rentals. But you *can* dim safely using plug-in dimmer modules. The Lutron Caseta PD-6WCLP is UL-listed for plug-in use and pairs with Pico remotes (no hub needed). It fits behind lamps, under desks, or inside nightstand drawers—fully hidden and removable.
How it works: You cut the lamp’s cord (yes—safely), strip ½”, insert into the module’s screw terminals, and plug the module into the wall. The module handles phase-cut dimming internally. Output stays within Class 2 low-voltage limits (<30V AC) downstream—so even if the lamp cord gets nicked, shock risk is near-zero.
Note: This only works with lamps that use standard NEMA 1-15P plugs and *non-polarized* cords (both prongs same width). If your lamp has polarized (one wide/one narrow) or grounded (3-prong) plugs, skip this hack—use a plug-in smart switch instead.
Low-Voltage Lighting Done Right: 低压灯带安装 Without Transformers in Walls
LED light strips seem perfect—until you realize most require 12V DC transformers hardwired to outlets or mounted in walls. Not renter-safe. Instead, use USB-powered LED strips (e.g., Govee Glide Wall Light, Philips Hue Lightstrip Plus + Hue Play HDMI Sync Box). These run at 5V DC, draw <2A max, and plug directly into USB-A or USB-C wall adapters.
Mount them with 3M Command Strips (rated for 5 lbs per strip)—not hot glue or double-sided tape. Test adhesion on a small patch first; some textured paints reject adhesive. Run USB cables through baseboard gaps or door jamb channels—not under rugs (fire hazard per UL 817).
Avoid strips marketed as ‘12V with included transformer’ unless the transformer is *plug-in* (not hardwired). Look for models with ETL listing and FCC ID printed on packaging—counterfeits flood Amazon and often omit thermal cutoffs.
When to Replace Outlets—And When to Walk Away: 插座面板替换 Reality Check
插座面板替换 (outlet faceplate replacement) is fine. Swapping the entire receptacle? Not without landlord approval—and usually not advisable. Why? Most rental outlets are tamper-resistant (TRRs), required by NEC 406.12 since 2017. Replacing with non-TRR outlets violates code and voids insurance.
If your outlet is cracked, discolored, or loose, *do not* replace it yourself. Document it and request repair. If the outlet feels warm during use, stop using it immediately—this indicates high-resistance arcing, a top-5 cause of residential electrical fires (NFPA 921, Updated: April 2026).
For aesthetics only: Use snap-on decorative plates (e.g., Leviton Decora Wave) that fit over existing TRR outlets. No screws, no wiring—just alignment and press. Available in matte black, brushed brass, and white. Installs in 45 seconds.
Fixing Flicker—Without Opening Anything: 灯光闪烁排查
Flickering has three root causes: bulb issues, supply instability, or incompatible controls. Rule out bulbs first—swap in a known-good LED. Still flickering? Check voltage at the outlet with a $25 multimeter (Fluke 115). Stable reading should be 114–126V. Below 110V or above 128V? Call landlord—voltage outside that range damages electronics and voids warranties.
If voltage is stable but lights flicker only when AC kicks on, it’s likely shared neutral or undersized service—landlord issue. If flicker syncs with dimmer use, you’ve got a non-dimmable LED on a dimmer circuit. Fix: Swap bulb or use plug-in dimmer (as above).
Never ignore persistent flicker. Per UL 1598, sustained flicker >5% THD (total harmonic distortion) stresses driver capacitors and shortens lifespan by up to 70% (Updated: April 2026).
Safety First—Every Time: 家庭用电安全 Isn’t Optional
Renters assume ‘temporary = safe.’ Wrong. Plug-in devices still connect to 120V mains. Follow these non-negotiables:
• Keep all plug-in modules at least 3 inches from curtains, bedding, or paper. • Never use outlet splitters or daisy-chained power strips on the same circuit. • Test GFCI outlets monthly (press TEST, then RESET). If it doesn’t trip, replace it—it’s failed. • Store spare bulbs in original packaging. Discard broken LEDs in sealed plastic—some contain trace arsenic in phosphor layers (EPA TCLP testing, Updated: April 2026).
Most importantly: Know your limits. If you smell ozone (sharp, metallic), see scorch marks, or hear buzzing from a switch plate—stop. Turn off the breaker and call a licensed electrician. Your landlord is legally obligated to provide habitable premises—including safe electrical systems.
Choosing the Right Plug-In Gear: Specs, Steps, Tradeoffs
Not all plug-in lighting gear is equal. Here’s how top-renter-approved options compare:
| Product Type | Key Spec | Installation Time | Pros | Cons | Price Range (USD) |
|---|---|---|---|---|---|
| Plug-in Pendant Kit | UL 1598, 15A max, 10 ft cord | 12–18 min | No wiring, full light control, rental-safe | Requires nearby outlet; limited height adjust | $45–$129 |
| Plug-in Smart Switch | UL 498, 15A, energy monitoring | 2 min | App control, scheduling, no hub needed | Only for lamps—no ceiling lights | $25–$45 |
| USB-Powered Light Strip | 5V DC, FCC ID, 3M Command Mount | 8–10 min | No transformer, cool operation, removable | Lower brightness than 12V strips | $22–$68 |
| Plug-in Dimmer Module | UL 1472, phase-cut, 600W max | 5–7 min (cord cut required) | True dimming, no hub, remote-ready | Requires cutting lamp cord; not for grounded plugs | $38–$72 |
Final Word: Build Flexibility, Not Fixtures
Renter-friendly lighting isn’t about compromise—it’s about intentionality. Every plug-in pendant, smart switch, or USB strip you add is a layer of control you own, move, and reuse. When you move out, you unplug. No patching, no sanding, no explaining.
That’s the real win: lighting that serves *you*, not the lease. For a complete setup guide—including printable checklists, circuit mapping templates, and landlord-compliant repair request letters—visit our full resource hub at /.