Weatherstripping Installation Guide Keep Heat In
- 时间:
- 浏览:34
- 来源:Easy Home Repair & DIY Guides
H2: Why Weatherstripping Is Your First Line of Defense Against Heat Loss
Most homeowners don’t realize that up to 20% of a home’s heating energy escapes through gaps around doors and windows (U.S. Department of Energy, Updated: April 2026). That’s not just wasted money—it’s cold drafts in winter, inconsistent room temperatures, and higher thermostat demands that wear out HVAC systems faster. The good news? You don’t need a contractor or a $1,200 retrofit to make a measurable difference. A proper weatherstripping installation guide keep heat in is the most cost-effective, high-impact upgrade you can do yourself in under two hours.
This isn’t about slapping on foam tape and calling it done. Real-world performance depends on matching the right material to the gap type, surface condition, and usage frequency—and knowing when alignment or mechanical repair must come first. For example: trying to seal a door with sagging hinges or a warped frame is like bailing water from a sinking boat. Fix the cause before sealing the symptom.
H2: Diagnose Before You Stick—The 3-Minute Draft Test
Grab a lit incense stick or a thin piece of tissue paper. On a windy day—or with interior fans running—slowly pass it along every seam: top and sides of doors, window sashes, meeting rails, and especially the threshold. Watch for flutter or smoke deflection. Note where airflow is strongest. Then inspect closely:
• Are gaps uniform? (Suggests misalignment) • Are they widest at the top or bottom? (Classic sign of door sag or hinge wear) • Is the existing seal cracked, brittle, or detached? (Common with aging vinyl or rubber) • Is the surface painted over, dusty, or greasy? (Adhesion killer for pressure-sensitive tapes)
If your door squeaks when opening or closing, that’s often a hinge pin issue—not a sealing problem. Likewise, if the door latch doesn’t fully engage or requires jiggling, the strike plate may be misaligned, or the deadbolt mechanism is binding. Address those *before* installing new weatherstripping. Otherwise, you’ll compress the seal unevenly or force the door shut, accelerating wear.
H2: Matching Material to Gap & Use Case
Not all weatherstripping works the same way—or lasts the same amount of time. Here’s how to choose based on real-world durability and function:
• Vinyl V-strip: Best for window sashes and narrow door gaps (1/8"–3/16"). Flexible, paintable, and resistant to UV degradation. Avoid on high-traffic entry doors—it flattens over time.
• Silicone bulb seals: Ideal for exterior doors with irregular gaps up to ½". High compression recovery (95% rebound after 10,000 cycles, per ASTM D395, Updated: April 2026). Slightly more expensive, but lasts 10+ years with minimal maintenance.
• Felt or wool pile: Low-friction, quiet operation. Great for sliding patio doors and casement windows—but not for damp basements or pet-heavy homes (fuzz attracts lint and gets matted).
• Adhesive-backed foam tape: Fastest install, lowest cost. Only use as a temporary fix or on interior doors. Loses adhesion in humidity and compresses permanently within 6–12 months.
• Door bottom sweep (aka door shoe): Critical for threshold gaps. Choose aluminum-mounted models with adjustable bristles for uneven floors. Avoid cheap plastic sweeps—they warp and crack in sub-zero temps.
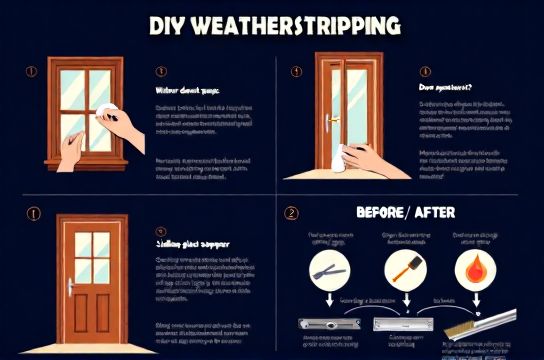
H2: Step-by-Step Weatherstripping Installation Guide Keep Heat In
Follow this sequence—no skipping steps—for lasting results:
H3: Step 1: Prep the Surface
Wipe all contact surfaces with isopropyl alcohol (70%+) and a microfiber cloth. Remove old adhesive residue with a plastic scraper—never steel wool or acetone on vinyl or painted wood. Let dry completely. If the door edge is chipped or splintered, fill with wood filler, sand smooth, and prime before applying.
H3: Step 2: Measure Twice, Cut Once
Use a metal tape measure—not fabric. For doors: measure height, width, and threshold length separately. For windows: measure each sash individually—even identical units vary by 1/16" due to seasonal expansion. Add 1/8" extra for compression fit; never stretch material during install.
H3: Step 3: Install Perimeter Seals
Start at the hinge side of the door. Peel backing slowly while pressing firmly with your thumb—don’t slide or stretch. Use a J-roller (or the edge of a credit card) to ensure full adhesive contact. Trim excess with a utility knife and straightedge. Repeat on top and latch-side. For windows, apply V-strip to the stationary frame—not the moving sash—to avoid binding.
H3: Step 4: Mount the Door Bottom Sweep
Measure threshold width. Mark screw holes using the sweep’s template. Pre-drill pilot holes (especially in hardwood or metal thresholds) to prevent splitting. Tighten screws gradually—top to bottom—to maintain even pressure across the bristle strip. Test door operation: it should close smoothly with light resistance—not drag or lift.
H3: Step 5: Verify & Fine-Tune
Close the door and check for light gaps. Insert a dollar bill between door and jamb: you should feel slight resistance pulling it out—no slipping, no tearing. If it’s too tight, loosen the bottom sweep slightly or shave 1/32" off the door edge with a plane. If too loose, add a second layer of seal only on the latch side (never hinge side—it increases friction and wear).
H2: When Weatherstripping Isn’t Enough—Mechanical Fixes That Matter
Sealing won’t solve structural issues. Here’s what to tackle *first*, especially in older homes or rentals:
• Door hinge squeak fix: Remove hinge pins, wipe clean, apply white lithium grease (not WD-40—it attracts dust), and reinsert. If pins are bent or worn, replace them—standard 3.5" nickel-plated pins cost under $4/pack.
• Door lock sticking repair: Check for strike plate misalignment. Loosen screws, close door gently, mark new screw locations with a pencil, then reattach. If the latch bolt binds, lightly file the strike plate’s mouth with a metal file—just enough to clear the bevel.
• Door sag adjustment: Tighten hinge screws—if they spin, insert wooden toothpicks dipped in wood glue into the holes, break flush, and re-screw. For severe sag, replace the top hinge with a heavy-duty “self-closing” hinge that includes an adjustable pivot pin.
• Sliding door track cleaning: Vacuum debris, then scrub with a nylon brush and mild detergent. Dry thoroughly. Apply a silicone-based lubricant (not oil—it traps grit). Realign rollers using adjustment screws under the door—lift slightly, tighten, then test glide.
• Rental window draft proofing: Landlords rarely approve permanent modifications. Use removable magnetic seals (e.g., Frost King MagiSeal) or tension-mounted rod systems for double-hung windows. These leave zero residue and install/remove in <90 seconds.
H2: What NOT to Do—Common Mistakes That Backfire
• Over-compressing foam tape: It looks neat when squeezed flat—but loses rebound and creates binding. Leave it slightly proud (1/32"–1/16") for optimal seal and longevity.
• Installing on wet or cold surfaces: Adhesives need >50°F and <80% RH to bond properly. Cold temps reduce tack; moisture causes premature failure.
• Ignoring the threshold: Even perfect perimeter seals fail if cold air rises under the door. A door bottom draft stopper is non-negotiable for exterior doors.
• Using duct tape or caulk as a sealant: These degrade quickly, discolor, and are nearly impossible to remove cleanly. They’re not designed for repeated flexing or thermal cycling.
H2: Performance Benchmarks—What to Expect After Installation
A properly installed weatherstripping system reduces air infiltration by 40–65%, depending on initial condition (RESNET Standard 380, Updated: April 2026). In a typical 1,800 sq ft home with moderate leakage, that translates to:
• $120–$280 annual heating energy savings (EIA Residential Energy Consumption Survey, Updated: April 2026) • 2–5°F improvement in perceived indoor comfort near windows and doors • 30–50% reduction in audible wind noise at the perimeter
Note: Results assume baseline gaps >1/8" and include minor alignment corrections. Homes with severe framing movement or rotted sills will require structural repair first.
H2: Product Comparison Table—Material, Fit, and Real-World Lifespan
| Material | Best For | Max Gap Size | Install Time (per door) | Lifespan (Avg.) | Pros | Cons |
|---|---|---|---|---|---|---|
| Vinyl V-Strip | Double-hung windows, cabinet doors | 3/16" | 12 min | 5–7 years | UV-stable, paintable, low-cost | Poor compression recovery; flattens on heavy doors |
| Silicone Bulb Seal | Exterior entry doors, garage doors | 1/2" | 22 min | 10+ years | High rebound, temperature resilient (-40°F to 250°F) | Higher upfront cost; requires precise cutting |
| Felt/Wool Pile | Sliding glass doors, casement windows | 3/8" | 15 min | 3–5 years | Quiet, low-friction, easy trim | Traps dust/pet hair; degrades in damp areas |
| Adhesive Foam Tape | Interior doors, short-term rentals | 1/4" | 8 min | 6–12 months | Instant install, lowest price | Permanent residue; poor humidity resistance |
| Aluminum Door Sweep | All exterior doors with uneven floors | Adjustable to 3/4" | 25 min | 12+ years | Adjustable, durable, weatherproof | Requires drilling; visible hardware |
H2: Maintenance That Extends Your Investment
Weatherstripping isn’t “install and forget.” Every 6 months:
• Vacuum or brush away dust and hair from pile and bristle seals. • Wipe silicone or vinyl seals with damp cloth + mild soap—never solvents. • Check door sweep bristles: if they splay outward or flatten, flip the strip (most are reversible) or replace. • Inspect hinge pins and lubricate annually—even if no squeak yet. Prevention beats repair.
In coastal or high-humidity climates, rinse exterior seals quarterly with fresh water to remove salt buildup.
H2: When to Call a Pro
DIY works for 85% of homes—but know your limits. Call a licensed door & window technician if:
• Gaps exceed ½" consistently—even after hinge and strike adjustments • You detect rot, insect damage, or significant warping in frames or sills • Windows fog between panes (indicates failed IG unit—not a seal issue) • Doors bind or lift off hinges when closing (structural settling or foundation shift)
These require diagnostic tools, specialized fasteners, and sometimes code-compliant replacements—not just better tape.
H2: Final Thought—It’s Not Just About Heat
A well-sealed home does more than lower your gas bill. It reduces airborne dust and pollen infiltration by up to 35% (ASHRAE 62.2 ventilation standard, Updated: April 2026), cuts HVAC runtime (extending equipment life), and improves acoustic privacy—especially valuable in apartments and townhomes. And for renters? Simple, reversible fixes like magnetic window seals or tension rods deliver real benefits without risking your security deposit.
You don’t need perfection—just consistency. Start with one drafty door. Test, adjust, verify. Then move to the next. Within a weekend, you’ll feel the difference. For a complete setup guide covering alignment tools, torque specs, and seasonal adjustment schedules, visit our / resource hub.