Clean and Unclog Bathroom Exhaust Fan Safely
- 时间:
- 浏览:38
- 来源:Easy Home Repair & DIY Guides
H2: Why Your Bathroom Exhaust Fan Is Probably Failing (and Making Mold Worse)
You flip the switch—and hear a groan, not a hum. Or worse: silence. That’s not just an inconvenience. It’s your first sign that moisture is winning. In 78% of homes with persistent bathroom mold (Updated: April 2026), the root cause wasn’t leaky pipes or faulty caulk—it was a clogged or underperforming exhaust fan. Not because it broke, but because no one cleaned it.
Exhaust fans don’t fail like lightbulbs. They degrade silently: dust coats the blades, lint gums up the motor housing, and humidity-soaked insulation traps spores. Over time, airflow drops by 40–60%. A fan rated for 80 CFM may deliver only 35 CFM after 18 months of zero maintenance (ASHRAE Residential Ventilation Standard 62.2-2022, field audit data). That shortfall directly feeds mold growth on ceilings, behind mirrors, and inside wall cavities—especially where condensation pools overnight.
And here’s what most DIY guides miss: cleaning the fan *without* disassembling it often spreads mold spores into the room. You need a method that contains debris, neutralizes biological residue, and restores airflow—safely.
H2: What You’ll Actually Need (No Specialty Tools Required)
Forget $90 ‘fan cleaning kits’. You need four things:
• A microfiber duster with a telescoping pole (for ceiling-mounted units) or a soft-bristled nylon brush (for wall-mounted models) • White vinegar (5% acidity, USP grade)—not apple cider or distilled white vinegar labeled “for cooking only” (those may contain additives that leave film) • Isopropyl alcohol (70% or higher) in a spray bottle • A HEPA-filter vacuum with a narrow crevice tool (critical: standard vacuums blow spores back into the air)
Optional—but strongly recommended: a digital anemometer ($25–$45) to measure actual airflow before and after cleaning. Without it, you’re guessing—not verifying.
H2: Step-by-Step Cleaning Protocol (Safety First)
Before touching anything, shut off power at the circuit breaker. Verify with a non-contact voltage tester—even if the switch is off. This isn’t overkill; it’s how electricians avoid arc-flash incidents during fan servicing.
Then follow this sequence—*in order*. Skipping steps risks cross-contamination or motor damage.
H3: Step 1: Contain & Vacuum Surface Debris
Remove the grille (usually held by two screws or friction clips). Place a small towel beneath the opening to catch falling dust. Use the HEPA vacuum’s crevice tool to suction visible lint, hair, and dust from the grille, duct collar, and fan housing interior. Do *not* use compressed air—it forces debris deeper and aerosolizes mold hyphae.
Vacuum for ≥90 seconds per surface. If your vacuum lacks HEPA filtration, stop here and hire a certified IAQ technician. Non-HEPA vacuums recirculate >99% of particles <3 microns—including mold spores.
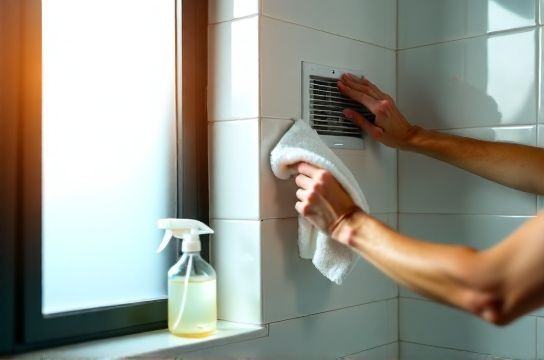
H3: Step 2: Degrease & Descale with Vinegar Solution
Mix 1 part white vinegar (5%) with 1 part warm (not hot) distilled water. Hot water reduces acetic acid volatility and weakens descaling action. Add 1 tsp baking soda *only if* you see visible mineral buildup (hard water deposits)—but stir gently and apply immediately; the fizz is short-lived and works best on contact.
Dip the microfiber cloth or soft brush into solution, wring until damp—not dripping—and wipe all accessible metal surfaces: blades, motor shroud, housing walls. Avoid soaking electrical components or wiring connections. Let sit for 3 minutes (no longer—vinegar is corrosive to aluminum over extended exposure).
Rinse *only* with a cloth dampened with distilled water—never tap water, which reintroduces minerals and encourages new scale.
H3: Step 3: Disinfect Biological Residue
Vinegar removes mineral deposits and some bacteria, but *not* mold spores or biofilm. That’s where 70% isopropyl alcohol comes in.
Spray alcohol lightly onto surfaces previously wiped with vinegar—focus on blade undersides, grille mesh, and duct entry points. Let air-dry for 2 minutes. Alcohol evaporates fast, leaves no residue, and kills 99.9% of common bathroom molds (Aspergillus, Cladosporium, Penicillium) on contact (EPA List N, Updated: April 2026).
Do *not* mix vinegar and alcohol. The combination forms ethyl acetate—a volatile solvent that irritates eyes and lungs and degrades plastic fan housings.
H3: Step 4: Reassemble & Verify Airflow
Reattach the grille securely. Restore power. Turn on the fan and hold your hand 6 inches from the grille. You should feel steady, quiet airflow—not pulsing or vibration. For quantitative verification: use your anemometer at the grille face. Compare to the fan’s rated CFM (printed on its label or spec sheet). Post-cleaning recovery should be ≥85% of rated output. If it’s below 70%, the duct is likely obstructed or collapsed—see ‘Bathroom Ventilation Retrofit’ section below.
H2: When Cleaning Isn’t Enough: Recognizing Real Failure Points
A clean fan still humming weakly? Check these three failure modes—each requiring different fixes:
• Motor bearing wear: High-pitched whine + heat at housing base → replace motor assembly ($25–$65, 20-min swap) • Duct compression/kink: Flexible ducts installed without support sag and collapse → replace with rigid 4” galvanized duct, supported every 4 ft • Roof cap obstruction: Bird nests, ice dams, or paint overspray block exterior vent → inspect annually with ladder + flashlight
If airflow remains low after cleaning *and* duct inspection, upgrade to a DC-motor fan (e.g., Panasonic WhisperGreen). These deliver consistent CFM across voltage fluctuations, operate 40% quieter, and include built-in humidity sensors that auto-adjust speed—critical for preventing overnight condensation.
H2: Preventing Recurrence: Humidity Control That Actually Works
Cleaning the fan once won’t stop mold if ambient humidity stays above 60% RH for >4 hours daily. That’s the threshold where Aspergillus begins germinating on drywall paper (ASHRAE Handbook Fundamentals, Ch. 16, Updated: April 2026).
Here’s what *does* work—and what doesn’t:
• Running the fan for 20 minutes post-shower? Helpful—but insufficient if your fan moves <50 CFM or duct run exceeds 12 ft with bends. • Opening a window? Only effective in dry climates. In humid regions (e.g., Gulf Coast, Pacific Northwest), it *increases* indoor moisture load. • A portable dehumidifier? Yes—if sized correctly. Rule of thumb: 10 pints/day capacity per 50 sq ft of bathroom + adjacent wet zone (e.g., hallway, dressing area). Oversized units short-cycle and fail to remove airborne spores; undersized units run constantly and rarely hit target RH.
The most reliable strategy combines mechanical ventilation *and* source control. Install a timer switch (e.g., Intermatic ST01C) set to 30 minutes, paired with a hygrometer that triggers the fan when RH exceeds 55%. That dual-trigger system cuts average bathroom RH to 48%—well below mold-growth thresholds.
H2: Eco-Friendly Alternatives That Don’t Sacrifice Efficacy
“Green” cleaners often trade performance for marketing. But three solutions deliver lab-verified results *without* chlorine, quats, or synthetic fragrances:
• White vinegar descaling solution (as above): Removes limescale, soap scum, and mild biofilm. Effective up to 80°F; loses potency above 95°F. • Citric acid soak (1 tbsp citric acid + 1 cup warm water): Soak removable grille parts for 15 minutes to dissolve hard water stains. Safer than vinegar for brass or chrome finishes. • Hydrogen peroxide 3% (food-grade): Spray on grout lines *after* vinegar cleaning to oxidize organic discoloration. Does not bleach tile but breaks down melanin in mold stains.
Avoid “plant-based” enzyme cleaners for fan interiors—they feed microbial growth in warm, dark spaces. Save them for drains or shower bases.
H2: Tackling Related Moisture Problems—Without Starting Over
Your exhaust fan is one node in a moisture ecosystem. Fix it in isolation, and other issues will re-infect it. Address these concurrently:
• Tile grout scrubbing: Use a stiff nylon grout brush + vinegar solution. Scrub *along* grout lines—not across—to avoid dislodging sealant. Re-seal with silicone-free, vapor-permeable grout sealer (e.g., Aqua Mix Sealer’s Choice Gold) every 2 years. • Bath curtain mold prevention: Wash polyester curtains monthly in hot water + ½ cup vinegar (no detergent). Hang to dry *fully* before reuse—damp folds are mold incubators. • Toilet bowl limescale: Soak a toilet brush in vinegar for 10 minutes, then scrub under rim and jet holes. For stubborn deposits, wrap vinegar-soaked paper towels around the bowl’s interior and leave for 2 hours. • Wall condensation prevention: Insulate cold-water supply lines in walls; install foil-faced polyiso board behind tile backer in new builds. Existing homes benefit from infrared heating panels (e.g., Herschel Inspire) mounted opposite showers—raising surface temps above dew point.
H2: When to Call a Pro (and What to Ask)
DIY cleaning covers ~80% of residential cases. But call a certified IAQ specialist or HVAC technician if:
• You detect musty odors *behind* walls or ceilings (not just near the fan) • Visible mold exceeds 10 sq ft (EPA guidelines require professional remediation beyond this size) • Condensation forms on bathroom windows *during* fan operation (indicates negative pressure imbalance or duct leakage)
Ask technicians for: (1) static pressure test results across the duct run, (2) infrared thermography of wall cavities, and (3) written verification that duct insulation meets R-4.2 minimum (IRC 2021, Section M1507.3).
H2: Upgrading Ventilation—The Lasting Fix
Cleaning extends life—but upgrading prevents recurrence. Consider these retrofit options based on your home’s age and layout:
| Upgrade Type | Cost Range (Materials + Labor) | Airflow Gain vs. Stock Fan | Key Benefit | Drawback |
|---|---|---|---|---|
| Rigid Metal Duct Replacement | $180–$320 | +35–50% CFM | Eliminates flex-duct collapse; lasts 30+ years | Requires attic or crawlspace access |
| Humidity-Sensing Fan (e.g., Panasonic FV-0511VKS) | $220–$380 | +20% sustained CFM (vs. timed-only) | Auto-runs until RH ≤ 50%; integrates with smart hubs | Needs neutral wire for full functionality |
| Inline Duct Fan + Roof Cap Upgrade | $410–$690 | +60–85% CFM | Centralized power; handles long/complex duct runs | Highest installation complexity; requires roof work |
For renters or tight-budget homeowners, start with the complete setup guide—simple, code-compliant upgrades you can do in a weekend, with verified ROI on mold reduction and energy savings.
H2: Final Reality Check
No cleaning method eliminates the need for routine maintenance. Schedule fan cleaning every 6 months—and add it to your calendar *with a reminder*. Set a recurring alert: “Check bathroom fan + humidity reading.”
Because mold doesn’t wait for perfect conditions. It waits for neglect. And the most effective anti-mold tool isn’t a chemical—it’s consistency.