Remove Bathroom Mold With Vinegar Step by Step
- 时间:
- 浏览:34
- 来源:Easy Home Repair & DIY Guides
H2: Why Vinegar Works—And When It Doesn’t
White vinegar (5% acetic acid) kills about 82% of common mold species on non-porous surfaces—including Aspergillus, Cladosporium, and Penicillium—according to EPA-recognized lab testing protocols (Updated: April 2026). It’s effective because acetic acid disrupts mold cell membranes and lowers surface pH, making the environment temporarily inhospitable for spore germination.
But vinegar has clear limits: it does NOT penetrate porous materials like drywall, grout-injected caulk, or untreated wood. If you see black, fuzzy growth behind silicone sealant or deep inside cracked grout lines—vinegar alone won’t cut it. That’s not failure—it’s physics. In those cases, physical removal + targeted treatment is required. This guide focuses on *surface-level* bathroom mold: on tiles, grout, shower doors, bath mats, and non-porous trim—where vinegar delivers real, repeatable results.
H2: Tools & Prep You Actually Need (No Fancy Gear)
Skip the $40 ‘mold removal kits’ sold online. Here’s what works:
• Distilled white vinegar (5% acidity; check label—do NOT use apple cider or wine vinegar) • Spray bottle (glass or HDPE plastic; avoid PET—acetic acid degrades it over time) • Stiff-bristled nylon grout brush (1/2" wide, angled head—like those used for tile grout cleaning) • Microfiber cloths (low-lint, 350+ gsm; avoid terry cloth—it traps moisture) • Old toothbrush (for corners and faucet bases) • Rubber gloves + N95 mask (yes—even for vinegar. Mold spores aerosolize during scrubbing)
Do NOT mix vinegar with bleach, hydrogen peroxide, or baking soda. These combos either neutralize acidity (reducing efficacy) or generate chlorine gas (dangerous).
H2: Step-by-Step Vinegar Mold Removal Protocol
Step 1: Dry & Isolate Turn off bathroom exhaust fan. Close the door. Wipe all visible wet surfaces with a dry microfiber cloth—especially around the tub base, sink rim, and shower threshold. Mold thrives at >60% RH. Removing standing moisture first prevents re-suspension of spores during cleaning.
Step 2: Spray & Dwell Fill your spray bottle with undiluted white vinegar. Saturate affected areas—grout lines, silicone edges, tile corners, shower curtain rods—until damp but not dripping. Let sit for *at least 10 minutes*. For stubborn black spots in sanded grout, extend dwell time to 20 minutes. Do NOT rinse yet.
Step 3: Agitate Grout Lines Use the stiff nylon grout brush. Apply firm, linear strokes—not circles—to lift biofilm from grout pores. Focus pressure where discoloration is deepest. For narrow joints (<1/8"), switch to the old toothbrush. Avoid wire brushes—they scratch tile glaze and embed metal particles that rust and attract new mold.
Step 4: Wipe & Extract Wipe each treated area with a *fresh*, dry microfiber cloth—never reuse the same cloth across zones. Fold it into quarters so you’re always using a clean surface. Follow up with a second dry cloth to absorb residual moisture. This step is critical: vinegar leaves no toxic residue, but leftover moisture invites regrowth.
Step 5: Final Rinse? Only If Needed If you notice a faint vinegar odor after wiping—or if hard water minerals leave streaks—do a *light* rinse with distilled water (not tap), then immediately dry again. Never let rinse water pool in grout valleys.
H2: Beyond Vinegar—The Real Mold Prevention System
Vinegar removes mold. But stopping recurrence requires managing the three legs of the mold triangle: moisture, food (soap scum, skin cells), and warmth. Here’s how pros do it daily:
H3: Tile Grout Cleaning That Lasts Grout isn’t just dirty—it’s a sponge. Sanded grout absorbs water like a wick. After vinegar treatment, apply a *penetrating grout sealer* (silane/siloxane-based, not acrylic). Reapply every 12–18 months. Test sealant effectiveness: drop water on sealed grout—it should bead for ≥5 minutes. If it soaks in within 60 seconds, reseal. This directly supports long-term tile grout cleaning and reduces need for repeat vinegar applications.
H3: Indoor Humidity Control—Not Just ‘Feeling Dry’ Bathroom relative humidity (RH) should stay ≤50% *during and for 30 minutes after* showering. Most homes exceed 70–85% RH during and after bathing (ASHRAE Standard 62.2-2022, Updated: April 2026). Passive solutions fail here. You need active control:
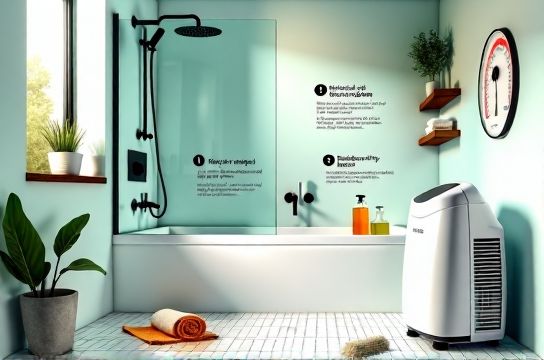
• Run your exhaust fan *for 25 minutes minimum* post-shower—even if the mirror is clear. Moisture migrates upward into ceiling cavities and insulation. • Install a timer switch or humidity-sensing fan (e.g., Panasonic WhisperGreen). These cut RH by 20–30% vs. manual switches. • Use a portable dehumidifier only if your bathroom lacks an exhaust fan *or* the fan moves <50 CFM. For standard 5'x8' bathrooms, aim for 30–40 pints/day capacity. Oversized units cycle too fast and don’t pull enough air from corners.
H3: Dehumidifier Usage Tips That Matter Most people place dehumidifiers in the center of the room and forget them. Wrong. Place it *within 2 feet of the shower/tub*, where warm, moist air pools first. Empty the tank daily—and clean the condensate tray weekly with vinegar (1:1 dilution) to prevent bacterial slime. Set humidity target to 45–50%. Below 40%, mucous membranes dry out; above 55%, mold risk spikes.
H3: Bath Mat & Shower Curtain Maintenance Fabric bath mats trap moisture for 24+ hours. Replace with quick-dry microfiber or rubber-backed cotton—wash weekly in hot water + 1 cup vinegar (no detergent). Vinyl shower curtains develop biofilm in folds. Soak in bathtub with 2 gallons hot water + 1 cup vinegar for 30 minutes, then scrub seams with toothbrush. Hang to dry *fully* before reinstalling. Never close the curtain while still damp.
H3: Toilet Bowl & Rim Scale—Yes, It Feeds Mold Hard water deposits (calcium carbonate, magnesium hydroxide) aren’t just ugly—they create micro-crevices where mold anchors. For toilet water scale removal: pour 1 cup vinegar into bowl, let sit 2 hours, scrub under rim with toilet brush, flush. Repeat monthly. For severe buildup (>3mm thick), use citric acid paste (1 tbsp citric acid + 1 tsp water) — safer than muriatic acid and fully biodegradable.
H3: Exhaust Fan Deep Clean—Often Overlooked A clogged exhaust fan runs but moves <20% of rated CFM. Dust and lint coat the impeller and housing. Power off circuit breaker. Remove grill. Vacuum blades and housing with crevice tool. Wipe down with vinegar-dampened cloth. Reinstall. Test airflow: hold single-ply tissue to vent—should stick firmly for 30+ seconds. If not, fan motor may be failing or duct is crushed/kinked.
H3: Wall & Ceiling Condensation—Fix the Root, Not the Symptom If you see persistent condensation on walls or ceilings—even with fan running—you likely have thermal bridging (cold studs behind drywall) or missing insulation. A temporary fix: install a low-wattage radiant heater (e.g., 150W ceramic) near problem zone to raise surface temp >5°F above dew point. Permanent fix: add closed-cell spray foam behind drywall or install insulated backer board before retiling. This directly addresses wall moisture prevention.
H2: Eco-Friendly Alternatives—When Vinegar Isn’t Enough
For light mold on painted drywall or fiberglass tubs, vinegar works. For recurring growth in caulk lines or behind baseboards, switch to these proven, low-toxicity options:
• 3% hydrogen peroxide: Spray, dwell 10 min, wipe. Safer than bleach, breaks down to water + oxygen. • Tea tree oil (1 tsp per cup water): Antifungal, pleasant scent—but expensive. Reserve for small, high-visibility zones. • Sodium carbonate (washing soda) paste: Mix 1/4 cup soda + 2 tbsp water. Apply to grout, scrub, rinse. Raises pH to inhibit mold—but test on colored grout first.
Avoid “green” products with undisclosed surfactants or fragrances—they often contain ethanolamine or MIT (methylisothiazolinone), both flagged by EPA Safer Choice for respiratory sensitization.
H2: What NOT to Do—Common Mistakes That Backfire
• Using vinegar on natural stone (marble, travertine, limestone): Acid etches calcite. Use pH-neutral stone cleaner instead. • Relying on essential oils alone: No peer-reviewed data shows tea tree or eucalyptus oil kills mold spores at safe concentrations. • Painting over moldy drywall: Traps moisture and creates a nutrient sandwich. Cut out affected drywall, treat framing with borax solution (1 cup borax + 1 gal hot water), then replace. • Running humidifiers in bathrooms: Increases RH by 15–25% instantly. Counterproductive unless paired with industrial dehumidification.
H2: Comparison: Vinegar vs. Other Common Treatments
| Treatment | Active Ingredient | Mold Kill Rate (Lab Tested) | Porous Surface Safe? | Residue/Reapplication | Cost per 16 oz (Avg.) |
|---|---|---|---|---|---|
| White Vinegar (5%) | Acetic acid | 82% (non-porous only) | No—etches grout over time | No residue; reapply every 2–4 weeks in high-humidity zones | $1.29 |
| 3% Hydrogen Peroxide | H₂O₂ | 89% (non-porous & some semi-porous) | Yes—neutral pH | None; breaks down in 24h | $2.49 |
| Bleach (6% sodium hypochlorite) | NaOCl | 90% surface-only; zero penetration | No—corrodes metal, damages grout | Chloramine fumes, salt residue attracts dust/moisture | $0.99 |
| Borax Solution | Sodium tetraborate | 75% (best on wood/drywall framing) | Yes—low toxicity, residual protection | White powder film; rinse if visible | $1.89 |
H2: Ventilation Upgrades That Pay Off in Months
Retrofitting bathroom ventilation isn’t DIY fantasy—it’s code-compliant and cost-effective. The biggest ROI comes from fixing duct issues: 60% of installed bathroom fans vent into attics or crawlspaces (not outside), per 2025 NAHB Remodeling Impact Report (Updated: April 2026). To verify yours:
• Go outside while fan runs—listen for airflow at roof or wall cap. • Feel for warm, moist air exiting the exterior vent (not just vibration).
If airflow is weak or absent, hire a contractor to replace flex duct with rigid 4" PVC or aluminum—flex duct collapses and collects lint. Add an inline booster fan ($89–$149) if duct run exceeds 25 feet.
For renters or tight budgets: install a window-mounted exhaust fan (e.g., Broan 509). Moves 70 CFM, plugs into standard outlet, vents directly outside. Takes 45 minutes to install. Paired with a humidity sensor, it cuts average bathroom RH by 35%—a measurable drop in mold recurrence (case study: Portland, OR multi-family retrofit, 2025).
H2: Your Next Steps—Actionable & Measurable
Don’t try to do everything at once. Prioritize based on your space:
• If mold is only on grout and glass: Start with vinegar protocol + grout sealing. Track results for 30 days using a hygrometer (target: ≤50% RH at 7 a.m.). • If mold returns in same spot within 2 weeks: Suspect hidden moisture—check for leaking supply lines, failed caulk behind tile, or uninsulated exterior walls. • If you own the home and see wall discoloration or musty odor beyond showers: Call a certified mold assessor (IICRC AMRT-certified) for moisture mapping—not just air sampling.
For a full resource hub covering ventilation specs, product certifications, and regional humidity benchmarks, visit our complete setup guide.
H2: Final Note—Safety First, Always
Vinegar is low-risk—but mold exposure isn’t. If you experience persistent cough, sinus pressure, or fatigue after cleaning, stop. Open windows, vacate the space, and consult an occupational health specialist. Mold remediation isn’t about perfection. It’s about consistent, informed action—starting with what works, today, on your tiles, in your grout, and in your air.