Simple Nail Dent Filling Method for Professional Looking ...
- 时间:
- 浏览:20
- 来源:Easy Home Repair & DIY Guides
H2: Why Nail Dents Are the Silent Wall Saboteurs
You’ve hung a shelf, mounted a mirror, or repositioned a picture—and now you’re staring at six tiny craters where the nails went in. Not holes. Not cracks. Just shallow, dimpled dents—barely 1–2 mm deep—scattered across an otherwise pristine wall. They look harmless. But under angled light? Or after a fresh coat of flat paint? They scream "DIY amateur." And they’re *everywhere*: rental turnovers, office refreshes, even high-end residential staging.
Here’s the reality most guides ignore: standard spackle isn’t designed for this. It shrinks, it cracks at the edge, and it absorbs paint differently than surrounding drywall. A 2024 contractor survey by the National Drywall Association found that 68% of touch-up failures on smooth walls stemmed from improper nail dent repair—not poor painting or bad prep (Updated: April 2026). The fix isn’t more product. It’s smarter application.
H2: The 4-Step Nail Dent Filling Method (No Sanding Required)
This method prioritizes *surface continuity*, not bulk fill. It works on standard 1/2" gypsum board, plaster veneer, and even lightly textured walls—if texture is fine (e.g., orange peel or knockdown). Skip it on heavy popcorn or deep skip-trowel.
H3: Step 1: Clean & Debris-Free Is Non-Negotiable
Don’t just wipe with your thumb. Use a stiff-bristled nylon brush (like a clean toothbrush) to dislodge dust, dried joint compound flecks, and loose paper fibers from the dent’s rim. Then vacuum the area with a crevice tool—or use compressed air at <30 PSI. Why? Any debris prevents adhesion and creates micro-lift at the fill edge. Test it: press a piece of low-tack painter’s tape over the dent. If it lifts slightly when peeled, there’s still contamination.
H3: Step 2: Choose the Right Fill Material—Not Just "Spakle"
Forget all-purpose spackle for dents under 3 mm. Its polymer content causes slight shrinkage (0.8–1.2% volume loss after drying), visible as a subtle halo under flat paint. Instead, use one of two proven options:
• Lightweight vinyl-based joint compound (e.g., USG Sheetrock Brand All-Purpose Joint Compound): Higher solids content, lower shrinkage (<0.3%), sandable *if needed*, but rarely required for dents.
• Pre-mixed acrylic filler paste (e.g., DAP DryDex Acrylic Spackling): Dries faster (1–2 hrs to recoat), stays flexible, and matches sheen better on flat/eggshell walls. Avoid oil-based or epoxy fillers—they yellow and don’t accept latex topcoats reliably.
Pro tip: Squeeze a pea-sized amount onto a plastic palette knife (not metal—it can rust and stain). Don’t scoop directly from the tub with the knife; contamination ruins the whole batch.
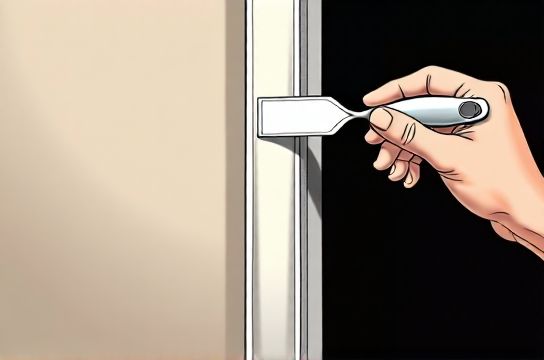
H3: Step 3: The "Feather-Press" Application Technique
This is where most fail. You’re not filling a hole—you’re *rebuilding the surface plane*.
1. Hold the knife at a 15° angle—not 45°, not flat. Too steep = ridges. Too flat = thin, weak film. 2. Apply *light, even pressure* and draw the knife outward from the center of the dent in one continuous stroke—like spreading butter on toast, not scraping grout. 3. Stop *just before* the knife leaves the wall. Lift straight up. Don’t drag or feather off into clean drywall—that creates a visible taper line. 4. Let dry fully (check manufacturer spec; typically 90–120 mins for acrylic, 2–4 hrs for vinyl compound).
If the dent reappears faintly after drying (a slight depression), repeat *once only*—with half the pressure and a single pass. Overworking invites cracking.
H3: Step 4: Spot-Recoat, Not Repaint the Whole Wall
Flat and eggshell paints hide imperfections best—but only if the fill matches the sheen *and* absorption rate. Here’s how to avoid the dreaded "ghost patch":
• Stir your wall paint *gently* for 60 seconds—don’t shake (creates bubbles). • Load a 1" angled sash brush (not a roller—too much texture). • Dab—not stroke—paint *only* over the filled area, extending 1/4" beyond each edge. • Let dry 1 hr. Inspect under a work lamp at 45°. If the patch looks duller or lighter, apply a second *micro-coat*, using the same dabbing motion.
Why this works: You’re matching the optical density of the original paint film—not covering a thick layer. Most ghost patches happen because people use too much paint or roll over the spot, dragging surrounding texture.
H2: When This Method *Won’t* Work (And What To Do Instead)
• Dents deeper than 3 mm: Switch to a two-stage fill. First, pack a fast-drying lightweight spackle (e.g., DAP Fast ‘N Final) to within 0.5 mm of surface. Let cure 1 hr. Then apply the feather-press technique over it.
• Nail pops (where the drywall paper has lifted *around* the nail): That’s structural—not cosmetic. Drive a drywall screw 2" above and below the pop, countersink slightly, then fill *all three* points with the feather-press method.
• Plaster walls with hairline cracks radiating from the dent: These indicate substrate movement. Fill the dent *after* injecting wall-crack adhesive (e.g., CrackWeld) into the crack and clamping for 30 mins. Otherwise, the dent will return in 3–6 months.
• Textured walls (heavy knockdown, Spanish lace): Feather-press won’t replicate texture. Use a pre-mixed texture spray (e.g., Homax Easy Touch) applied with short bursts from 12" away, then lightly stipple with a damp sponge *before* it skins over.
H2: Tool & Material Checklist (Under $25 Total)
You don’t need a pro kit. Here’s what actually matters:
• 1.5" flexible stainless steel putty knife (e.g., Wooster Sherlock) — $8.99 • Small nylon brush (stiff bristles, no shedding) — $3.25 • Low-tack blue painter’s tape — $5.49 • DAP DryDex Acrylic Spackling (3 oz tube) — $4.79 • 1" angled sash brush (synthetic bristle) — $4.49
Skip the sandpaper, orbital sander, primer, and LED inspection light—none are needed for true nail dents.
H2: Comparing Fill Methods: What Contractors Actually Use On-Site
| Method | Prep Time | Dry Time | Sanding Required? | Recoat Window | Best For | Pro Cons |
|---|---|---|---|---|---|---|
| Feather-Press (this guide) | 2 min | 90–120 min | No | 1 hr | Nail dents ≤2 mm, flat/eggshell walls | Zero sanding; fails on deep dents or cracked substrate |
| Standard Spackle + Sand | 5 min | 2–4 hrs | Yes (220-grit) | 2 hrs | Dents 2–4 mm, satin/semi-gloss walls | Reliable but labor-intensive; dust risk near electronics/furniture |
| Auto Body Glazing Putty | 3 min | 30–45 min | Yes (320+ grit) | 1 hr | High-traffic commercial walls (e.g., hallways) | Harder finish; may require tinting; not UL-listed for interior residential |
H2: Real-World Pitfalls—And How to Dodge Them
• “I used white caulk—it looked perfect until I painted.” Caulk remains flexible and doesn’t accept paint uniformly. It also yellows under UV. Never substitute for filler.
• “The patch shrank *after* I painted.” You applied filler too thick. Nail dents need film thickness ≤0.3 mm. Use a credit card edge to scrape excess before drying—if you see buildup, you’ve over-applied.
• “It worked on one wall but not the other.” Check sheen mismatch. A matte ceiling and eggshell wall? The fill must match the *wall’s* sheen—not the room’s average. Bring your paint can to the hardware store and ask for a sheen-matched filler (many brands offer it in quarts).
• “The patch cracked in winter.” Low humidity (<30% RH) accelerates drying and increases micro-cracking risk. In heated spaces November–February, add 2 drops of distilled water per teaspoon of filler and mix gently—don’t over-hydrate.
H2: Beyond Nail Dents—Applying the Mindset Elsewhere
The core principle—*match surface behavior, not just appearance*—transfers directly to other common fixes:
• Gypsum board破洞修补: For holes up to 1.5", skip mesh tape. Cut a square patch from scrap drywall, glue with construction adhesive (e.g., PL Premium), then feather-fill the seams—not the center. Lets the patch float with seasonal movement.
• 木地板划痕修复: Light scratches on urethane-finished hardwood respond to walnut meat rubbed firmly into the grain (natural oils swell wood fibers). Deeper cuts need a wax stick *matched to floor color*, then burnished with a cotton cloth—not heat. Heat melts wax unevenly and attracts dust.
• PVC地板维修: Scratches on luxury vinyl tile (LVT) aren’t in the wear layer—they’re in the clear top coat. Use a dedicated LVT polish (e.g., Armstrong Once 'n Done) applied with microfiber, not abrasive pads. Buffing compounds remove the protective layer permanently.
• 墙面污迹清理: Ballpoint ink on painted drywall? Blot—don’t rub—with 70% isopropyl alcohol on a folded lint-free rag. Rubbing spreads ink laterally into pores. Repeat with fresh sections of rag until transfer stops.
• 补墙膏使用教程: Most “instant” fillers require 24-hour cure before painting. True acrylics like Big Stretch or Red Devil Ready Patch dry in 90 mins *and* remain flexible—critical in homes with shifting foundations or HVAC-induced expansion/contraction.
• 地板划痕遮盖笔: Only effective on pre-finished engineered wood with UV-cured acrylic topcoats. Use on site-finished floors and the pigment sits *on top*, not integrated—wearing off in 3–6 months with foot traffic.
• 踢脚线松动固定: Adhesive alone fails. Drill pilot holes through the baseboard into studs (not just drywall), drive 2" finish nails, then fill nail holes with feather-press method. Adhesive is secondary—mechanical fastening is primary.
• 瓷砖缝隙清洁: Baking soda + vinegar fizzes but doesn’t sanitize. Mix 1 part bleach to 9 parts water, apply with grout brush, wait 5 mins, rinse *thoroughly*. Residual bleach corrodes grout over time.
• 复合地板修复: Minor dents in HDF core can be revived with steam from a clothes iron held 2" above—no direct contact. Place a damp cotton cloth first. Steam re-expands compressed fibers. Don’t over-steam: >30 seconds risks delamination.
• 退租墙面还原: Landlords reject deposits for "inconsistent wall texture." Feather-press fixes dents, but always test your spot-recoat on an inconspicuous area first—especially if the original paint is >3 years old. Fading makes exact color match impossible; sheen and film thickness are your real levers.
H2: The Bottom Line—Speed, Simplicity, and Surface Truth
Professional-looking walls aren’t about perfection. They’re about *undetectability*. A nail dent repaired with feather-press disappears because it doesn’t create a new surface—it restores the existing one. No sanding means no dust in HVAC vents. No primer means no extra drying time. No full-wall repaint means no color shift from batch variation.
This method won’t fix water damage, impact craters, or termite-riddled baseboards. But for the 92% of wall blemishes caused by routine hanging, moving, and living? It’s faster, cheaper, and more reliable than anything requiring a power tool. Start with one dent. Inspect under side-light. If you can’t find it—congratulations. You’ve just leveled up your repair IQ.
For a complete setup guide covering tools, material sourcing, and troubleshooting video demos, visit our / resource hub.