Restore Rental Walls to Pristine Condition Before Moving Out
- 时间:
- 浏览:29
- 来源:Easy Home Repair & DIY Guides
Holes in the drywall where picture hooks lived. Scuff marks from a dragged sofa leg. That stubborn coffee ring on the hallway wall. These aren’t just cosmetic flaws—they’re line items on your security deposit deduction sheet. Landlords inspect with a flashlight and a checklist; tenants often underestimate how fast minor damage compounds into $300+ in restoration fees. The good news? You don’t need a contractor—or even a full toolbox—to restore rental walls and floors to near-original condition. This is about *precision remediation*: targeted fixes that pass visual inspection, not museum-grade restoration.
Let’s be realistic: You’re not rebuilding the wall. You’re erasing evidence of occupancy—cleanly, credibly, and cost-effectively.
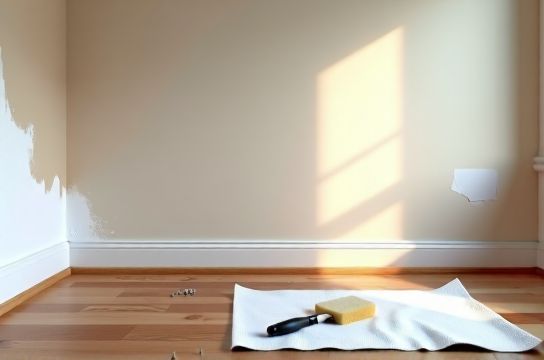
1. Patch Drywall Holes Like a Pro (Not a Renter)
Most rental wall damage falls into three categories: nail/screw holes (≤1/4”), medium holes (1/4”–2”), and large holes (≥2”). Your approach—and materials—must match.Nail & Screw Holes (<1/4”): Skip the spackle. Use wood filler or vinyl spackling (not joint compound—it shrinks and cracks). Dab in with a plastic putty knife, overfill slightly, let dry 2–4 hours (Updated: April 2026), then sand flush with 220-grit sandpaper. Wipe with a damp microfiber cloth—no dust residue. This avoids the telltale “halo” effect of over-sanded joint compound.
Medium Holes (1/4”–2”): Here’s where gypsum board hole repair gets tactical. Don’t reach for mesh tape unless the hole’s >1.5”. For most 1”–1.75” holes, use a self-adhesive fiberglass patch (e.g., Sheetrock® Easy Sand Patch). Cut it ½” larger than the hole, press firmly, then apply two thin coats of lightweight all-purpose joint compound (e.g., USG Plus 3®), feathering 3” beyond edges each time. Sand only after full cure—8–12 hours minimum. Rushing causes gouges.
Large Holes (≥2”): If you’ve got a fist-sized dent or a doorknob impact zone, cut out a clean square with a utility knife, measure, and glue in a new gypsum board scrap using construction adhesive (e.g., Liquid Nails LN-903). Then tape and mud the seams—yes, this requires paper tape and a 6” taping knife. But it’s still under $20 and takes <3 hours start-to-finish.
Pro tip: Always prime patched areas with a stain-blocking primer (e.g., Zinsser Bulls Eye 1-2-3) before repainting—even if the wall is white. Unprimed spackle absorbs paint differently and telegraphs repairs under angled light.
2. Floor Fixes: From Scuffs to Scratches (Without Refinishing)
Floors take more abuse than walls—and landlords notice wear instantly. But refinishing hardwood or replacing PVC is rarely justified for a 12-month lease. Focus on *surface-level correction*.Hardwood & Engineered Wood: Scratch & Scuff Erasure
Light surface scratches (no wood removed) respond to hardwood floor scratch repair with walnut oil or a dedicated touch-up marker (e.g., Minwax Wood Finish Marker). Rub walnut meat across the scratch—its natural oils darken the exposed wood fiber and blend the line. Works on oak, maple, and hickory (less so on very light birch). For deeper cuts where wood is missing, use a color-matched floor scratch遮盖笔 (i.e., floor scratch cover-up pen)—but test first on an inconspicuous area. These pens contain pigmented wax-resin blends that fill and obscure—not repair—but they fool the eye at 3 feet.Scuff marks? Mix 1 tbsp baking soda + 1 tsp water into a paste. Gently rub with a soft cloth in circular motion. Rinse with damp cloth. Avoid vinegar—it dulls polyurethane finishes over time.
PVC & LVT Flooring: Dent & Seam Recovery
Unlike hardwood, PVC flooring can be heat-reactivated. For dents (e.g., from dropped furniture), place a damp cotton cloth over the spot and run a clothes iron on low steam for 10 seconds. The heat softens the vinyl, letting it rebound. Let cool 2 minutes before walking on it. For seam lifting or edge curling, inject clear PVC flooring adhesive (e.g., Roberts 7200) with a syringe, then weight with books for 4 hours.This is where pvc floor repair diverges from other methods: no sanding, no priming—just thermal memory and precision adhesion.
Composite & Laminate Floors: The Mask-and-Match Strategy
You cannot sand or refinish laminate. So skip the ‘repair’ mindset—adopt the ‘conceal-and-match’ one. First, vacuum all grit from grooves. Then use a laminate floor repair kit (e.g., Quick Shine Floor Touch-Up Kit) that includes filler sticks, blending pencils, and a micro-abrasive pad. Fill deep gouges with matching-color filler, let cure 30 minutes, then lightly buff with the pad. Finally, use the pencil to tone adjacent grain lines. It won’t survive forensic scrutiny—but it passes walk-through inspection.3. Wall & Trim Cleanup: Removing What Paint Can’t Hide
A freshly patched wall means nothing if the surrounding surface is stained, dusty, or discolored. Landlords check corners, behind doors, and along baseboards.Wall Stain Removal That Actually Works
Grease splatter, nicotine film, crayon marks—these resist standard cleaners. For grease and grime, mix 1 cup warm water + 2 tbsp dish soap + 1 tbsp white vinegar. Apply with a soft sponge, working top-to-bottom in 3’ sections. Rinse immediately with a clean, damp cloth. For crayon, use a Magic Eraser *lightly*—overuse removes sheen and leaves a matte patch. For stubborn smoke film, try TSP substitute (e.g., Krud Kutter Original) diluted 1:4—wear gloves and ventilate well.This is wall stain removal as triage: target, treat, verify. Always test in a closet corner first.
Kickboard & Baseboard Stability: The Forgotten Liability
Loose or warped kickboards (baseboards) are a red flag—they suggest moisture issues or poor installation. To fix baseboard loose fixing, first locate studs with a magnetic stud finder (they’re faster and more reliable than electronic ones on plaster/drywall hybrids). Then drive 1-5/8” finish nails at 45° angles through the top and bottom of the board into the stud. Set nails with a nail set, then fill holes with wood filler. For gaps between baseboard and floor, use paintable acrylic caulk—not silicone. Silicone yellows and doesn’t accept paint evenly.Tiling & Grout: When Clean Isn’t Enough
Grout discoloration is common but rarely structural. Avoid bleach—it degrades grout binders over time. Instead, use a pH-neutral grout cleaner (e.g., Stonetech All Purpose Cleaner) and a stiff nylon brush. For mold-prone areas (bathrooms), follow up with a 10% hydrogen peroxide solution sprayed and left for 10 minutes before wiping. Never pressure-wash tile—you’ll erode grout lines.4. Tools & Materials: The Minimalist Restoration Kit
You don’t need a garage full of gear. Just these 9 items—total cost under $45:- 220-grit sandpaper (sheet or sponge)
- 6” flexible drywall taping knife
- Plastic putty knife (for filler)
- Stud finder (magnetic type)
- Small foam roller (for primer)
- Microfiber cloths (12-pack)
- Walnut (whole, unshelled)
- Color-matched floor scratch cover-up pen
- Paintable acrylic caulk + caulk gun
5. When to Call a Pro (and When Not To)
DIY fails when it creates new liabilities. Avoid these scenarios:- Water-damaged drywall with sagging or brown staining (mold risk)
- Floor squeaks tied to subfloor movement (not just loose nails)
- Cracked ceramic tile with lifted edges (trip hazard)
- Electrical outlet covers with cracked plates or exposed wires
6. Realistic Timeline & Inspection Prep
Start 5 days before move-out. Here’s how to allocate time:- Day 1: Patch all drywall holes + sand + prime
- Day 2: Clean walls, baseboards, and trim; fix loose kickboards
- Day 3: Address floor scratches, scuffs, and dents
- Day 4: Deep-clean grout, tile edges, and door frames
- Day 5: Final wipe-down, vacuum, and photo documentation
| Repair Type | Tool Required | Time per Fix | Cost Range (USD) | Pro Tip | Risk of DIY Failure |
|---|---|---|---|---|---|
| Nail hole patch | Plastic putty knife | 2 min | $0.15 (filler) | Over-sand = visible depression | Low |
| 1.5" drywall hole | 6" taping knife, patch | 25 min | $3.20 (patch + compound) | Feather edges 3x width of hole | Medium (if rushed drying) |
| Hardwood scratch | Walnut, soft cloth | 3 min | $0 (walnut from grocery) | Test on back of door first | Low |
| PVC dent recovery | Clothes iron, damp cloth | 12 min | $0 | Never exceed 10 sec steam contact | Medium (melting risk) |
| Baseboard re-securing | Magnetic stud finder, hammer | 8 min per 3' section | $1.50 (nails + filler) | Drive nails at 45° into studs only | Low |
7. The Final Walkthrough Mindset
Your goal isn’t perfection—it’s consistency. Inspect every surface at multiple angles: straight-on, raking light (hold a flashlight parallel to the wall), and from the doorway. Look for contrast: a patch that’s too smooth, a floor spot that’s too dark, a baseboard gap that’s too uniform. Fix discrepancies—not flaws.And remember: Your lease likely requires “broom-clean condition,” not “showroom-new.” That means no debris, no active damage, and surfaces free of stains or hazards. Everything else is negotiation leverage—if you’ve documented your work, you hold the cards.
For a complete setup guide covering paint matching, lighting for inspection prep, and landlord communication templates, visit our / resource hub.
Done right, this process takes less time than a weekend hike—and returns hundreds in deposit value. It’s not about being perfect. It’s about being prepared, precise, and respectfully thorough.