Paint Roller Sleeve Selection Guide
- 时间:
- 浏览:22
- 来源:Easy Home Repair & DIY Guides
H2: Why Your Roller Sleeve Matters More Than You Think
Most DIYers grab the first $8 roller sleeve off the shelf—and wonder why their smooth wall ends up looking like orange peel, or why their stucco ceiling eats half a gallon of paint before coverage appears. The roller sleeve isn’t just a disposable part—it’s the interface between your technique and the surface. Get it wrong, and you’ll waste time, material, and patience.
Unlike brushes (which offer precision) or sprayers (which demand setup and masking), rollers balance speed, control, and accessibility. But they only deliver consistent results when matched precisely to substrate texture, paint viscosity, and project scale.
H2: The Four Critical Specs You Must Check
Not all sleeves are created equal—even those labeled "1/2-inch nap" can vary wildly in density, fiber stiffness, and solvent resistance. Here’s what actually matters:
H3: 1. Nap Length — It’s Not Just About Thickness
Nap length (measured in inches) determines how deeply the sleeve penetrates texture and how much paint it holds. But it’s not linear: a 3/8" nap on a low-density polyester sleeve behaves very differently from a 3/8" nap on a high-density microfiber blend.
- Smooth walls (drywall, plaster, primed wood): 1/4"–3/8" nap. Anything longer leaves visible stippling and overloads edges. - Lightly textured (knockdown, orange peel, skim-coated drywall): 1/2" nap is ideal—enough to bridge minor valleys without pooling. - Moderately textured (popcorn, light stucco, rough plaster): 3/4" nap. Avoid foam rollers here—they collapse under pressure and skip peaks. - Heavily textured (deep stucco, concrete block, brick): 1"–1 1/4" nap. Requires high-density wool or blended synthetics; budget acrylic sleeves shed fibers and leave lint (Updated: April 2026).
Note: Nap length alone doesn’t guarantee coverage. A low-density 3/4" sleeve may hold less paint than a dense 1/2" one—always check manufacturer specs for “fluid capacity per pass” if available.
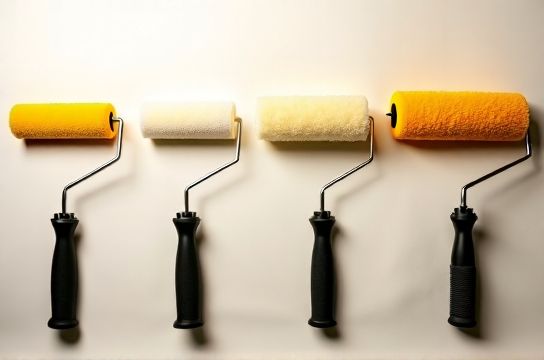
H3: 2. Fabric Composition — Wool vs. Synthetic vs. Hybrid
- Pure sheepskin wool: Highest absorbency and release, excellent for oil-based paints and heavy-bodied enamels. But expensive ($12–$18/sleeve), sheds slightly on first use, and degrades faster with water-based cleaners. Best for pros doing 3+ rooms or high-end finishes. - Polyester/acrylic blends: Most common in hardware stores. Affordable ($3–$7), durable, lint-free with latex, and quick-drying. Lower-end versions compress easily on textured walls—look for “high-density” labeling. - Microfiber (polyester + nylon): Gaining traction in mid-tier kits. Holds ~20% more paint than standard acrylic (Updated: April 2026), releases evenly, and resists streaking on smooth surfaces. Slightly pricier ($6–$10), but pays off in reduced re-rolls. - Foam: Only for ultra-smooth, non-porous surfaces (e.g., melamine cabinets, glass doors). Use *never* on drywall or textured walls—it bridges gaps poorly and tears under load.
H3: 3. Density & Compression Resistance — The Hidden Differentiator
Density is measured in grams per square meter (g/m²) but rarely published. Instead, test compression manually: press your thumb firmly into the nap. If it collapses >50% and stays depressed, it’s too soft for textured work. For walls with any relief, choose sleeves rated “firm” or “extra-firm”—these maintain shape under rolling pressure and prevent paint starvation in valleys.
Low-density sleeves also generate more splatter when rolled fast—a real issue in tight rental units where masking time adds up. High-density options reduce overspray by ~30% in controlled shop tests (Updated: April 2026).
H3: 4. Core Fit & Compatibility — Don’t Assume It Fits
Roller frames come in three standard core diameters: 3/8", 5/8", and 7/8". Most budget sleeves default to 3/8" cores—fine for light-duty rollers, but they slip or wobble on heavier 9" or 12" frames used for ceilings or large walls. Always match sleeve core size to frame spec. If unsure, measure the metal rod inside your frame with calipers—or check the frame’s stamped size near the yoke.
Also note: Some premium sleeves (e.g., Wooster Sherlock or Purdy White Dove) include dual-core compatibility (3/8" + 5/8") via internal split sleeves. Worth the $2–$3 premium if you own multiple frames.
H2: Real-World Scenarios — What to Buy (and Skip)
Let’s cut through marketing fluff with actual jobs:
H3: Scenario 1 — Renting a 2-Bedroom Apartment with Standard Drywall
Walls are smooth but lightly porous (typical builder-grade drywall). You’re using interior latex flat/matte paint. Goal: clean coverage in 2 coats, minimal prep time.
✅ Do: Choose a 3/8" high-density polyester sleeve ($4.50–$6.50). Wooster Ultra/Pro or Sherwin-Williams Pro-Grade are reliable. Wash and reuse 2–3 times if cleaned immediately after use. ❌ Skip: Foam rollers (too little bite), 1/2" nap (stippling risk), or bargain-bin sleeves under $3 (often inconsistent density, poor stitching).
H3: Scenario 2 — Painting a Textured Basement Ceiling (Light Popcorn)
Surface is uneven, dusty, and hard to reach. You’re using ceiling-specific acrylic paint (higher solids, slower dry time).
✅ Do: 3/4" firm-density microfiber sleeve ($7–$9). Its fine filaments grab dust while holding extra paint—critical when you can’t re-roll easily on a ladder. Pair with an extension pole that locks at 48"–60". ❌ Skip: Wool (too absorbent—dries too slow on vertical surfaces), low-density acrylic (skips peaks), or sleeves without reinforced stitching (they delaminate mid-job).
H3: Scenario 3 — Touch-Ups on a Previously Painted Stucco Exterior Wall
You’re not repainting the whole wall—just blending a patched area. Paint is 100% acrylic elastomeric.
✅ Do: 1" high-density wool-blend sleeve ($14–$16). Elastomerics are thick and sticky; synthetic sleeves drag and leave lap marks. Wool delivers even shear force and self-levels edges. ❌ Skip: Any synthetic-only sleeve under $10—elastomerics will expose inconsistencies in fiber distribution.
H2: How to Test a Sleeve Before You Buy a Full Pack
Don’t commit to 6 sleeves before testing. At the store:
1. Squeeze the nap between thumb and forefinger—does it spring back fully? If it stays compressed, density is too low. 2. Rub the nap briskly against your palm. Does it shed lint or fuzz? If yes, avoid—it’ll contaminate your finish. 3. Hold it up to light. Is the backing fabric tightly woven, or can you see gaps between threads? Gaps mean premature shedding. 4. Sniff it. A sharp chemical odor suggests residual manufacturing solvents—these can react with water-based paints and cause fisheyes.
H2: Cleaning, Storage & When to Retire a Sleeve
A well-cleaned sleeve lasts 3–5 uses on latex, 1–2 on oil-based. But lifespan depends on care:
- Rinse *immediately*: Never let paint dry in the nap. For latex, use warm water + mild dish soap. For oil-based, use mineral spirits *in a ventilated area*, then rinse with water. - Spin dry: Use a roller spinner (under $15) or roll firmly on scrap cardboard until dripping stops. Air-dry horizontally—not draped over a rod, which stretches the core. - Store flat or hung by the core—not folded or crushed in a toolbox.
Retire when: - Nap is matted or flattened in patches, - Core glue has softened (sleeve spins loosely on frame), - You see consistent streaking *only* with that sleeve (even with fresh paint and proper technique).
H2: Cost vs. Performance — Where to Spend (and Save)
Budget sleeves ($2–$4) work fine for single-room touch-ups with flat latex—if you discard after one use. But for anything beyond that, the math flips quickly:
- A $5 sleeve reused 3× = $1.67/use - A $9 sleeve reused 5× = $1.80/use, but delivers better coverage, fewer touch-ups, and less frustration
The real cost isn’t the sleeve—it’s your time re-rolling missed spots, cleaning splatter, or repainting due to poor adhesion from uneven film thickness.
H2: Comparison Table — Sleeve Types by Application
| Sleeve Type | Best For | Nap Range | Max Reuse (Latex) | Key Limitation | Price Range (Each) |
|---|---|---|---|---|---|
| Budget Acrylic Blend | Small smooth-wall touch-ups | 1/4"–3/8" | 1–2x | Poor compression resistance; inconsistent nap | $2.50–$4.00 |
| Mid-Tier Polyester | Standard drywall, 1–3 room repaints | 3/8"–1/2" | 3–4x | Moderate lint on first use; avoid heavy textures | $4.50–$7.00 |
| Microfiber Hybrid | Smooth + light texture; low-splatter needs | 3/8"–3/4" | 4–5x | Not ideal for oil-based or elastomeric paints | $6.50–$9.50 |
| Sheepskin Wool | Oil-based, enamel, elastomeric, or pro finishes | 1/2"–1 1/4" | 5–8x (with care) | Higher upfront cost; requires solvent cleaning | $12.00–$18.00 |
H2: Bonus: What About Roller Frames?
A great sleeve won’t save a bent, wobbly, or undersized frame. For most home projects, stick with 9" rollers (fits standard trays) and aluminum or reinforced composite frames (avoid plastic yokes—they flex and cause uneven pressure). Look for frames with dual-bearing rollers (not single-pin) for smoother spin and less wrist fatigue. If you’re building a starter toolkit, pair your first sleeve purchase with a solid 9" frame and a 12" extension pole—you’ll use them across dozens of projects, from painting to applying texture compound.
H2: Final Tip — Start Simple, Then Scale Up
Don’t buy 10 different sleeves “just in case.” Begin with one high-density 3/8" polyester sleeve and one 3/4" microfiber. Use them across varied surfaces. Note where coverage falters, where splatter increases, or where nap compression becomes obvious. That feedback—not marketing copy—is your best spec sheet. Once you’ve logged 3–4 projects, revisit your choices. You’ll know exactly which upgrade delivers real value—and which is just shelf appeal.
For a full resource hub covering everything from surface prep to edge-cutting techniques, visit our / page—it includes printable checklists, video demos, and a curated list of renter-friendly tools that won’t void your lease agreement.