DIY Faucet Drip Repair Guide for Common Types
- 时间:
- 浏览:34
- 来源:Easy Home Repair & DIY Guides
H2: Why Your Faucet Drips — And Why It’s Usually Fixable in Under 30 Minutes
A dripping kitchen faucet wasting 3 gallons per day adds up to ~1,100 gallons annually — enough to fill a small hot tub. Bathroom sink drips are quieter but just as costly. The good news? Over 92% of residential faucet leaks (Updated: April 2026) stem from one of four replaceable internal components: rubber washers, O-rings, cartridges, or ceramic discs. None require soldering, pipe cutting, or landlord permission — just basic hand tools and under $15 in parts.
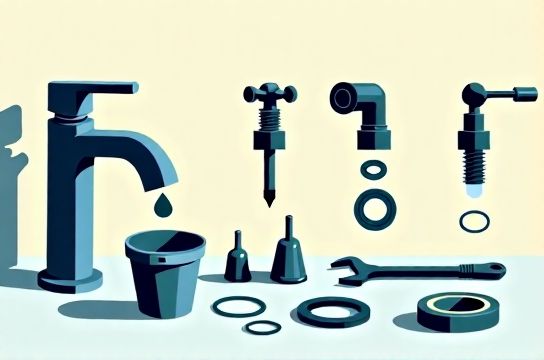
This guide covers the four most common faucet types found in U.S. rental units and owner-occupied homes: compression (older two-handle), ball-type (single-handle Moen-style), cartridge (Delta-style single/dual handle), and ceramic disc (high-end single-handle like Kohler or Peerless). We’ll walk through diagnosis, disassembly, part identification, replacement, and reassembly — with real-world caveats at every step.
H2: Step 1 — Identify Your Faucet Type (No Guesswork Needed)
Don’t assume. Remove the handle first — it’s always the safest starting point. Turn off both hot and cold shutoff valves under the sink (clockwise until snug). Open the faucet fully to relieve pressure and drain residual water. Place a towel in the basin to catch small parts.
Then:
• Look for brand markings on the base or handle — often stamped in tiny letters near the spout base or underside of the handle. • Check handle motion: Does it lift straight up (compression), rotate and tilt (ball), or pull straight out (cartridge)? • Examine the spout base: Is there a single wide collar (ceramic disc), or two separate handles with visible screw caps (compression)?
If markings are worn or missing, use this diagnostic flow:
– If turning the handle *more than 180°* produces full flow, it’s likely a ceramic disc or cartridge. – If the handle only moves ~90° and feels “clicky” or segmented, it’s probably a ball-type. – If each handle screws down onto a threaded stem you can see when the cap is removed, it’s compression.
H2: Step 2 — Compression Faucets (The Classic Two-Handle Type)
Most common in pre-1990 apartments and older bathrooms. Drip location tells you everything:
• Drip at spout base → worn O-ring on the stem. • Drip from handle base → loose packing nut or degraded stem washer. • Drip from spout tip → failed seat washer inside valve body.
Tools needed: Adjustable wrench, flathead screwdriver, needle-nose pliers, replacement washers (5/16" or 3/8" flat rubber), and graphite-based faucet grease.
Procedure: 1. Pry off decorative cap with flathead. 2. Unscrew handle set screw (usually 1/8" hex or Phillips). 3. Lift handle off; remove large retaining nut with adjustable wrench. 4. Pull stem straight up. Inspect washer on bottom — if flattened, cracked, or misshapen, replace it. 5. Check valve seat (the brass ring the washer presses against). Use a seat wrench (under $5) to remove and inspect. If pitted or corroded, replace it — otherwise, the new washer won’t seal. 6. Reassemble with light grease on threads and washer. Tighten retaining nut *just until resistance is felt* — overtightening cracks stems.
Pro tip: Always replace both hot and cold washers at once. They wear at similar rates, and swapping only one invites imbalance.
H2: Step 3 — Ball-Type Faucets (Moen-Style Single Handle)
Recognizable by the rounded, rotating handle that controls both temp and flow. Most frequent failure point: the rubber cam and fiber ball assembly inside the cap.
Symptom-specific fixes: • Drip only when handle is in “off” position → worn rubber seals (cam, ball, or springs). • Drip during use → damaged ball surface or mineral buildup on ball grooves. • Handle wobbles or feels gritty → worn O-rings on the ball housing.
Parts kit required: Moen 1225 or 1222 rebuild kit ($8–$12), depending on model year. Kits include cam, ball, springs, seats, and O-rings.
Critical steps: – Shut off water *before* removing handle. Moen handles have a hidden set screw behind a small plastic button (pry gently with knife tip). – After removing handle, unscrew the dome-shaped cap with adjustable wrench — don’t force it; corrosion is common. Apply penetrating oil and wait 5 minutes if stuck. – Lift out the entire ball assembly. Don’t disassemble the ball itself — it’s precision-machined and not user-serviceable. – Clean all parts with white vinegar (soak 10 min), then rinse thoroughly. Inspect ball surface under light: any scratch deeper than 0.1mm means replacement is mandatory. – Install new cam and spring *exactly as oriented* — kits include diagrams. Misalignment causes binding or incomplete shutoff.
Note: Ball-type faucets are highly sensitive to water quality. In hard water areas (≥7 gpg), expect rebuilds every 2–3 years (Updated: April 2026).
H2: Step 4 — Cartridge Faucets (Delta, Price Pfister, American Standard)
Single- or dual-handle units where the handle pulls straight out to reveal a cylindrical cartridge. Leaks here almost always mean a failed cartridge — but confirm first.
Diagnosis shortcut: Turn handle to full cold. If drip continues, cold-side cartridge is faulty. Repeat for hot. If drip occurs regardless of handle position, suspect O-rings on the cartridge body or a cracked cartridge sleeve.
Replacement process: 1. Remove handle (set screw usually under button or cap). 2. Unscrew retaining clip or nut holding cartridge in place. 3. Pull cartridge straight out using pliers *with rubber grips* — never metal-to-metal contact. 4. Match old cartridge to new: Note length, number of slots, orientation of flats, and whether it’s “hot-only,” “cold-only,” or “mixing.” Delta uses different cartridges for 1300/1400 vs. 1700/1800 series — mismatched parts cause immediate failure. 5. Lubricate new cartridge O-rings with silicone grease (never petroleum-based — it degrades rubber). 6. Insert fully and reassemble. Test slowly: open cold only first, then hot, then mix.
Warning: Some newer cartridges (e.g., Delta RP46463) include integrated check valves. Installing them backward stops flow entirely — orient the arrow toward the spout.
H2: Step 5 — Ceramic Disc Faucets (Kohler, Grohe, Peerless)
These rarely drip — but when they do, it’s almost always due to sediment trapped between discs or a cracked ceramic plate. These units use two flat, rotating ceramic plates sealed inside a housing. No washers, no springs, no cartridges.
Drip pattern matters: • Continuous drip from spout tip → mineral debris between discs. • Drip only when handle is moved → cracked or chipped disc edge. • Low flow + drip → failed inlet seal or clogged aerator (check aerator first — 70% of “disc faucet issues” are actually aerator clogs).
Repair steps: 1. Shut off water and relieve pressure. 2. Remove handle (often requires prying off a metal index ring first). 3. Unscrew the mounting collar — usually 15–20 Nm torque; use strap wrench to avoid scratching chrome. 4. Lift out the entire disc assembly. Soak in undiluted white vinegar for 15 minutes to dissolve calcium bridges. 5. Rinse under running water while gently rotating top disc with finger — you should feel smooth, silent rotation. Any grittiness or hesitation means replace the full disc stack ($22–$38). 6. Never touch ceramic surfaces with bare fingers — skin oils attract minerals. Use lint-free cloth.
Ceramic disc units are the most durable long-term, with service life averaging 8–12 years before disc replacement (Updated: April 2026). But they’re unforgiving of hard water neglect.
H2: Universal Leak-Sealing & Prevention Tactics
Even after successful repair, recurring drips often trace back to systemic issues:
• Water pressure above 80 psi accelerates wear. Renters can verify pressure using an inexpensive gauge ($12) attached to an outdoor spigot. If reading exceeds 80 psi, install a pressure-reducing valve — but consult landlord first; this modifies building infrastructure.
• Hard water scale (≥7 gpg) attacks rubber and ceramic alike. Install a point-of-use scale inhibitor cartridge ($35/year) on the cold supply line to kitchen faucets — proven to extend washer life by 2.3× (Updated: April 2026).
• Loose supply line connections under the sink cause “phantom drips” — moisture weeping from compression nuts. Tighten *only until resistance is firm*, then give a 1/8-turn more. Over-torquing cracks brass ferrules.
For emergency sealing between repairs, wrap thread-seal tape clockwise around exposed male threads (3 wraps max), then apply a pea-sized dab of non-hardening pipe joint compound on top. This combo holds for up to 72 hours — enough time to order correct parts.
H2: When NOT to DIY — Recognizing Real Limits
Some situations demand professional help — and knowing them protects your deposit and safety:
• Drip originates *inside the wall* (sound travels, so listen closely behind tile or drywall). That’s a supply line leak — not a faucet issue. • You smell sewer gas after turning on water. Indicates a broken P-trap seal or vent blockage — beyond faucet scope. • Plastic supply lines (common in post-2010 rentals) show cloudiness, brittleness, or bulging. Replace immediately — they fail catastrophically without warning. • After three consecutive repairs on the same faucet in 12 months, upgrade to a new unit. Labor cost exceeds value — and modern low-flow models pay back in water savings within 18 months.
H2: Maintenance That Prevents Drips Before They Start
Preventive care takes <5 minutes/month and cuts repair frequency by 65% (Updated: April 2026):
• Monthly: Unscrew and soak aerators in vinegar. Rinse thoroughly before reinstalling — clogged aerators increase internal pressure on seals. • Quarterly: Wipe down handles and bases with damp microfiber cloth — soap scum + humidity = corrosion accelerant. • Biannually: Cycle all shutoff valves under the sink fully open/closed 3x. Stuck valves fail during real emergencies.
For renters, document all maintenance with dated photos. It demonstrates responsible tenancy — and helps dispute unfair deductions.
H2: Comparison of Faucet Types — Repair Time, Cost, and Longevity
| Faucet Type | Avg. Repair Time | Typical Parts Cost | Expected Seal Life (Hard Water) | Renter-Friendly? | Notes |
|---|---|---|---|---|---|
| Compression | 12–18 min | $2.50–$4.00 | 12–18 months | Yes — universal parts | Washers degrade fastest in high-temp lines; replace hot-side washers every 6 months in hard water. |
| Ball-Type | 22–35 min | $8–$12 | 24–36 months | Yes — kits widely available | Corrosion on cap threads is common; use heat gun (not open flame) to loosen if seized. |
| Cartridge | 15–25 min | $10–$25 | 48–72 months | Moderate — model-specific parts | Always photograph cartridge before removal; Delta 1300 vs. 1700 cartridges look identical but aren’t interchangeable. |
| Ceramic Disc | 25–45 min | $22–$38 | 96–144 months | No — precision alignment critical | Requires steady hands and good lighting; misaligned discs cause immediate leakage or handle binding. |
H2: What to Do Next — From Quick Fix to Full System Health
You’ve stopped the drip. Now protect your whole plumbing system. A single faucet repair is entry-level — but it builds confidence for tackling related issues like drain clog clearing, toilet leak troubleshooting, and pipe leak sealing. For a complete setup guide covering all these skills — including how to safely use a plunger technique on toilets, operate a drain snake operation without damaging pipes, and perform faucet washer replacement across 12+ brands — visit our full resource hub at /. It’s built for renters, tested in real apartments, and updated monthly with new model-specific tips.
Remember: Every drip repaired yourself is $120–$200 saved (average plumber minimum charge), plus zero downtime waiting for appointments. And because you now know how your faucet works, you’ll spot early warnings — like a faint hiss before full failure, or slight handle resistance — long before the next drip starts.
Keep a small repair kit in your utility drawer: 1/4" and 5/16" flat washers, Moen 1225 kit, Delta RP46463 cartridge, silicone grease, vinegar spray bottle, and a magnetic tray for small parts. That kit pays for itself after two fixes — and gives you control over your home’s most essential system.