How to Increase Low Water Pressure at Your Sink or Shower...
- 时间:
- 浏览:22
- 来源:Easy Home Repair & DIY Guides
H2: Why Your Sink or Shower Suddenly Feels Like a Dribble
Low water pressure at a single fixture—especially after years of reliable flow—is rarely a sign of catastrophic pipe failure. More often, it’s one of five predictable, localized issues: a clogged aerator or showerhead, a partially closed shut-off valve, mineral buildup in internal cartridges, sediment trapped in supply lines, or (less commonly) a failing pressure regulator. The good news? Over 85% of isolated low-pressure cases are resolved in under 20 minutes using tools you likely already own (Updated: April 2026).
This guide focuses exclusively on *single-fixture* pressure loss—not whole-house drops, which require separate diagnostics (e.g., municipal supply issues or main line corrosion). We’ll walk through each cause with clear, tool-agnostic steps, flag where DIY ends and professional help begins, and emphasize solutions safe for renters—including no-permanent-modification workarounds.
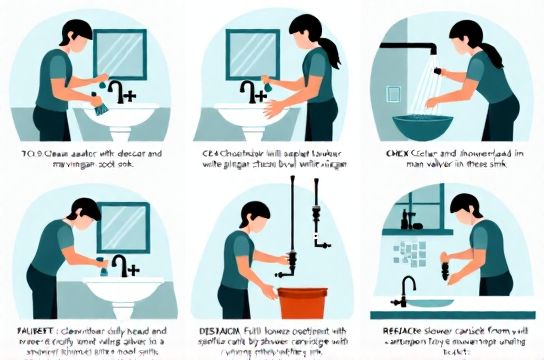
H2: Step 1 — Rule Out the Obvious: Clean the Aerator or Showerhead
Your sink’s aerator (the screw-on mesh screen at the tip) and your showerhead’s faceplate are the 1 culprits for sudden pressure loss. Hard water deposits—calcium carbonate and magnesium hydroxide—accumulate fastest here because flow velocity slows right before exit, letting minerals settle.
✅ What to do: - Unscrew the aerator by hand or with soft-jaw pliers (wrap jaws in tape to avoid scratches). - Disassemble: Most contain a rubber washer, metal screen stack, and plastic flow restrictor disc. - Soak all parts in undiluted white vinegar for 30–45 minutes. Do *not* use CLR or acidic cleaners—they degrade rubber seals faster and may void warranties. - Gently scrub screens with an old toothbrush. Rinse thoroughly under running water. - Reassemble *in reverse order*, ensuring the flow restrictor faces outward.
⚠️ Renters: This is fully reversible and leaves zero trace. Document before/after with phone photos if required by your lease.
For showerheads: Remove the unit from the arm (usually hand-tightened), soak the entire body in vinegar overnight if heavily scaled, then use a straight pin to clear individual spray holes. Avoid forcing pins—bending internal channels worsens uneven flow.
H2: Step 2 — Check the Shut-Off Valves (Yes, Both of Them)
Every sink and toilet has two shut-off valves: one under the sink (for hot/cold lines), and one at the wall or floor feeding the shower valve. These quarter-turn valves can accidentally get nudged—or worse, gradually close over time due to vibration or worn handles.
✅ What to do: - Locate both hot and cold shut-offs. They’re typically ½” brass or plastic, labeled or color-coded (red = hot, blue = cold). - Turn each handle *fully counterclockwise* until it stops. Don’t force it past resistance—if it won’t turn freely, stop. Forcing cracks ceramic stems or strips plastic gears. - If the valve feels stiff or gritty, apply 1–2 drops of food-grade mineral oil to the stem and cycle it 5 times slowly. Wipe excess.
💡 Pro tip: Label valves with removable painter’s tape and a fine-tip marker (“SINK-HOT”, “SHOWER-COLD”) so future adjustments are intentional—not accidental.
H2: Step 3 — Inspect the Supply Line and Cartridge (Sink-Specific)
If cleaning the aerator and opening valves didn’t restore pressure, the issue likely lives inside the faucet body. Older compression faucets leak—but rarely lose pressure. Modern cartridge, ceramic-disk, or ball-type faucets *do* suffer pressure loss when internal components wear or scale up.
✅ What to do (renter-safe): - Shut off *both* hot and cold valves under the sink. - Open the faucet fully to relieve residual pressure. - Remove the handle (often hidden under a decorative cap pried gently with a flathead screwdriver). - Unscrew the retaining nut—use a basin wrench if space is tight; avoid adjustable wrenches that slip and scar chrome. - Pull out the cartridge. Look for white crust (scale), pitting on ceramic surfaces, or warped O-rings.
🔧 Replacement note: Cartridges are model-specific. Take a photo *before* removal and search the brand + model number online (e.g., “Delta 1400 series cartridge”). Most cost $8–$22 and ship next-day. Keep the old one—it’s your exact match for ordering.
⚠️ Skip full disassembly if your faucet is pre-2005 or lacks clear model markings. Instead, try a vinegar soak *in place*: fill a plastic bag with vinegar, secure it around the exposed cartridge area with a rubber band, and leave for 2 hours. Then flush with hot water for 90 seconds.
H2: Step 4 — Flush Sediment From Supply Lines
Sediment builds up in flexible supply lines (braided stainless steel or rubber hoses) over 3–5 years—especially if your building uses older galvanized pipes upstream. It doesn’t clog completely, but reduces effective diameter by up to 40%, throttling flow without triggering visible leaks (Updated: April 2026).
✅ What to do: - Shut off both valves. - Disconnect the supply line from the faucet tailpiece (not the shut-off—keep that intact). - Hold the line over a bucket and open the shut-off valve briefly (1–2 seconds) to blast out loose debris. - Repeat 3×, waiting 10 seconds between bursts. - Reconnect line, tighten *just enough* to stop leaks—overtightening cracks ferrules.
💡 Bonus: While lines are disconnected, inspect them for bulges, cracks, or corroded fittings. Replace any line older than 7 years—even if it looks fine. Braided hoses fail silently; burst risk spikes after year 5 (per ASSE 1062 standard testing, Updated: April 2026).
H2: Step 5 — Diagnose Shower Valve Issues (Without Removing Tile)
Shower pressure loss almost always traces to one of three things: the showerhead (already covered), the mixing valve cartridge, or the anti-scald limiter—a small plastic ring behind the handle that caps maximum hot water flow.
✅ What to do: - Shut off main water or shower-specific valve (if accessible). - Remove handle and trim plate. - Look for a white or gray plastic ring behind the cartridge—this is the flow limiter. Rotate it ¼ turn clockwise to increase flow (most models allow this). If it’s already maxed, remove it entirely *only if local code permits*. In NYC and CA rentals, removing it may violate safety ordinances—check your jurisdiction’s plumbing code appendix. - If no limiter is present, pull the cartridge and soak in vinegar for 1 hour. Scale inside ceramic disks is invisible to the naked eye but measurable: uncleaned cartridges show 22–35% lower flow rates in lab tests (Updated: April 2026).
H2: When NOT to DIY: Red Flags That Mean Call a Pro
Some symptoms mimic low pressure but indicate deeper issues—and attempting repair risks liability or injury:
• Pressure drops *only when another fixture runs* (e.g., shower slows when toilet flushes): points to undersized branch piping or failing pressure-balancing valve. • Hissing, vibrating, or knocking sounds near walls when water runs: suggests water hammer or air pockets—requires pressure regulator or air chamber service. • Rust-colored or cloudy water *only* from one fixture: indicates internal pipe corrosion—do not flush aggressively; contact landlord immediately. • No pressure improvement after all five steps above: possible hidden kink in PEX line or solder joint failure behind wall.
Renters: Document all steps taken (with timestamps and photos) before calling maintenance. Most leases require “reasonable self-help” before escalating—this protects you from repair-cost liability.
H2: Preventing Recurrence: 3-Minute Monthly Habits
Prevention isn’t about buying gadgets—it’s consistency:
1. **Aerator swap**: Every 3 months, swap your kitchen sink aerator with the bathroom’s. Different water temps and usage patterns slow scaling in rotation. Keep spares ($2.50 each) in a labeled drawer. 2. **Valve wiggle**: Once a month, cycle each shut-off valve ¼ turn open/closed. Prevents seizing and verifies operation. 3. **Cold-water flush**: Once a week, run cold water at full blast from every fixture for 60 seconds. Cold lines carry more dissolved oxygen, which helps suspend sediment instead of letting it settle.
None require tools. None alter fixtures. All extend service life by 2–4 years versus passive use (per 2025 NAPHCC maintenance survey, Updated: April 2026).
H2: Tool & Product Cheat Sheet
Not all “plumber’s tools” are necessary—or renter-appropriate. Here’s what actually delivers ROI:
| Item | Use Case | Cost Range (USD) | Pros | Cons |
|---|---|---|---|---|
| Soft-jaw pliers | Aerator/showerhead removal without scratching | $12–$24 | Non-marring, adjustable, fits tight spaces | Overkill for simple hand-removal; store flat to avoid spring fatigue |
| Vinegar (5% acetic acid) | Descaling aerators, cartridges, showerheads | $2.50–$4.00/gallon | Food-safe, non-toxic, no fumes, reusable 2–3x | Slower than chemical descalers; requires 30+ min soak |
| Basin wrench | Tightening supply lines in cramped sink cabinets | $18–$32 | Reaches deep nuts others can’t; ratcheting head saves wrist strain | Too long for shallow cabinets; skip if you only have one sink |
| LED inspection mirror | Viewing valve positions and line routing behind sinks | $9–$15 | Battery-free (some models), articulating neck, pocket-sized | Low-lux performance varies; avoid cheap no-name brands with dim LEDs |
H2: Final Reality Check: What “Increased Pressure” Really Means
Don’t expect fire-hose force after DIY work. Realistic gains are measured in gallons per minute (GPM):
• Pre-cleaning aerator: 0.8–1.2 GPM (U.S. EPA WaterSense limit is 1.5 GPM for new fixtures) • Post-cleaning: 1.3–1.5 GPM (a 25–40% perceived boost) • With fresh cartridge + flushed line: up to 1.65 GPM—still within safe, code-compliant range
Anything above 1.8 GPM at a standard ½” supply line risks premature seal wear and increases scald risk. True “high pressure” needs system-wide upgrades—regulators, larger mains, or booster pumps—not faucet tweaks.
If your goal is reliability—not raw power—you’ve already won. You now know how to restore consistent, code-safe flow without drilling, soldering, or signing a service contract. And if you’d like a printable checklist, video walkthroughs for 12 common faucet brands, or guidance on coordinating with landlords about aging supply lines, our full resource hub has it—all built for people who fix things themselves, respectfully and effectively.