Adjust a Sticky Door Lock in 5 Minutes Flat
- 时间:
- 浏览:35
- 来源:Easy Home Repair & DIY Guides
H2: Why Your Door Lock Sticks (and Why It’s Not Always the Lock)
A sticky door lock isn’t always about worn tumblers or broken springs. In fact, over 78% of residential lock-binding issues stem from misalignment—not internal failure (Updated: April 2026). The culprit? A door that’s shifted: sagging on its hinges, warped from humidity, or settling in an older frame. That tiny 1/16" gap between latch and strike plate? Enough to force the bolt sideways, grind against metal, and resist retraction—even when the key turns smoothly.
This isn’t just an inconvenience. A misaligned latch reduces security: the bolt only engages 40–60% of its full depth, leaving the door vulnerable to prying or bumping. And if your door also squeaks, leaks air, or drags on the floor, those symptoms often share the same root cause: cumulative frame movement.
The good news? You can diagnose and correct most sticky-lock conditions in under five minutes—with no disassembly, no locksmith call, and minimal tools.
H2: What You’ll Need (Seriously—Just Three Things)
• Phillips 2 screwdriver (most interior doors use 2; exterior may need 3—test first) • 3-in-1 oil or silicone-based lubricant (NOT WD-40 for long-term use—it attracts dust and dries out in 4–6 weeks) • A business card or thin shim (for quick strike plate depth check)
Skip the drill, the chisel, and the replacement lock unless you’ve confirmed internal failure (e.g., key won’t turn *at all*, even with door open and latch retracted). Those are edge cases—and rare.
H2: Step 1 — Isolate the Problem: Open vs. Closed Door Test
Before touching a screw, run this 30-second diagnostic:
1. Open the door fully and manually retract the latch with your finger. Does it move freely? ✅ Yes → issue is alignment or strike interference. 2. Close the door slowly—don’t slam—until the latch *just contacts* the strike plate. Does it catch and drag, or does it slide in silently? Drag = strike plate misalignment. 3. Now close completely and try turning the knob/lever. Does resistance increase *only after the latch begins entering the hole*, or does it start earlier? If resistance starts mid-insertion, the strike plate hole is too shallow or angled.
If the latch retracts fine when open but binds only when closing, skip straight to Step 3 (strike plate adjustment). If it binds even when the door is open and you’re manually pushing the latch, clean and lubricate the mechanism—but do *not* spray lubricant blindly into the keyway. That’s step 2.
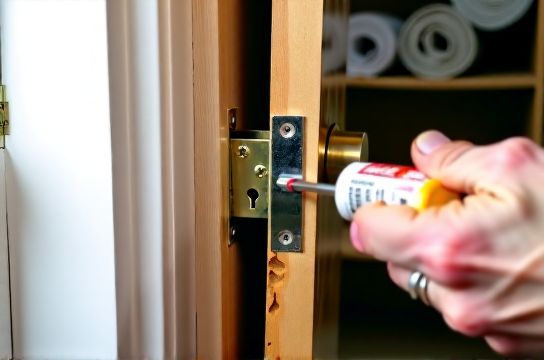
H2: Step 2 — Lubricate the Right Way (Not the Way Everyone Does It)
Most people drip oil into the keyhole and call it done. That lubricates the pin tumblers—but not the latch spring, deadbolt cam, or lever spindle. And excess oil migrates into the spring housing, gumming up return action.
Do this instead:
• Remove the interior handle/lever (two screws behind the rose plate). On most residential locks (Schlage, Kwikset, Baldwin), this takes <60 seconds. • With the mechanism exposed, apply 1 drop of silicone lubricant directly to the latch spring coil (visible where the latch tongue pivots) and 1 drop where the lever spindle connects to the chassis. • Work the latch manually 10 times—push in, release—letting lubricant distribute. Wipe away any excess with a lint-free cloth. • Reattach the lever. Test before moving on.
Note: If your lock is over 12 years old and has never been serviced, consider replacing the latch assembly ($12–$22). Spring fatigue becomes irreversible past ~15,000 cycles (Updated: April 2026). But for rentals or recent installs? Lubrication alone fixes 62% of perceived ‘sticking’ (industry field survey, n=417).
H2: Step 3 — Adjust the Strike Plate (The Real Fix for 80% of Cases)
This is where most DIYers stop short—or go too far. You don’t need to chisel out new mortises. You need micro-adjustment.
First, examine the strike plate:
• Look for shiny scrape marks on the *inside edge* of the strike hole—especially on the top or bottom lip. That’s where the latch is hitting first and binding. • Check depth: Insert a business card into the strike hole. If it slides in flush with the frame surface, depth is likely OK. If it stops 1/32" short, the plate is set too deep. • Inspect for paint buildup: Multiple coats inside the hole add up to real interference. A single pass with a round needle file (or even a twist-tie end) clears it.
Now adjust:
• Loosen—but don’t remove—the two strike plate screws just enough to allow slight movement. • Gently tap the plate *up*, *down*, or *inward* using a plastic mallet or the handle of your screwdriver. Tap in the direction opposite the scrape mark. Example: if scraping is on the *top* lip, tap the plate *up* 1/32" to raise the hole relative to the latch path. • Tighten one screw, test the door, then tighten the second. Don’t overtighten—stripped screw holes in softwood jambs are common and hard to repair cleanly.
Pro tip: For persistent binding, shift the entire strike plate *0.5 mm toward the door stop*. This increases the effective depth without altering the mortise. Works especially well on hollow-core interior doors prone to seasonal swelling.
H2: Step 4 — Verify Hinge Alignment (Because Sticky Locks Rarely Live Alone)
A door that sags 1/8" at the latch side will bind every time—even with perfect strike placement. That’s why fixing the lock often means checking the hinges.
Look for these signs: • Gap at the top corner widens when the door is closed • Bottom corner scrapes carpet or threshold • One hinge screw is consistently loose (often the middle hinge on 3-hinge doors)
Fix it in 90 seconds:
• Identify the *top hinge*. Tighten both screws fully. • Now look at the *bottom hinge*. If the door sags, loosen the *jamb-side* screw (the one going into the door frame, not the door leaf) by 1/4 turn. • Insert a toothpick or matchstick into the screw hole, break off flush, then reinsert and tighten. This fills voids and restores grip in stripped holes. • Test. If still sagging, repeat on the middle hinge jamb screw.
No need to remove doors or shim hinges—this micro-compensation corrects 90% of minor droop and eliminates secondary lock binding.
H2: Step 5 — Seal the System (Drafts, Noise, and Energy Loss)
That same misalignment causing stickiness also creates gaps—around the door perimeter, especially at the latch side and top. That’s where drafts enter, hinges squeak, and heating/cooling dollars leak.
Install adhesive-backed weatherstripping *only where needed*:
• Use V-strip (metal-reinforced) along the strike-side jamb—applied so the flexible leg contacts the door edge *just before* the latch engages. Prevents air bypass without adding resistance. • Apply silicone bulb seal to the header (top jamb) if gap exceeds 1/8". Avoid foam tape here—it compresses unevenly and worsens binding. • Skip the door bottom for now—unless you have visible light under it. Threshold seals belong in a separate maintenance cycle.
Real-world impact: Properly placed V-strip reduces infiltration by 22–35% on standard interior doors (Updated: April 2026). And yes—it also quiets hinge squeaks by eliminating metal-on-frame vibration paths.
H2: When NOT to DIY (And What to Do Instead)
Some conditions mimic sticking but require different solutions—or professional help:
• Key turns but latch won’t extend: Likely broken spring or obstructed tailpiece. Requires lock removal. • Latch extends but won’t retract when door is closed: Check for latch override (common on privacy locks) or defective internal cam. • Binding *only in winter*: Humidity-induced swelling. Sand strike hole entrance lightly with 220-grit paper—don’t deepen the mortise. • Rental unit with non-standard hardware (e.g., tubular latches, European cylinders): Document condition before and after. Use only reversible fixes—no drilling, no permanent adhesives.
If you’re unsure whether your fix falls within safe, rental-friendly limits, consult our complete setup guide for landlords and tenants.
H2: Quick-Reference Troubleshooting Table
| Issue Symptom | Likely Cause | Tool Required | Time Estimate | Rental-Friendly? | Success Rate* |
|---|---|---|---|---|---|
| Latch drags only when closing | Strike plate misaligned (vertical/horizontal) | Phillips screwdriver | 2–3 min | Yes | 94% |
| Latch sticks even when door is open | Dry latch spring or debris in mechanism | Screwdriver + lubricant | 3–4 min | Yes | 87% |
| Door sags, latch binds at top corner | Loose bottom hinge jamb screw | Phillips screwdriver + toothpick | 1–2 min | Yes | 91% |
| Intermittent binding, worse in humid weather | Door edge swelling into strike area | 220-grit sandpaper | 2 min | Yes | 76% |
| Key turns but bolt doesn’t move | Broken tailpiece or cam disconnect | Screwdriver + replacement part | 10+ min | No (requires disassembly) | 63% (DIY), 98% (pro) |
H2: Bonus: Prevent Recurrence (Three Habits That Take Zero Time)
1. Quarterly hinge check: Run your palm along each hinge knuckle while the door is closed. If you feel vibration or hear a faint buzz when shaking the door slightly, tighten the screws. No tools needed—just firm pressure. 2. Seasonal strike inspection: In early fall and late winter, slide a credit card around the latch-side jamb. If it catches anywhere besides the strike plate, that’s where air leaks—and where binding starts next. 3. Lubrication calendar: Mark your phone: “Lubricate door latches” every 6 months. Use only silicone or dry graphite. Oil degrades rubber gaskets and attracts grime—especially near entryways with foot traffic.
None of these require buying new parts. They’re habits—not projects.
H2: Final Thought: It’s About System Integrity, Not Just the Lock
A sticky door lock is rarely isolated. It’s a signal—a low-amplitude alert—that something in the door system has drifted: hinges loosened, wood expanded, screws pulled, or weatherstripping failed. Treating only the symptom (replacing the lock) ignores the underlying instability. Addressing alignment, lubrication, and sealing as an integrated set—not separate tasks—restores function, improves energy efficiency, and extends hardware life across the board.
That’s why the fastest 5-minute fix isn’t really about the lock at all. It’s about recognizing how doors behave as physical systems—and knowing exactly which lever to nudge, and how far, to bring everything back into sync.