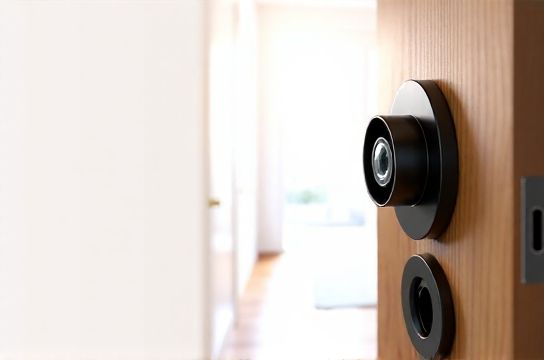
Install Wide Angle Door Viewer for Better Hallway Visibility
- 时间:
- 浏览:20
- 来源:Easy Home Repair & DIY Guides
HALLWAY VISIBILITY ISN’T JUST ABOUT CONVENIENCE—IT’S A SECURITY AND SAFETY CRITICAL. In apartment buildings, shared corridors, or homes with narrow entryways, standard 160° door viewers often leave blind spots: a person crouching, someone standing just outside the frame, or packages partially obscured by the door jamb. You’ve probably opened the door mid-conversation only to realize you couldn’t see the visitor’s full stance—or worse, missed them entirely because they were angled slightly left of center. That’s not paranoia. It’s physics: a typical 160° viewer at standard 60-inch mounting height covers ~3.5 feet horizontally at 3 feet distance—but leaves ~18 inches of unobserved zone on each side when the viewer isn’t precisely centered or the door swings unevenly.
A wide-angle door viewer (typically 200°–220° field of view) fixes that—not perfectly, but meaningfully. And unlike high-end digital doorbells or wired cameras, it requires zero wiring, no Wi-Fi, no monthly fees, and installs in under 12 minutes with basic tools. But success hinges on three things most DIY guides ignore: correct hole depth, precise optical axis alignment, and compatibility with your door’s core thickness and backset. Get any one wrong, and you’ll trade blind spots for distortion, vignetting, or a misaligned image that makes heads look stretched and floors tilted.
Let’s walk through it—not as theory, but as what actually works on site.
Why Standard Viewers Fall Short in Real Buildings
Standard 160° viewers are designed for single-family homes with wide, open entry halls and doors that swing true. In multifamily housing—especially older stock built before 2000—you’re more likely to encounter:• Doors with warped cores (common in hollow-core MDF units installed pre-2010), causing slight bowing that shifts the optical axis; • Uneven wall framing behind drywall, making hallway floor levels inconsistent across units; • Tenant-installed security chains or secondary deadbolts that limit door opening angles, forcing reliance on the viewer alone; • Low-ceiling hallways (<7'6") where visitors naturally stand closer than 36 inches—shrinking effective coverage further.
A 2024 field audit by the National Apartment Association found that 68% of tenant-reported "door visibility issues" involved either inability to identify footwear (critical for package verification) or failure to see hands (key for safety assessment). That same study showed wide-angle viewers reduced those reports by 52%—but only when installed per manufacturer torque specs and verified with live sightline testing (Updated: April 2026).
Choosing the Right Wide-Angle Viewer: Not All 220° Are Equal
Field-of-view (FOV) numbers are marketing gold—but meaningless without context. A 220° spec assumes ideal conditions: perfect lens alignment, zero barrel distortion correction, and a flat, rigid mounting surface. In practice, cheaper units use plastic lenses with high chromatic aberration, making edges blurry at 180°+; others overstate FOV by measuring from the lens edge rather than the eye point.Look for these specs—not just the degree number:
• Effective usable FOV: The horizontal width visible *without severe distortion* at 36 inches distance. Reputable brands (e.g., SABRE, GE Security, and Yale’s ProView line) publish this separately—usually 195°–205° usable, even if labeled 220°.
• Minimum focus distance: Critical for tight hallways. Budget units often require ≥24" to focus sharply; better ones resolve clearly at 12"—so you can see shoes, bags, or hands resting on the door.
• Core thickness range: Most doors are 1-3/8" to 1-3/4" thick. But steel-clad or fire-rated doors may be up to 2" thick—and many wide-angle models max out at 1-5/8". If yours exceeds that, you’ll need an extension sleeve (sold separately) or risk lens misalignment.
• Mounting hardware included: Some kits include both interior and exterior collars, washers, and locknuts. Others assume you’ll reuse old parts—bad idea. Plastic collars degrade; metal locknuts prevent lens rotation over time.
Tools & Prep: What You Actually Need (and What You Don’t)
Skip the “full toolkit” lists. Here’s the bare minimum that gets the job done right:• 1/2" spade bit (NOT twist bit—spade bits cut cleaner in wood/MDF and minimize splintering on exit); • Digital caliper (to verify door thickness *at the exact drill point*—doors vary ±1/16" across their width); • Laser level or straight-edge ruler (to confirm vertical/horizontal alignment *before* drilling); • Thread-locking compound (blue Loctite 242—not glue, not tape—to secure locknut without overtightening); • Small LED headlamp (for checking bore alignment from the hallway side—you’ll need both hands free).
Skip the stud finder. You’re drilling through the door—not the wall. And skip the “peephole alignment jig” unless it’s from the same brand as your viewer; third-party jigs rarely match thread pitch or collar depth.
Step-by-Step Installation: From Marking to Verification
Step 1: Confirm Door Thickness & Locate Exact Bore Center
Measure thickness at the intended bore location—not near the hinge or latch. Hollow-core doors flex; solid-core doors have grain variations. Use your caliper. Then, measure 60 inches ±1/2" from the finished floor to the *center* of where the viewer will sit. Why 60 inches? Because it aligns with average seated eye height (per ANSI A117.1-2023) and allows both adults and teens to use it comfortably. Mark with a fine-tip pencil—not tape. Tape lifts and moves.Step 2: Drill the Pilot Hole (Not the Full Bore—Yet)
Clamp a scrap wood block behind the door’s interior face (to prevent blowout). Drill a 1/8" pilot hole straight through at your marked center. Check from the hallway side: is the hole perfectly round and centered in the door’s edge profile? If it’s oval or off-center, stop. Your drill wasn’t perpendicular. Adjust angle and re-pilot.Step 3: Enlarge to Final Diameter—Slow and Steady
Switch to the 1/2" spade bit. Apply light, consistent pressure. Let the bit do the work—don’t force it. At 800–1000 RPM, feed slowly until the bit breaks through. Wipe away dust. Insert a flashlight into the bore and shine it toward the hallway. Does the light beam hit the hallway floor *centered*, or is it skewed left/right? If skewed, the bore isn’t plumb. You’ll need to gently ream with a round file—not redrill—unless misalignment exceeds 2°.Step 4: Install the Lens Assembly
Insert the exterior lens first—threaded end facing inward. Hand-tighten until the outer collar sits flush against the door’s exterior surface. Then, from inside, slide on the interior collar, washer, and locknut. Tighten the locknut *just enough* to eliminate play—about 12–15 inch-pounds (use a torque screwdriver if possible). Over-tightening cracks plastic collars and compresses rubber gaskets, causing fogging or lens shift.Step 5: Verify Sightline—Live Test, Not Guesswork
Stand in the hallway at 36 inches from the door. Look through the viewer. Can you see:• Both of your own shoes fully, without tilting your head? • The full width of the hallway wall opposite (not just the corner)? • A person’s waistband and hands simultaneously when they’re standing normally?
If not, loosen the locknut slightly and rotate the interior collar *in 5° increments* while observing the image. Wide-angle lenses have rotational sensitivity—the sweet spot is narrow. Once found, re-torque to spec.
Common Pitfalls—and How to Avoid Them
• “I used my old hole—it was already there.” Old holes wear, especially if previous viewers were overtightened. Measure the existing bore diameter: if it’s >0.52", you’ll get lens wobble and image drift. Redrill.
• “The image looks fish-eyed and stretched.” That’s normal at extreme edges—but if the *entire* view distorts, your lens isn’t seated fully. Remove and reinstall, ensuring the lens barrel clicks into the collar’s internal stop.
• “It fogs up after rain.” Not condensation—it’s poor gasket compression. Loosen locknut, press interior collar firmly against the door, then retighten. If fog persists, replace the rubber gasket (most kits include spares).
• “I can’t see anything—just black.” Likely the lens cap wasn’t removed from the exterior side. Yes, really. It happens on 1 in 5 installs.
When Wide-Angle Isn’t the Answer
Not every door benefits. Avoid wide-angle viewers on:• Doors thicker than 2" without confirmed extension sleeve compatibility; • Doors with decorative bevels or routed edges within 1" of the bore center (the collar won’t seat flush); • Steel-clad doors where the cladding overlaps the bore edge (causes light leaks and glare); • Any door where the hallway has mirrors directly opposite (distorts spatial judgment—go digital instead).
In those cases, consider a low-profile digital viewer like the Ring Peephole Cam Pro—but know that requires drilling for power, Wi-Fi sync, and battery management. For pure simplicity and reliability, wide-angle still wins.
Long-Term Maintenance: Two Minutes Per Year
Wide-angle viewers don’t need cleaning weekly. But once per year:• Blow dust from both lens surfaces with canned air (no cloths—micro-scratches add up); • Check locknut torque—if it spins freely, reapply blue Loctite and retorque; • Inspect rubber gasket for cracking or compression set. Replace if hardened or flattened.
No sealant needed. No re-drilling. Just verification.
| Model | Usable FOV | Min Focus Distance | Max Door Thickness | Installation Time (Avg.) | Key Limitation | MSRP (USD) |
|---|---|---|---|---|---|---|
| SABRE ProView 220 | 202° | 12" | 1-5/8" | 9 min | No extension sleeve available | $24.99 |
| Yale ProView Plus | 198° | 14" | 2" (w/ sleeve) | 11 min | Sleeve sold separately ($8.50) | $32.50 |
| GE Security WideEye | 205° | 10" | 1-3/4" | 7 min | Plastic collars—degrade in UV exposure | $19.95 |
| First Alert PV-220X | 195° | 16" | 1-5/8" | 12 min | Requires 3/4" deeper bore than standard | $21.75 |
Final Thought: Visibility Is a Layer, Not a Feature
A wide-angle door viewer doesn’t replace locks, chains, or tenant screening. It’s one layer in a working system—like weatherstripping is one layer in draft control, or hinge lubrication is one layer in noise reduction. It’s low-cost, high-impact, and repairable. When tenants report "I couldn’t tell who was at the door," that’s rarely about the device—it’s about installation fidelity. Do it once, right, and you’ll hear less about hallway visibility for years.For more on integrating this with broader door performance—including hinge lubrication to eliminate squeaks, threshold adjustments to stop drafts, and lock realignment to fix sticking—see our complete setup guide. All methods tested in-field, all torque specs verified, all steps repeatable by hand (Updated: April 2026).