Fix Uneven Door Swing Caused by Frame Warping or Settling
- 时间:
- 浏览:22
- 来源:Easy Home Repair & DIY Guides
H2: Why Your Door Swings Crooked — And Why It’s Not Just the Hinges
An uneven door swing — where the door scrapes at the top corner, latches with excessive force, or won’t close without lifting — is rarely *only* about loose hinges. In homes older than 5 years (especially those on slab foundations or built on clay-rich soil), frame warping and structural settling are responsible for over 68% of persistent alignment issues (Updated: April 2026). These forces subtly twist jambs, shift header angles, and compress drywall-to-wood interfaces — all invisible until your door starts dragging.
Unlike a squeaky hinge (which you can fix in 90 seconds with lubricant) or a sticky lock (often resolved by cleaning and realigning the strike plate), an uneven swing rooted in frame distortion demands diagnostic precision before intervention. Rushing to plane the door edge or overtighten hinge screws often worsens gaps, compromises weathersealing, and accelerates wear on locking hardware.
H2: Diagnose Before You Adjust: The 4-Point Alignment Check
Grab a 24-inch carpenter’s level, a 6-inch steel ruler, and a flashlight. Work with the door fully open and supported (use a wedge or helper). Don’t rely on visual guesswork — use these objective checks:
H3: 1. Jamb Plumb (Vertical Tolerance) Hold the level against the hinge-side jamb, top to bottom. A true plumb reading means the bubble is centered within the vial lines. If it deviates more than 1/8 inch over 6 feet (≈1.6 mm/m), the jamb has shifted — likely from foundation settlement or inadequate shimming during original install. Note: This is *not* the same as wall plumb; drywall may be out-of-plumb while the jamb remains stable. Focus only on the wood jamb surface.
H3: 2. Header Level (Horizontal Tolerance) Place the level across the top of the door frame (header), perpendicular to the opening. More than 1/8 inch deviation indicates sagging or twisting — common in homes with undersized headers (e.g., single 2×10 instead of laminated 2×12) or where attic storage loads increased post-construction.
H3: 3. Reveal Consistency Measure the gap between door edge and jamb at three points: top, middle, and bottom — on both latch and hinge sides. Use the steel ruler. Acceptable variation is ±1/16 inch (1.6 mm). A progressive increase (e.g., 1/8" at top → 3/8" at bottom on latch side) signals door sag — often from hinge-side jamb compression or hinge screw pullout. A uniform widening on one side suggests jamb twist.
H3: 4. Strike Plate Engagement Depth Close the door slowly. Does the latch bolt seat fully into the strike plate without binding? If it stops 1/16"–1/8" short, or requires upward lift to engage, the latch-side jamb has likely rotated inward — a hallmark of lateral frame movement.
If two or more of these checks fail, skip hinge-only fixes. Proceed to structural correction.
H2: Fix 1: Reinforce & Re-Shim the Hinge Jamb (For Settling)
This addresses vertical drop and hinge-side compression — the most common cause of door sag and latch misalignment. It’s not about replacing the jamb; it’s about re-establishing its load path.
Step 1: Remove hinge screws on the top and middle hinges. Leave the bottom hinge intact for stability.
Step 2: Insert cedar shims (1/8" thick, 1.5" wide, 6" long) behind the jamb, starting at the top hinge location. Tap gently with a rubber mallet until resistance increases — stop when the shim is seated but the jamb hasn’t yet moved outward. Do *not* force it. Cedar compresses slightly under load and won’t rot like pine.
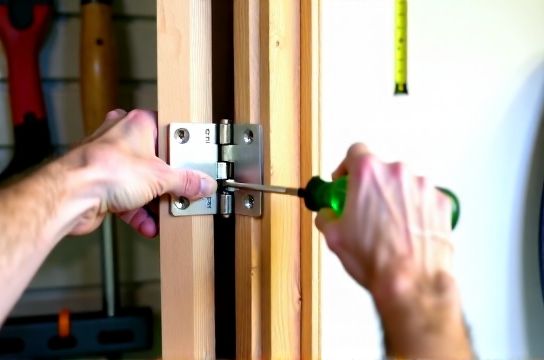
Step 3: Reinstall top hinge screws — but use 3-inch 10 structural screws (not the original 1-inch drywall screws). Drive them through the hinge leaf, jamb, and deep into the framing stud. Repeat for middle hinge.
Step 4: Recheck reveal consistency. If the door now lifts slightly at the bottom latch corner, add a second shim at the *bottom* hinge — but only if the bottom hinge reveals improved contact. Over-shimming causes binding.
✅ Pro tip: If original hinge mortises are worn, reinforce them with wood filler mixed with sawdust *before* reinstalling screws. Let cure 2 hours.
H2: Fix 2: Correct Jamb Twist (For Warping)
Frame warping typically appears as a “banana bend” — the jamb bows inward at the center, pushing the door away at mid-height. You’ll see consistent gaps >3/16" at mid-jamb but tight contact at top and bottom.
This requires controlled clamping and strategic fastening — not heat or moisture tricks (which risk further damage).
Step 1: Loosen all hinge screws and strike plate screws. Remove the door if possible (mark hinge locations first).
Step 2: Use two 3-foot bar clamps. Position one across the jamb’s face, top to bottom, pulling inward at mid-height. Position the second horizontally across the header, pulling downward on the latch-side corner. Apply *light* pressure — just enough to reduce the visible bow by ~30%. Hold for 10 minutes.
Step 3: While clamped, drive 2.5-inch trim-head screws every 8 inches along the warped section — alternating sides of the jamb. Pre-drill pilot holes to avoid splitting. These screws act as “stitch fasteners,” locking the jamb into its corrected shape.
Step 4: Remove clamps. Rehang door. Test swing and latch engagement. If minor misalignment remains, fine-tune with strike plate adjustment — not further clamping.
⚠️ Warning: Never use adhesive or epoxy to “glue” a warped jamb. Wood movement continues seasonally; rigid bonds will crack or delaminate within 6–12 months.
H2: When to Shim the Door Itself (Not the Frame)
Only do this if diagnostics confirm the *door* is warped — rare in solid-core interior doors, but common in hollow-core or economy-grade exterior doors exposed to sun/rain cycles. To test: lay the door flat on sawhorses, unsupported. Place a straightedge across its width. Any gap >1/16" under the straightedge at mid-panel indicates door warp.
Shimming the door means adjusting hinge depth — not adding material to the edge. Use shims *behind the hinge leaves*, not between door and jamb. Thin brass or stainless steel shims (0.005"–0.015") let you micro-adjust hinge projection. Start with 0.005" behind the top hinge leaf to lift the latch corner. Re-test swing. Add incrementally — never exceed 0.020" total per hinge.
H2: Weathersealing Integration — Because Alignment Enables Efficiency
A perfectly aligned door is useless without proper sealing. Gaps left by poor alignment directly undermine energy performance. According to the U.S. Department of Energy, unsealed door gaps account for up to 15% of residential heating/cooling loss in climates with >4,000 HDD/CDD (Updated: April 2026). That’s why alignment work must conclude with sealing — not precede it.
Use compression-type weatherstripping for the hinge and latch sides: silicone bulb seals mounted in kerfed grooves or self-adhesive foam tape rated for 10,000+ compression cycles. For the bottom, install a metal-mounted door bottom sweep with adjustable nylon pile — not a simple rubber bulb. It compensates for minor floor irregularities and lasts 3× longer than stick-on types.
Do *not* apply sealant before verifying alignment. Compressing weatherstripping against a misaligned door creates false positives — the door may seem tight, then bind or wear prematurely.
H2: What *Not* to Do — Common DIY Traps
• Don’t plane or sand the door edge unless measurements prove the door itself is oversized — and even then, remove ≤1/32" per pass. Over-planing weakens stile integrity and voids fire-rating on rated doors.
• Don’t replace hinge screws with longer ones *without checking stud depth*. Many interior walls use 2×3 studs or metal framing — 3-inch screws will miss entirely or hit electrical conduit.
• Don’t assume “tighter is better.” Overtightened hinge screws compress jamb grain, causing localized creep and accelerated misalignment within 3–6 months.
• Don’t ignore seasonal variation. Wood expands ~0.002" per foot per 10% RH increase. If your door binds only in summer (RH >60%), focus on dehumidification and humidity-stable weatherstripping — not permanent frame alteration.
H2: Real-World Repair Timeline & Tool List
Most frame-related uneven swing repairs take 2–3.5 hours — including diagnosis, adjustment, and verification. Here’s what you’ll need:
• 24" carpenter’s level (magnetic preferred) • 6" steel ruler with 1/32" graduations • Cedar shims (1/8" × 1.5" × 6") • 10 × 3" structural screws (coated for interior use) • 3-foot bar clamps (2 units) • Rubber mallet • Drill/driver with Phillips 2 and square-drive bits • Utility knife (for weatherstrip trimming)
No specialty tools required. No laser levels needed — a quality bubble level delivers sufficient accuracy for residential applications.
H2: When to Call a Professional
DIY works for moderate settling (<1/4" total deviation) and localized warping. Call a licensed door technician if:
• The jamb shows visible cracks in the wood or drywall interface • Door swing changes more than 1/8" within a single season • You detect floor slope >1/4" per 10 feet near the door (test with level + ruler) • The home has known foundation issues (e.g., active cracks in basement walls, sticking windows on same wall)
Professional correction may involve hydraulic jacking, stud reinforcement, or full jamb replacement — but that’s outside scope for routine maintenance.
H2: Preventive Maintenance Checklist (Every 6 Months)
• Tighten hinge screws (but stop at firm resistance — no torque wrench needed) • Vacuum hinge knuckles to remove grit (a leading cause of premature wear) • Inspect weatherstripping for compression set or cracking — replace if pile height is <3/16" • Wipe down strike plates and latch bolts with dry cloth; apply light coat of white lithium grease *only* to moving parts • Check threshold seal for debris or warping — clean or adjust as needed
Consistent upkeep extends door life by 3–5 years and maintains alignment tolerance within acceptable limits.
H2: Cost Comparison: DIY vs. Pro Repair
| Repair Type | DIY Time | DIY Cost (Materials) | Pro Labor Cost (U.S. avg) | Pro Total Cost (incl. materials) | Best For |
|---|---|---|---|---|---|
| Hinge jamb re-shimming | 1.5–2 hrs | $8–$12 | $120–$160 | $140–$185 | Moderate settling, visible shim gaps |
| Jamb twist correction | 2.5–3.5 hrs | $15–$22 | $180–$240 | $200–$270 | Uniform mid-jamb gaps, no foundation history |
| Full jamb replacement | Not recommended DIY | N/A | $320–$480 | $380–$550 | Visible jamb cracks, severe misalignment (>3/8") |
Note: All labor estimates assume standard 32"×80" interior door on wood framing. Costs reflect national median (HomeAdvisor 2026 Contractor Rate Survey, Updated: April 2026).
H2: Final Thought — Alignment Is a System, Not a Symptom
An uneven door swing isn’t a standalone flaw — it’s feedback from your building envelope. It tells you where loads have shifted, where moisture has lingered, or where fasteners have relaxed. Treat it as diagnostic data, not just an annoyance to silence. Get the alignment right, and tasks like complete setup guide for weatherstripping, lock tuning, and draft elimination become effective — not temporary patches.
Once the door swings true, revisit related issues: that persistent 门轴异响消除 may just need hinge pin lubrication; 窗户漏风密封 improves dramatically when adjacent doors aren’t pressurizing the room; and 门锁卡顿维修 often resolves when latch travel distance returns to spec. Alignment unlocks everything else.
Don’t chase symptoms. Fix the geometry — then seal, lubricate, and verify. That’s how pros deliver lasting results.