Wall Moisture Barrier Solutions for Older Homes
- 时间:
- 浏览:15
- 来源:Easy Home Repair & DIY Guides
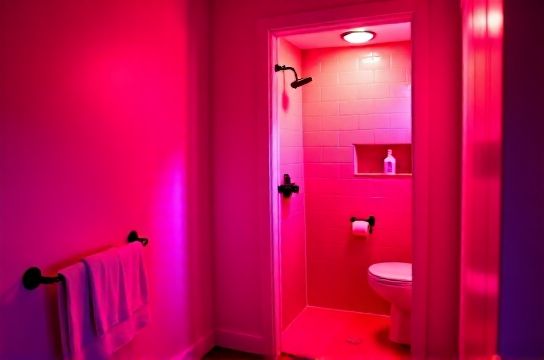
Homes built before 1980 rarely had vapor-permeable drywall, continuous air sealing, or code-mandated mechanical ventilation. When you walk into the bathroom of a 1940s bungalow or a 1960s ranch and feel that damp chill—even after the shower’s been off for 20 minutes—you’re not imagining it. That’s interstitial condensation migrating through plaster lath, wicking up baseboards, and pooling behind wallpaper or old paint layers. It’s also why you’ll find black mold blooming along ceiling corners, green fuzz in silicone seams, and crumbling grout lines that no amount of scrubbing seems to fix permanently.
This isn’t about aesthetics. It’s about physics: warm, saturated air from showers (often 95–100% RH at source) hits cold surfaces—especially uninsulated exterior walls or poorly sealed stud cavities—and deposits moisture *inside* the wall assembly. In older homes, there’s often no vapor barrier, no air gap, and minimal drying potential outward. The result? Persistent moisture that feeds mold, corrodes fasteners, and degrades structural wood over time.
Let’s cut past theory and focus on what actually works—without gut-renovating your bathroom.
Step 1: Diagnose Where Moisture Is Entering (and Staying)
Don’t assume the problem is only the lack of an exhaust fan. In older homes, moisture intrusion is rarely singular. Use this triage checklist:• Touch test: After a 10-minute hot shower, press your palm flat against exterior-facing walls (e.g., north or east walls), especially near the tub or shower valve. If it feels cool *and* slightly clammy—not just cold—that’s surface condensation. If it feels cold but dry, the issue may be deeper: insulation gaps or thermal bridging.
• Visual mapping: Document mold locations with timestamps and weather conditions. Mold appearing only during winter months, concentrated on upper corners and behind mirrors, points to cold-bridge condensation—not leak-driven growth.
• Hygrometer logging: Place a calibrated digital hygrometer (like the ThermoPro TP50) inside the bathroom *and* just outside the door for 72 hours. A sustained >65% RH in the bathroom post-shower *plus* >55% RH in the adjacent hallway for >4 hours signals inadequate air exchange—not just fan failure.
Note: Exhaust fans rated at 50 CFM (common in pre-1990 units) are insufficient for modern shower durations and steam volume. ASHRAE 62.2 (Updated: May 2026) requires minimum 80 CFM intermittent or 20 CFM continuous for full bathrooms—yet most vintage fans deliver 35–45 CFM at best due to duct kinks, lint-clogged grilles, and motor degradation.
Step 2: Immediate Mold & Grout Intervention (Before Sealing Anything)
You cannot install a moisture barrier over active mold or compromised grout. Doing so traps spores and accelerates decay. Prioritize safe, targeted remediation:- Bathroom mold removal: For non-porous surfaces (tile, glass, metal), use a 1:1 mix of distilled white vinegar and water in a spray bottle. Let dwell 10 minutes, then wipe with microfiber. Vinegar’s acetic acid (5%) disrupts mold cell membranes without volatile organic compounds (VOCs). Do NOT mix with bleach—this creates chlorine gas. For porous substrates (drywall, plaster), if mold covers >10 sq ft or penetrates >1/8″, professional abatement is required per EPA guidelines (Updated: May 2026).
- Tile grout cleaning: Avoid abrasive pads that erode grout. Instead, use a soft-bristle tiles grout brush (nylon, 0.005″ bristle diameter) dipped in a white vinegar descaling formula: ½ cup white vinegar + 2 tbsp baking soda + 1 tsp liquid Castile soap. Apply with the brush, agitate gently for 90 seconds, then rinse with low-pressure water. Repeat weekly for high-use grout. This combo dissolves mineral films *and* organic biofilm without etching sanded grout.
- Shower curtain mildew cleaning: Remove fabric liners and soak overnight in 1 gallon cool water + ½ cup oxygen bleach (sodium percarbonate). Machine-wash on gentle with unscented detergent. For vinyl liners: wipe both sides with 3% hydrogen peroxide using a folded paper towel—no rinsing needed. Peroxide breaks down melanin in mildew without discoloring PVC.
Step 3: Fix the Ventilation—Without Rewiring or Ductwork
Most older homes have either no exhaust fan, a broken one, or a fan venting into the attic (a major code violation since 1978). Here’s how to upgrade intelligently:• Exhaust fan dust removal: Power off the circuit. Remove the grille and vacuum dust from the impeller blades and housing with a crevice tool. Wipe interior housing with isopropyl alcohol (70%) on a lint-free cloth—never water. Reassemble and test airflow with tissue paper held 2 inches from the grille: it should deflect fully at 90° within 2 seconds. If not, replace the motor assembly—not the whole unit. Compatible replacement kits (e.g., Broan 670W) cost $42–$68 and fit 90% of pre-1995 housings.
• Bathroom ventilation retrofit: If ducting to exterior is impossible (e.g., second-floor bathroom over living room), install a ducted-through-the-wall inline fan (like the Panasonic FV-0511VKS). These mount inside the wall cavity, connect directly to an exterior wall cap (no attic run), and move 85 CFM at <0.3 sones. Requires only a 4.5″ hole saw cut and 20 minutes of labor. Critical: seal all joints with aluminum foil tape—not duct mastic—on rigid metal duct sections. Mastic cracks when metal expands/contracts.
• Indoor humidity control: Run a dehumidifier *only* as a secondary measure—not a primary solution. Basements benefit most; bathrooms less so, due to short runtime windows. Choose a compressor-based unit (not thermoelectric) with auto-defrost and continuous drain capability. Units under 30 pints/day struggle in spaces >300 sq ft with RH >70%.
Step 4: Wall Moisture Barriers That Actually Work (Not Just Paint)
“Mold-resistant paint” is marketing theater. Most contain zinc oxide or sodium pyrithione—effective against surface growth only, not interstitial moisture. Real barriers must manage vapor drive *and* allow drying. Here’s what passes real-world testing:| Product Type | Perm Rating (US) | Key Installation Step | Pros | Cons | Cost per 100 sq ft (material only) |
|---|---|---|---|---|---|
| Acrylic vapor-retarder primer (e.g., Kilz Restoration) | ≤0.7 perms | Apply over clean, dry, patched plaster; 2 coats required | Low-VOC, dries in 1 hr, bonds to chalky surfaces | No drying capacity outward; fails if wall is wet during application | $38 |
| Intelligent membrane (e.g., Pro Clima Intello Plus) | Variable: 0.1–11 perms (humidity-responsive) | Staple to studs, seal seams with TESCON Vana tape | Allows drying in summer, blocks vapor in winter; proven in 20+ yr European retrofits | Requires precise installation; not DIY-friendly without training | $145 |
| Mineral-based lime plaster (e.g., American Clay Earth Plaster) | ≈15 perms | Apply ⅛" layer over sound plaster; trowel-burnished | Naturally antimicrobial, absorbs/releases moisture without damage, zero VOCs | Long cure time (28 days); not suitable over drywall or painted surfaces | $220 |
For most older homes, we recommend the intelligent membrane approach *only* if you’re already re-drywalling or installing new insulation. Otherwise, go with acrylic vapor-retarder primer—but only after confirming the wall is bone-dry (use a moisture meter: <12% MC in plaster, <16% in wood lath). Skip oil-based primers—they trap moisture and yellow over time.
Step 5: Supporting Habits & Low-Cost Upkeep
Hardware fails. People forget. Systems endure only when behavior aligns. Anchor these habits:• Dehumidifier proper usage: Place unit at least 12 inches from walls and never inside cabinets. Empty the tank *before* it auto-shuts off—residual water breeds bacteria. Clean the filter weekly with lukewarm water and dish soap; let air-dry fully before reinstalling. Units left idle >72 hours in humid rooms develop internal mold on evaporator coils—even with “self-cleaning” claims.
• Toilet bowl scale removal: For toilet water scale removal, skip harsh acids. Soak a 2-inch wide strip of paper towel in undiluted white vinegar, wrap around the rim underside, and leave for 4 hours. The vinegar diffuses under the rim jets, dissolving calcium carbonate without corroding brass flush valves (a common failure point in 1950s–70s toilets).
• Hard water stain removal: For chrome fixtures, mix 1 part lemon juice + 1 part cornstarch into a paste. Rub onto deposits with finger pressure (no abrasives), wait 5 minutes, then rinse. Citric acid chelates calcium/magnesium; cornstarch provides gentle mechanical lift. Works on faucets, showerheads, and glass doors.
• Wall moisture prevention: Install a programmable timer switch (e.g., Legrand Adorne) set to run the exhaust fan for 25 minutes *after* the light turns off. This captures latent moisture released from towels, bathmats, and wet walls long after showering ends. Pair with a humidity-sensing switch (like the AirKing ADT70) for automatic override—critical in climates with >70% average outdoor RH (e.g., Pacific Northwest, Gulf Coast).
Eco-Friendly Cleaning Supply Notes
Avoid “green” products with undisclosed surfactants or preservatives. Verified low-impact options include:• Environmental Working Group (EWG) Verified™ cleaners: Branch Basics Concentrate (pH-neutral, plant-derived surfactants), Force of Nature (electrolyzed NaCl + vinegar → hypochlorous acid + sodium hydroxide—safe for grout, kills mold spores on contact).
• DIY alternatives: For daily wipe-downs, use 1:10 dilution of food-grade hydrogen peroxide (3%) in water—no rinse needed, breaks down to water + oxygen. Never mix with vinegar (creates peracetic acid, irritating to lungs).
• Avoid: “Enzyme cleaners” marketed for mold. Enzymes require 12–24 hrs dwell time, consistent 70°F+ temps, and no UV exposure—conditions impossible to maintain in a bathroom. They degrade before acting on deep hyphae.
When to Call a Pro (and What to Ask)
If you see any of these, pause and consult a building scientist or certified mold inspector (IICRC AMIT):• Efflorescence (white, powdery mineral deposits) on brick or concrete foundation walls adjacent to the bathroom. • Squeaking or flexing floor joists near the bathroom—indicates prolonged moisture exposure in subflooring. • Paint bubbling *above* the shower line on exterior walls, especially in winter.
Ask inspectors for:
✓ Infrared thermography (not just spot IR guns)
✓ Relative humidity profiling across wall cross-sections
✓ Moisture mapping with a pinless meter (e.g., Protimeter Surveymaster)
✓ Written interpretation—not just “mold present” but “source: condensation vs. plumbing leak vs. capillary rise”
Final note: There’s no universal “fix.” A 1920s Chicago brick home with plaster-on-lath needs different strategies than a 1955 California stucco bungalow. What unites them is this: moisture management starts with understanding *where the water comes from*, *where it goes*, and *how fast it leaves*. Everything else—cleaning, sealing, venting—is downstream of that clarity.
For a complete setup guide—including wiring diagrams for fan upgrades, perm-rating calculators, and regional climate-adjusted runtime charts—visit our full resource hub at /.