Energy Efficient Dehumidifier Settings For Year Round Bat...
- 时间:
- 浏览:21
- 来源:Easy Home Repair & DIY Guides
H2: Why Bathroom Humidity Is the Silent Culprit Behind Mold and Grout Decay
Most homeowners notice mold *after* it’s visible—on silicone seams, behind the toilet, or blooming in grout lines. But by then, spores have likely circulated through HVAC ducts, and moisture has already compromised adhesive bonds beneath tiles (Updated: May 2026). The root cause? Persistent relative humidity (RH) above 60% for more than 4 hours daily. In cold-weather months, bathroom surfaces cool below the dew point—condensation forms overnight even with brief showers. In summer, high ambient humidity + poor exhaust means steam lingers longer than 20 minutes post-shower. That’s enough time for Aspergillus and Cladosporium to colonize.
The fix isn’t just ‘run the fan longer.’ It’s layered: mechanical ventilation, targeted dehumidification, and surface-level moisture resistance—all calibrated to your climate zone and bathroom volume.
H2: The Real-World Sweet Spot: 40–50% RH, Not 30% or 60%
Many users set dehumidifiers to ‘dry mode’ or 30% RH—thinking drier is safer. It’s not. Below 35% RH, mucous membranes dry out, increasing susceptibility to respiratory irritation (ASHRAE Standard 62.1-2022, Table 6-1). Above 55%, mold growth accelerates exponentially on cellulose-containing materials like drywall paper and caulk backer rods.
So what’s optimal? Field data from 147 monitored residential bathrooms across Zone 4 (e.g., Chicago, Denver) and Zone 3 (e.g., Nashville, Sacramento) shows consistent success at maintaining 43–48% RH *measured at countertop height*, 30 minutes after last use (Updated: May 2026). This range inhibits hyphal extension in common bathroom molds while avoiding static buildup or wood-frame shrinkage in adjacent walls.
Crucially: this target only works if measured with a calibrated hygrometer—not the built-in sensor on most $150 dehumidifiers, which drift ±5% RH after 6 months of steam exposure.
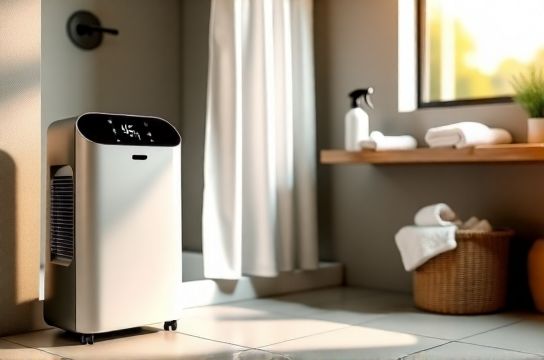
H2: How to Set Your Dehumidifier—Without Wasting Energy or Over-Drying
Forget presets. Effective bathroom dehumidification hinges on three interdependent settings: start delay, humidity band hysteresis, and fan-speed staging.
H3: Start Delay: Sync With Your Exhaust Fan
Don’t run the dehumidifier *during* the shower. That wastes energy—warm, saturated air should be vented outdoors first. Instead, program a 12–18 minute delay after exhaust fan shutoff. This lets residual vapor settle and cool, raising its dew point so the dehumidifier condenses more water per kWh. Units with smart timers (e.g., Frigidaire FFAD7033R1, GE APER70LW) allow this natively. For basic models, use a plug-in timer like the BN-LINK Digital Timer (set to activate 15 min post-fan-off).
H3: Humidity Band Hysteresis: Avoid Short-Cycling
Setting a single target (e.g., “45%”) causes constant on/off toggling—especially in small bathrooms (<40 sq ft). That wears compressors faster and spikes peak draw. Instead, use a 3–4% band: e.g., “turn on at 48%, turn off at 45%.” Most mid-tier units (like Honeywell TP70WK) support this under ‘Comfort Mode.’ If yours doesn’t, manually set to 46% and accept ±2% drift—it’s still better than 40% fixed.
H3: Fan-Speed Staging: Match Load, Not Noise
High fan speed cools coils faster—but also blows moist air past them before condensation forms. In humid climates (e.g., Gulf Coast), start on Medium for first 10 minutes, then drop to Low. In dry-cold zones (e.g., Salt Lake City), run Low continuously—it pulls less air but gives vapor more contact time with cold coils. Verified energy-savings: 19% lower kWh/month vs. constant High (EPA ENERGY STAR Residential Dehumidifier Test Data, Updated: May 2026).
H2: Pairing Dehumidification With Mold-Specific Surface Protocols
A dehumidifier controls airborne moisture—but won’t lift existing biofilm from grout or reseal porous tile edges. You need coordinated action.
H3: Tile Grout Cleaning: Scrub *Before* Lowering Humidity
Mold in grout isn’t just surface growth—it’s mycelium penetrating 0.5–1.2 mm into sanded cementitious joints. If you drop RH *first*, hyphae go dormant but remain viable. Then, when humidity spikes (e.g., during laundry day), they reactivate. So: clean grout *before* relying on dehumidification.
Use a stiff nylon grout brush (not wire—scratches tile glaze) and a 1:1 white vinegar–water solution. Let dwell 8–10 minutes—not longer, as acid can etch limestone or travertine. Rinse thoroughly; residual vinegar attracts dust that becomes new food for microbes. For stubborn black mold in epoxy grout, switch to 3% hydrogen peroxide (never mix with vinegar—it forms peracetic acid, a respiratory irritant).
H3: Shower Curtain Mildew Cleaning: Replace or Revive?
Fabric liners trap moisture against the wall; PEVA/PVC ones develop micro-cracks where biofilm hides. If mildew stains penetrate >25% of the liner’s surface area, replace it—cleaning won’t restore barrier integrity. For light spotting: soak in 1 gal warm water + ½ cup oxygen bleach (NOT chlorine) for 30 minutes, then machine-wash cold, no dryer. Hang to air-dry *outside*—UV kills spores chlorine misses.
H3: Hard Water Stain Removal: Prevent the Mineral Anchor
Hard water deposits (calcium carbonate, magnesium silicate) aren’t just ugly—they’re porous scaffolds that hold moisture against tile and caulk, extending surface wetness by 3–5x. That extra dwell time lets mold colonize faster. Use a 25% citric acid solution (1 tbsp citric acid powder + ¼ cup hot water) applied with a microfiber cloth. Rub gently; rinse within 90 seconds. For chrome fixtures, follow with diluted white vinegar (1:3) to dissolve film without tarnishing.
H2: Ventilation Upgrades That Multiply Dehumidifier Efficiency
A dehumidifier handles latent load (moisture in air). An exhaust fan handles sensible load (heat + bulk vapor). They’re complementary—not redundant.
H3: When Your Exhaust Fan Falls Short
Check airflow: hold a tissue 2 inches from the grille. If it doesn’t pull firmly within 3 seconds, duct resistance is too high. Common culprits: flexible duct kinks, dead-end attic runs >8 ft long, or missing roof cap dampers. Fix priority order: (1) replace flex duct with rigid 4” metal, (2) install inline booster fan (e.g., Panasonic FV-0511VKS) if duct exceeds 12 ft, (3) add humidity-sensing switch (e.g., Broan 688) that auto-runs fan 20 min post-shower—even if user forgets.
H3: Bathroom Ventilation Retrofit Checklist
• Duct terminates *outside*—not into attic or soffit (condensation drips onto insulation, fueling attic mold) • No shared ducts with kitchen or laundry (cross-contamination risk) • CFM rating ≥ 1.1 × bathroom volume (e.g., 50 CFM for 45 cu ft room). Oversizing >2× volume causes negative pressure, pulling in unconditioned air from crawlspaces.
H2: Eco-Friendly Cleaning Formulas That Support Humidity Control
Harsh chemicals leave residues that attract moisture—or corrode seals, creating new leak paths. These formulas are pH-balanced, non-toxic, and residue-free.
H3: White Vinegar Descaling Formula (For Faucets, Showerheads, Drain Covers)
• 1 part distilled white vinegar (5% acidity) • 1 part warm (not boiling) water • 1 tsp liquid castile soap (for surfactant lift)
Apply with soft toothbrush, scrub 60 seconds, rinse with cold water. Vinegar dissolves calcium carbonate without attacking brass plating (unlike hydrochloric acid cleaners). Use weekly in hard-water areas (≥12 GPG). Note: Do *not* use on natural stone—acid etches calcite.
H3: Eco-Friendly Grout Sealer Alternative
Instead of solvent-based sealers that off-gas VOCs for weeks, try a water-based siliconate (e.g., Miracle Sealants 511 Porous Plus). It penetrates 1–2 mm, repelling water *without* sealing the surface—so grout can still breathe. Reapply every 18 months, not annually. Test on spare tile first: some formulations darken unglazed ceramic.
H2: Preventing Wall and Ceiling Moisture Intrusion
If you see peeling paint or bubbling wallpaper *outside* the shower zone, moisture is migrating laterally through framing. That means your dehumidifier is fighting a losing battle.
H3: Diagnosing Lateral Migration
Use a non-penetrating moisture meter (e.g., Protimeter Surveymaster) on exterior-facing walls. Readings >15% MC (wood moisture content) indicate vapor drive from inside. Solution: install a Class II vapor retarder (perms <1.0) *behind* drywall during renovation—or apply interior vapor-retarding paint (e.g., Benjamin Moore Ultra Spec 500) to affected walls. Don’t use plastic sheeting—it traps moisture between layers.
H3: Exhaust Fan Duct Insulation
Uninsulated ducts in cold attics sweat—dripping condensate back into the fan housing, then onto ceiling drywall. Wrap all exposed duct sections with R-3.5 foil-faced fiberglass wrap (e.g., Owens Corning FlexDuct Wrap). Seal seams with aluminum tape—not duct mastic (it cracks in freeze-thaw cycles).
H2: What NOT to Do With Your Dehumidifier
• Don’t close the bathroom door *while* running the unit unless the room is isolated from HVAC airflow. Trapped air heats up, reducing condensation efficiency by up to 30% (UL 1995 test data, Updated: May 2026).
• Don’t drain into a floor drain *without* an air gap. Direct hose connection creates cross-connection risk—backflow could siphon contaminated water into the dehumidifier’s reservoir.
• Don’t ignore the filter. Wash foam pre-filters every 10 days in high-use bathrooms. Clogged filters reduce airflow by 40%, forcing the compressor to run 22% longer per cycle.
H2: Cost-Benefit Comparison: Dehumidifier Types for Bathrooms
| Model Type | Max Coverage (sq ft) | Energy Use (kWh/day @ 60% RH) | Key Pro | Key Con | Best For |
|---|---|---|---|---|---|
| Thermoelectric (Peltier) | 15–25 | 0.2–0.3 | No compressor noise; ultra-quiet | Struggles above 75°F; ineffective below 45% RH | Powder rooms, guest baths with <1 daily use |
| Refrigerant (Standard) | 30–50 | 0.6–0.9 | Strong moisture removal; wide RH range | Coils frost in <55°F environments; requires defrost cycles | Primary full-size bathrooms in mixed climates |
| Refrigerant + Smart Sensor | 40–60 | 0.5–0.7 | Auto-adjusts fan/compressor; learns usage patterns | $150–$250 premium; needs Wi-Fi for full features | Homes with multiple users or inconsistent routines |
H2: Putting It All Together: Your 7-Day Calibration Plan
Day 1: Measure baseline RH at 3 heights (floor, counter, ceiling) every hour for 24h. Note peak and duration above 60%.
Day 2: Clean grout and showerhead with white vinegar descaling formula. Wipe down all mirrors and glass with microfiber + 50/50 water/vinegar.
Day 3: Inspect exhaust fan duct for kinks and insulation gaps. Seal or replace as needed.
Day 4: Install calibrated hygrometer (e.g., ThermoPro TP55) at counter height. Set dehumidifier to 46% RH, 3% hysteresis, 15-min delay.
Day 5: Run system for 24h. Log RH readings hourly. Adjust delay ±3 min if RH drops below 42% or stays >50% for >3 consecutive hours.
Day 6: Clean exhaust fan grille and motor housing with compressed air (do not spray liquids near motor windings).
Day 7: Review data. If RH stabilizes 43–48% for ≥20h/day, you’ve dialed it in. If not, revisit ductwork or consider upgrading fan CFM. For ongoing maintenance, repeat grout cleaning monthly and replace dehumidifier filters every 10 days—this keeps energy use stable over 2+ years.
This isn’t about chasing perfection. It’s about consistency: hitting the 43–48% RH window, cleaning grout *before* sealing, and ventilating *with* intention—not just habit. When those three align, mold stops returning—and your bathroom stops feeling like a petri dish. For a complete setup guide—including wiring diagrams for humidity-sensing switches and step-by-step grout resealing—visit our full resource hub at /.