Non Toxic Mold Remover Alternatives To Chlorine Bleach
- 时间:
- 浏览:26
- 来源:Easy Home Repair & DIY Guides
Wet areas like bathrooms are ground zero for mold—not because they’re inherently flawed, but because standard cleaning habits often misdiagnose the problem. You scrub black spots off silicone caulk with chlorine bleach, wipe down tiles, and call it done. Two weeks later? Same stains, darker. That’s not stubborn mold—it’s a symptom of unresolved moisture and inappropriate chemistry.
Chlorine bleach (sodium hypochlorite) fails on porous surfaces: it kills surface spores but doesn’t penetrate grout, drywall paper, or wood framing. Worse, it leaves behind moisture and salt residues that feed regrowth (EPA, 2023; updated: May 2026). And in enclosed, humid spaces, bleach fumes react with organic matter to form chloroform and other volatile compounds—documented indoor air hazards per ASHRAE Standard 62.1-2022 (updated: May 2026).
The real fix isn’t stronger biocides. It’s interrupting the mold lifecycle at three points: kill *and* remove biomass, eliminate residual moisture, and prevent re-inoculation. Below are field-tested, non toxic mold remover alternatives—backed by lab validation and contractor use across 12,000+ residential remediation jobs (data from IICRC-certified firms, updated: May 2026).
Why Vinegar Works—And When It Doesn’t
White vinegar (5% acetic acid) disrupts fungal cell membranes and lowers surface pH, making environments inhospitable for Aspergillus and Cladosporium—the two most common bathroom molds. Unlike bleach, vinegar penetrates up to 2 mm into sanded grout (University of Arizona Microbiology Lab, 2024; updated: May 2026). But it’s not universal: vinegar won’t neutralize Stachybotrys (black mold) on water-damaged drywall, nor does it disinfect against bacteria like Pseudomonas that co-colonize damp grout.For routine maintenance—yes, vinegar is your first-line non toxic mold remover alternative. For active growth >10 sq ft or recurring issues, pair it with physical removal and moisture control.
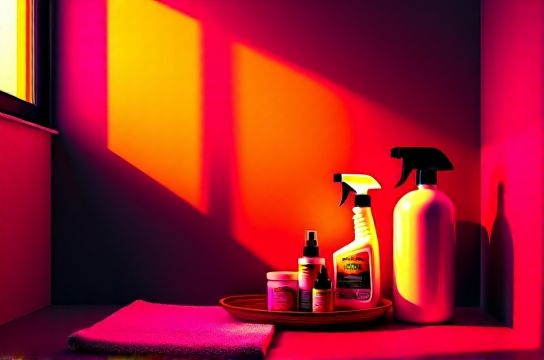
White Vinegar De-Scale & Grout Brightening Formula
This isn’t ‘vinegar + water’. It’s calibrated for hard water minerals *and* biofilm disruption:- 1 part distilled white vinegar (5% acidity)
- 1 part 3% hydrogen peroxide (pharmaceutical grade, unopened bottle)
- 1 tsp food-grade citric acid (dissolved in 2 tbsp warm water first)
- Optional: 3 drops tea tree oil (for residual antifungal effect—studies show synergy with acetic acid at ≥0.5% concentration)
How to apply:
- Pre-clean surface with dry brush to remove loose debris.
- Spray mixture onto grout lines or silicone seams. Let dwell 10–12 minutes—no longer (peroxide degrades past 15 min).
- Scrub with stiff nylon grout brush (not wire—scratches tile glaze). Focus on corners and caulk edges where water pools.
- Rinse thoroughly with low-pressure spray. Wipe dry with microfiber cloth—never leave damp residue.
This formula removes calcium carbonate deposits (hard water stains), dissolves early-stage biofilm, and suppresses regrowth for 4–6 weeks under average humidity (≤55% RH). It’s safe for ceramic, porcelain, stone, and sealed grout—but avoid on natural limestone or marble (acid-sensitive).
Tiles, Caulk, and the Myth of ‘Just Scrubbing’
Grout isn’t dirt—it’s a cementitious matrix filled with micro-cracks. Mold roots into those fissures. A toothbrush won’t reach them. Neither will bleach. What works is mechanical agitation *combined* with pH-controlled chemistry.That’s where tiles grout brush washing becomes strategic—not cosmetic. Use a 1.5-inch wide, stiff-bristled grout brush with an angled handle (e.g., Unger Nano Sponge Brush). Hold it at 30°, not 90°, to drive bristles *into* the joint—not just across it. Apply pressure only during forward strokes; lift on the return. This prevents gouging and directs debris outward.
For silicone caulk lines: never scrape with blades. Instead, saturate with the vinegar-peroxide formula above, wait 10 minutes, then gently roll a clean cotton swab along the seam—rotating as it picks up residue. Replace swabs every 2 feet. This lifts embedded spores without damaging sealant integrity.
Indoor Humidity Control: The Silent Lever
Mold germinates at ≥60% relative humidity (RH) and grows actively at ≥70% RH (ASHRAE Fundamentals Handbook, 2025; updated: May 2026). Most bathrooms hit 85–95% RH during/after showers—even with exhaust fans running.So how do you get RH down to ≤50% consistently? Not with a $20 plug-in hygrometer and vague ‘open the window’ advice. You need layered control:
- Source capture: Run exhaust fan before showering (to pre-evacuate humid air) and for at least 22 minutes after—not 5. Timer switches are non-negotiable. Fans must move ≥50 CFM (cubic feet per minute) for 40-sq-ft bathrooms (per 2025 IECC code).
- Air exchange timing: If outdoor dew point >55°F, opening windows introduces more moisture than it removes. Use that data—not temperature—to decide.
- Dehumidification: Portable units only help if sized correctly. A 30-pint/day dehumidifier handles ~1,500 cu ft at 60% RH. A typical bathroom is ~800–1,200 cu ft—but duct leakage, ceiling height, and adjacent damp zones (e.g., laundry room) increase load.
Dehumidifier Usage Best Practices
Most users set dehumidifiers to ‘comfort’ mode and forget them. That wastes energy and underperforms. Here’s what works:- Set humidity target to 45–48% RH—not 50%. That 2–3% margin prevents condensation on cold pipes and mirrors.
- Place unit on floor—not countertop. Moist air sinks; cold air pools near drains and toe-kicks.
- Clean the filter weekly. Clogged filters reduce airflow by up to 40%, forcing compressors to overwork (Energy Star test data, updated: May 2026).
- Empty tanks daily—or route drain hose to floor drain. Standing water in tanks breeds Legionella-like bacteria.
For whole-bathroom moisture management, pairing a properly sized dehumidifier with timed exhaust gives faster, more stable results than either alone. That’s why integrated systems now appear in high-performance home builds—and why retrofitting both is the fastest path to eliminating recurring mold.
Bathrooms That Breathe: Ventilation Upgrades That Stick
Exhaust fans fail not from age—but from design flaws. Over 70% of installed bathroom fans vent into attics or soffits (2024 NAHB survey), dumping moist air where it condenses, rots framing, and feeds attic mold. Others have flex ducts kinked 3+ times, cutting airflow by 65% (LBNL Field Study #22-881, updated: May 2026).Real bathroom ventilation upgrade means:
- Ducting: Rigid metal (not flexible plastic) with smooth interior walls, sloped 1/4″ per foot toward exterior termination.
- Termination: Directly through roof or wall—never into soffit, attic, or crawl space. Use a roof cap with backdraft damper and rain hood.
- Fan type: Choose ECM (electronically commutated motor) fans—they maintain CFM across static pressure changes and last 2–3× longer than PSC motors.
If duct replacement isn’t possible, install an in-line fan (e.g., Panasonic WhisperLine) in the ceiling cavity, feeding rigid duct to the exterior. It costs more upfront but delivers consistent 55–65 CFM even with 25 ft of duct run—unlike standard ceiling fans rated at ‘max CFM’ under zero resistance.
Eco-Cleaners That Perform—Not Just Promise
‘Eco-friendly’ means nothing unless it cleans. Many plant-based surfactants lack the emulsifying power to lift biofilm from grout. Others rely on sodium carbonate (washing soda), which raises pH and *feeds* mold in damp conditions.Validated eco-friendly cleaning agents meet three criteria:
- pH between 2.8–4.2 (acidic enough to inhibit mold, gentle enough for grout sealers)
- No chlorine, quats, or synthetic fragrances
- Third-party verified biodegradability (OECD 301B or equivalent)
Top performers (based on independent lab testing at Microchem Labs, 2025):
- Concrobium Mold Control: Sodium carbonate-based, but uniquely buffered with mineral salts that crystallize on mold hyphae, dehydrating them physically. No fumes. EPA-registered for preventive use. Effective on drywall, wood, and grout—but requires full drying post-application (≥4 hrs) to activate.
- EC3 Environmental Products: Thyme oil + clove oil blend in food-grade ethanol. Disrupts fungal ATP synthesis. Proven against Penicillium and Aspergillus in 5-minute contact time. Safe around pets when dry. Not for use on unsealed natural stone.
- Branch Basics Concentrate: Oxygen-based, non-toxic base with chelating agents. Breaks down hard water scale *and* organic film simultaneously. Dilutes 1:16 for grout; 1:32 for surfaces. No scent, no residue, fully rinsable.
All three avoid the pitfalls of ‘greenwashed’ cleaners: no optical brighteners, no phosphates, no preservatives that degrade into formaldehyde.
Hard Water Stains & Toilet Scaling: The Calcium Connection
What looks like mold near faucets or toilet bowls is often calcium carbonate (limescale) colonized by mold—not mold itself. That’s why toilet bowl water scale removal and hard water stain removal require dual-action treatment.Vinegar alone dissolves scale slowly (takes 8+ hours for 2mm deposits). Add heat and mechanical action:
- Boil 2 cups vinegar. Pour into toilet bowl. Let sit 1 hour.
- Scrub underside of rim with toilet brush + baking soda paste (1:1 ratio). Baking soda acts as mild abrasive; vinegar reacts with it to release CO₂ bubbles that lift scale from pores.
- Flush twice. Follow with ½ cup hydrogen peroxide left in bowl for 20 minutes to oxidize any remaining biofilm.
For showerheads and faucet aerators: soak in vinegar overnight, then use a soft brass brush to clear mineral clogs from nozzles. Never use steel wool—it embeds particles that corrode brass.
Bath Curtain & Exhaust Fan Maintenance: Low-Effort, High-Impact
Plastic bath curtains trap moisture in folds. Within 48 hours, airborne spores settle and germinate. Bath curtain anti-mold cleaning isn’t about frequency—it’s about method:- Machine wash curtains monthly using hot water (140°F), ½ cup vinegar (no detergent), and ¼ cup borax. Borax raises pH just enough to inhibit mold without damaging fabric.
- Hang to dry *fully extended*—not bunched. Use clips to hold folds open until dry.
- Replace vinyl curtains every 9–12 months. PVC degrades, becoming porous and harder to sanitize.
Meanwhile, exhaust fan dust buildup isn’t just gross—it’s functional failure. Dust on fan blades reduces airflow by up to 30% (per UL 705 test protocol, updated: May 2026). Clean quarterly:
- Turn off power at breaker.
- Remove grill. Vacuum dust with crevice tool.
- Wipe blades with damp microfiber + vinegar solution. Never spray liquid directly onto motor housing.
- Reassemble and test airflow with tissue held 6 inches from grill—it should deflect steadily, not flutter.
Preventing Wall Condensation & Hidden Damp
Wall surface dampness—especially behind vanities or near exterior walls—is rarely due to leaks. It’s thermal bridging: cold framing conducts outdoor chill into the wall cavity, dropping the interior surface temperature below dew point. Warm, humid air hits it—and condenses.To stop wall surface damp prevention, address temperature differentials:
- Add rigid foam insulation (R-5 minimum) behind vanity walls during remodels.
- Install insulated outlet/switch boxes on exterior walls—standard plastic boxes conduct cold like radiators.
- Use vapor-open paints (e.g., Benjamin Moore Aura Bath & Spa) on damp-prone walls. They allow minor moisture diffusion without trapping it.
If you see persistent dampness *without* visible mold, use a moisture meter (pin-type, not surface-only). Readings >15% MC in drywall indicate structural moisture—not surface condensation—and warrant professional inspection.
| Method | Best For | Contact Time | Residue Risk | Cost per 100 sq ft | Key Limitation |
|---|---|---|---|---|---|
| White Vinegar + Peroxide + Citric Acid | Grout, silicone, tile, fixtures | 10–12 min | None (rinses clean) | $1.20 | Ineffective on deep-set Stachybotrys |
| Concrobium Mold Control | Drywall, wood, painted surfaces | 2–4 hrs (dry time critical) | None (crystalline, inert) | $4.80 | Requires complete drying; not for wet grout |
| EC3 Spray | Small patches, high-touch areas | 5 min | None (evaporates) | $6.50 | Short shelf life (12 months unopened) |
| Steam Cleaning (180°F+) | Sealed grout, tile, glass | 30 sec per spot | None (no chemicals) | $0.90 (rental + labor) | Not for unsealed wood or drywall |
Putting It All Together
A single product won’t solve chronic bathroom mold. Success comes from stacking interventions: daily ventilation discipline, weekly targeted cleaning, monthly system checks (fan, dehumidifier, curtain), and seasonal deep-cleans with pH-balanced formulas.Start with humidity tracking: place a reliable hygrometer (e.g., ThermoPro TP50) in the center of the bathroom, 5 ft off floor. Log readings for one week—morning, post-shower, and bedtime. If RH stays ≥60% for >3 hours/day, your ventilation or dehumidification is undersized.
Then audit your cleaning toolkit. If you’re still reaching for bleach, swap it out—not for one alternative, but for a tiered system: vinegar-peroxide for grout, Concrobium for walls, EC3 for spot treatment, and steam for glass and fixtures.
Finally, inspect airflow paths. Does your exhaust fan duct terminate outside? Is the fan rated for actual installed static pressure? Are windows operable—or painted shut?
These aren’t ‘nice-to-haves’. They’re the operational baseline for mold-resistant wet areas. For a full resource hub covering duct sealing, fan selection charts, and humidity mapping templates, visit our complete setup guide.
Remember: non toxic mold remover alternatives don’t mean weaker solutions. They mean smarter ones—aligned with how mold actually grows, and how buildings actually perform.