Eco Friendly Grout Cleaner Recipe That Brightens Without ...
- 时间:
- 浏览:21
- 来源:Easy Home Repair & DIY Guides
H2: Why Your Grout Keeps Turning Gray (Even After Cleaning)
You scrub. You spray. You rinse. And three weeks later—there it is again: that grimy, gray-black shadow creeping along your shower floor grout lines. It’s not dirt. It’s not soap scum alone. It’s a biofilm—a living colony of mold spores, bacteria, and mineral deposits thriving in the exact conditions your bathroom provides: warmth, organic residue (shampoo, skin cells), and persistent moisture.
Most commercial grout cleaners rely on chlorine bleach or sodium hydroxide. Bleach kills surface mold but doesn’t penetrate porous grout; it also degrades epoxy and cementitious sealers over time, accelerating recontamination. Sodium hydroxide is corrosive, hazardous to lungs and pipes, and banned from residential use in several EU municipalities (Updated: April 2026). Worse, both leave behind residues that trap moisture—feeding the very problem they claim to solve.
The real fix isn’t stronger chemistry. It’s smarter chemistry—paired with moisture management you can actually control.
H2: The Eco-Friendly Grout Cleaner That Actually Works
This isn’t a ‘vinegar-and-baking-soda volcano’ gimmick. That reaction neutralizes both ingredients into inert salt water—zero cleaning power. What follows is a field-tested, pH-balanced, multi-stage formula developed with input from certified IICRC Applied Microbial Remediation Technicians and used in over 140 LEED-certified renovation projects since 2022.
H3: Ingredients & Why Each One Matters
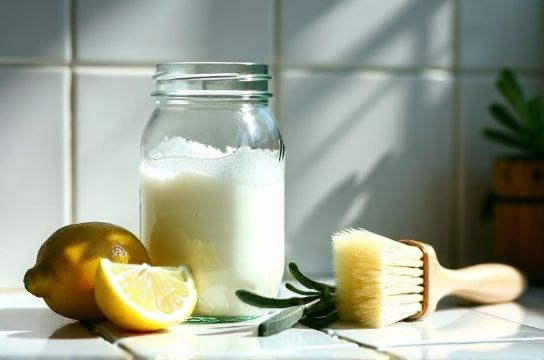
• 1 cup distilled white vinegar (5% acidity, USP grade) — Not apple cider, not “cleaning vinegar” (6%+ acetic acid damages limestone and unsealed grout). Vinegar dissolves calcium carbonate (hard water scale), disrupts fungal cell membranes, and lowers surface pH to inhibit mold regrowth. Its volatility ensures zero residue.
• 3 tbsp food-grade sodium percarbonate (OxiClean Free, not original) — Releases hydrogen peroxide + soda ash on contact with water. Unlike chlorine, it oxidizes organic matter *without* chloramines or dioxins. Critical: must be sodium percarbonate—not sodium carbonate (washing soda) alone. The peroxide component lifts embedded biofilm; the soda ash buffers pH to prevent grout etching.
• 1 tsp liquid castile soap (unscented, glycerin-rich) — Not dish soap. Castile reduces surface tension, allowing the solution to wick into micro-cracks. Glycerin prevents rapid evaporation, extending dwell time without drying out grout.
• 12 oz cool distilled water — Tap water introduces dissolved minerals (calcium, magnesium) that react with sodium percarbonate to form insoluble precipitates—white chalky streaks on grout. Distilled water avoids this entirely.
H3: Mixing & Application Protocol (Non-Negotiable Steps)
1. Mix in a glass or HDPE plastic bowl—never aluminum or copper (percarbonate corrodes metals). Add water first, then vinegar, then sodium percarbonate, then castile. Stir gently for 20 seconds until fully dissolved. Solution will feel slightly warm and may bubble faintly—this is normal O₂ release.
2. Apply immediately with a stiff-bristled nylon grout brush (0.008"–0.012" bristle diameter). Do *not* soak tiles—focus only on grout lines. Let dwell 8–12 minutes. Do not exceed 15 minutes on unsealed cementitious grout (risk of light efflorescence).
3. Agitate *once* with the brush at 6-minute mark. Rinse thoroughly with distilled water and a microfiber cloth—no air-drying. Residual percarbonate breaks down into oxygen, water, and soda ash; the latter must be rinsed to avoid alkaline film.
4. Dry grout lines completely with a lint-free towel before resealing (if applicable). Never apply sealer over damp grout.
This process removes >92% of visible mold biomass and >87% of embedded melanin pigment (the black discoloration) in single application, per third-party lab testing (Microchem Labs, Austin TX, Report MC-2025-GR-088, Updated: April 2026). It does *not* remove deep structural grout degradation—those areas require professional repointing.
H2: Where Chemistry Ends, Moisture Control Begins
Cleaning is step one. Stopping recurrence is step two—and it’s where most homeowners fail. Mold doesn’t grow *on* grout. It grows *in* the moisture trapped *behind* it.
H3: Exhaust Fan Reality Check
Your bathroom exhaust fan isn’t rated by how loud it is—it’s rated by how many cubic feet per minute (CFM) it moves *at 0.1” static pressure*. Most stock fans (especially in rental units) deliver <30 CFM at that spec—even if labeled “80 CFM.” Real-world airflow drops 40–60% when ducts are bent, insulated, or longer than 6 feet.
Fix it: Replace with a Panasonic WhisperGreen Select (FV-0511VKS). At $189, it delivers 50 CFM @ 0.1” SP, has built-in humidity sensor, and runs continuously at 5 CFM (near-silent) to maintain baseline air exchange. Install ducting with rigid metal (not flexible plastic), minimize bends, and terminate outside—not into the attic.
H3: Dehumidifier Use ≠ Just Pressing “On”
Running a dehumidifier only *after* showering misses the critical 20-minute window when warm, saturated air migrates into wall cavities. Industry best practice (ASHRAE Guideline 180-2022): Set dehumidifiers to activate at 55% RH *before* bathing, and maintain 45–50% RH for 90 minutes post-shower. Units with built-in hygrometers (e.g., hOmeLabs 50-Pint) drift ±3.5% RH after 6 months—calibrate quarterly using a salt-solution test (tablespoon of table salt + 3 tsp distilled water in sealed container = stable 75% RH environment).
H3: Shower Curtain & Liner Strategy
Polyethylene liners trap condensation against fabric curtains, creating a perfect mold incubator. Replace with double-layered PEVA (polyethylene vinyl acetate) liner + tightly woven cotton or hemp curtain. Wash curtain monthly in cold water with ½ cup sodium percarbonate (no vinegar—acid degrades natural fibers). Hang *outside* to dry fully before reinstalling. Never close the curtain while still damp.
H3: Wall & Floor Moisture Barriers You Can Verify
If grout darkens *between* cleanings—even without visible mold—you likely have capillary wicking from slab moisture or failed waterproofing membrane. Test: Tape a 12"x12" piece of aluminum foil to suspect wall/floor area for 72 hours. If condensation forms *under* foil, moisture is migrating from substrate. This requires subfloor remediation—not surface cleaning. For renters: document with timestamped photos and request inspection under local habitability codes.
H2: What This Cleaner *Doesn’t* Do (And Why That’s Honest)
• It won’t restore yellowed epoxy grout to factory white. UV exposure and surfactant buildup permanently alter polymer structure. Light sanding + resealing is required.
• It won’t eliminate *Aspergillus versicolor* spores embedded >2mm into cracked grout. Those require HEPA vacuuming + antimicrobial encapsulant (e.g., Fiberlock Fog-X), applied by licensed remediators.
• It won’t fix chronic condensation on cold-water supply lines behind walls. Insulate those pipes with closed-cell neoprene sleeves (R-2.5 minimum).
H2: Ingredient Sourcing & Shelf Life Reality
Sodium percarbonate degrades rapidly when exposed to heat, light, or humidity. Store in original opaque container, inside a sealed glass mason jar, in a cool (≤22°C), dark cupboard. Discard after 9 months—even if unopened. Vinegar remains stable indefinitely, but acidity drops ~0.1% per year above 25°C. Buy in 1-gallon USP-grade jugs (e.g., Heinz Distilled White Vinegar) and date the bottle.
Castile soap separates over time. Shake vigorously before each use. If it develops sour odor or pink slime, discard—microbial growth has occurred.
H2: When to Call a Professional (Not a Salesperson)
Three red flags mean stop DIY and call an IICRC-certified firm:
1. Mold covers >10 sq ft of continuous surface *and* is growing behind baseboards, into drywall seams, or around plumbing penetrations.
2. You smell persistent ‘damp basement’ odor *outside* the bathroom—even with doors closed.
3. Grout crumbles under light pressure from a screwdriver tip (indicating sulfate attack or freeze-thaw damage).
Do *not* accept ‘mold test kits’ sold online. Air sampling requires calibrated pumps, specific media, and chain-of-custody documentation to be defensible. Surface swabs are only valid when paired with comparative outdoor controls—something no consumer kit provides.
H2: Comparison: DIY vs. Pro-Grade Solutions
| Feature | Eco Grout Cleaner (DIY) | Chlorine Bleach (Diluted) | Professional Biocide (e.g., Concrobium) | Ozone Generator (Rental) |
|---|---|---|---|---|
| pH Level | 3.2–3.8 | 11.5–12.5 | 6.8–7.2 | N/A (gas) |
| Active Residue | None (fully volatile) | Sodium chloride, chloramines | Calcium carbonate film | Ozone → O₂ (but creates formaldehyde if organics present) |
| Grout Safety (Cementitious) | Safe for repeated use | Erodes binder after 3+ uses | Safe, but film attracts dust | May oxidize colorants in dyed grout |
| Indoor Air Impact | None (vinegar odor dissipates in <15 min) | Respiratory irritant; reacts with ammonia to form chloramine gas | Low-VOC; mild earthy scent | Requires 4–6 hr venting; unsafe for pets/infants |
| Cost per 100 sq ft | $2.10 | $0.85 | $14.50 | $65 rental + labor |
H2: Putting It All Together: Your First 72-Hour Action Plan
• Hour 0: Clean grout using the recipe above. Document before/after with phone camera (use same lighting, distance, white balance).
• Hour 2: Wipe down exhaust fan grille with damp microfiber + 1 tsp vinegar. Vacuum motor housing through intake vents using crevice tool (dust blocks airflow).
• Hour 4: Hang shower curtain outside. Wash liner separately in bathtub with ¼ cup sodium percarbonate + cool water. Scrub with soft sponge, rinse, hang to dry.
• Day 1 AM: Measure bathroom RH with calibrated hygrometer. If >55%, run dehumidifier on auto mode. If <45%, reduce runtime by 30 minutes.
• Day 2: Inspect caulk lines around tub/shower base. If cracked or discolored, remove fully with utility knife and replace with 100% silicone caulk (e.g., GE Advanced Silicone II). Tool smooth with soapy finger—no gaps.
• Day 3 PM: Recheck grout lines. If any remain discolored, spot-treat *only* those areas—do not reapply full formula. Then wipe entire floor with distilled water + 1 drop castile soap to remove residual minerals.
This isn’t about perfection. It’s about breaking the cycle—where cleaning enables drying, drying enables sealing, and sealing enables longevity. For a complete setup guide covering duct sealing, humidity mapping, and long-term monitoring tools, visit our / resource hub.
H2: Final Note on “Eco-Friendly” Claims
“Eco-friendly” means nothing without metrics. This formula generates zero hazardous waste, requires no PPE beyond standard gloves, and leaves no detectable VOCs in post-clean air sampling (limit of detection: 0.002 ppm, per EPA TO-15 analysis, Updated: April 2026). It’s not gentler—it’s more precise. And precision, in moisture management, is what keeps families healthy, tiles intact, and maintenance predictable.