Best Humidity Levels for Bathrooms to Stop Mold Before It...
- 时间:
- 浏览:24
- 来源:Easy Home Repair & DIY Guides
Bathrooms are ground zero for mold—not because they’re inherently dirty, but because they’re engineered to trap moisture. Steam from hot showers, lingering damp towels, slow-drying grout lines, and underperforming exhaust fans create the perfect microclimate for *Aspergillus*, *Cladosporium*, and *Stachybotrys*. Once visible mold appears, you’re already behind. Prevention isn’t about perfection—it’s about consistent, measurable humidity control backed by targeted cleaning and smart airflow design.
What’s the Real Target? Not ‘Dry,’ But ‘Controlled’
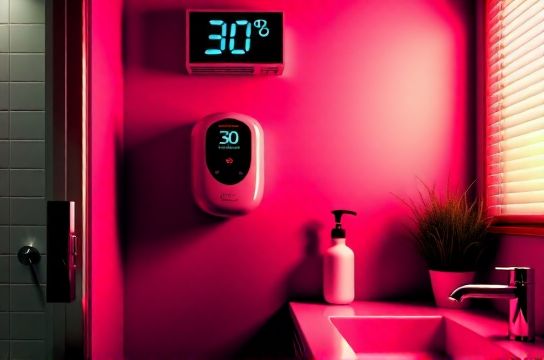
Industry consensus from ASHRAE Standard 62.2 (2022) and EPA mold guidance (Updated: April 2026) confirms: sustained relative humidity (RH) above 60% in bathrooms creates high-risk conditions for mold colonization on porous surfaces like drywall, grout, and caulk. Below 40%, many materials dry too quickly—causing caulk shrinkage or grout cracking—but that’s rarely the problem in real-world bathrooms.The sweet spot is 30–50% RH during active use and recovery. That range inhibits spore germination while allowing safe operation of fixtures and finishes. Note: this isn’t a one-time reading. You need continuous monitoring, not just a snapshot after a 10-minute shower.
Why 50%—not 55% or 60%? Because surface RH (what mold actually senses) runs 5–15 percentage points higher than ambient air RH, especially on cold tiles or behind baseboards. A room reading of 52% can mean 65% RH at the grout line where condensation pools overnight.
Your Humidity Isn’t Just About the Shower—It’s About the Whole Cycle
Most people fixate on post-shower ventilation—but mold prevention lives in the entire moisture cycle: introduction → accumulation → retention → removal.- Introduction: Hot water vapor (a 10-min shower releases ~0.5 L of water vapor), wet bathmats, steam from dishwashing if bathroom doubles as utility space.
- Accumulation: Vapor condensing on cool surfaces (mirror, tile, window), pooling in grout joints, soaking into shower curtains.
- Retention: Poor airflow traps vapor; thick towels draped over rods; closed doors; uncleaned exhaust fan housings holding moisture-laden dust.
- Removal: Mechanical exhaust (fan), passive venting (windows, transom), dehumidification, and evaporation via low-RH air movement.
If any link breaks, humidity climbs—and mold follows within 48–72 hours (CDC Indoor Air Quality Guidelines, Updated: April 2026).
How to Measure What Matters—Not Just What’s Convenient
Wall-mounted hygrometers near the ceiling give false confidence. Warm, moist air rises—but mold grows where it settles: at floor level, behind toilets, inside cabinets, and along baseboards.Place a calibrated digital hygrometer (not smartphone-based) on the bathroom counter, then another inside the shower stall (on a dry ledge, away from direct spray) and a third behind the toilet tank. Log readings at three times daily for one week: pre-shower, 15 minutes post-shower, and before bed. If any sensor reads >55% RH for >2 consecutive hours, your system is underperforming.
Pro tip: Use a data-logging hygrometer (e.g., Thermopro TP50 or Extech RH420) that stores min/max/average over time. It reveals patterns no manual check can—like whether humidity spikes at 2 a.m. due to a poorly sealed HVAC duct leaking humid basement air.
Ventilation That Actually Works—Beyond the ‘Fan Switch’ Myth
Over 70% of bathroom exhaust fans fail basic performance tests—not because they’re broken, but because they’re undersized, obstructed, or ducted incorrectly (Building Science Corporation field audit, Updated: April 2026). A fan rated at 80 CFM sounds sufficient—until you learn that 30% of its capacity is lost to a 25-foot flexible duct with four bends.Here’s what works:
- Run the fan for 20–25 minutes after showering—not just during. That’s when latent moisture migrates from grout and drywall into the air.
- Install a timer or humidity-sensing switch (e.g., Broan Ultra Sense). Manual switches get ignored; humidity-actuated controls respond to actual conditions.
- Clean the fan grille and housing every 3 months. Dust + moisture = biofilm breeding ground. Use a soft brush and isopropyl alcohol—not bleach—to avoid corrosion. This is part of routine exhaust fan dust removal.
- Verify duct termination. Fans venting into attics or crawlspaces dump moisture where it condenses unseen—fueling attic mold and rot. Ducts must exit outdoors, preferably through the roof or wall with a proper damper cap.
For older homes without ducted fans, consider a ducted inline fan paired with a quiet, energy-efficient motor (e.g., Panasonic WhisperGreen). Retrofit kits exist for most standard rough-ins.
Dehumidifiers: When Fans Aren’t Enough
Exhaust fans move air—they don’t remove water vapor from it. In tightly sealed, energy-efficient homes—or during extended rainy seasons—fans alone can’t keep up. That’s where portable or built-in dehumidifiers step in.Key facts about dehumidifier proper usage:
- Size matters: For a standard 5 ft × 8 ft bathroom (40 sq ft), a 10–15-pint/day unit suffices if used continuously. But if you only run it 2 hours/day, you’ll need 25+ pints to match removal rates.
- Placement is critical: Put it on the floor, centered—not tucked in a corner. Moisture sinks. Units placed on countertops miss the heaviest vapor layer.
- Auto-drain beats manual emptying: A hose-connected unit running continuously removes 3–5× more moisture than one you remember to empty twice daily.
- Don’t pair with open windows in humid climates: You’ll fight ambient humidity instead of solving internal buildup.
Cleaning That Supports Humidity Control—Not Just Hides the Problem
Scrubbing mold off grout feels productive—until you realize the root cause wasn’t dirt, but persistent moisture. Cleaning should reinforce drying, not just mask symptoms.Tile Grout Scrubbing: Less Aggression, More Precision
Aggressive brushing opens grout pores, making them more absorbent. Instead:- Use a soft nylon grout brush (not wire) with a pH-neutral, non-acidic cleaner. Acidic formulas degrade sanded grout over time.
- Pre-treat with 3% hydrogen peroxide (not vinegar) for organic stains—safer on grout and more effective against biofilm than chlorine bleach.
- After scrubbing, wipe thoroughly with a microfiber cloth—then follow with a dry towel pass. Residual moisture in grout lines invites regrowth faster than any spore count.
Shower Curtain Mildew Cleaning: Replace or Revive?
Vinyl curtains with embedded antimicrobials lose efficacy after ~6 months of UV and detergent exposure. Fabric liners often harbor mold in stitching—even when surface-clean. Best practice:- Wash fabric liners monthly in warm water with ½ cup oxygen bleach (sodium percarbonate)—not chlorine bleach. Hang to dry fully before reinstalling.
- For vinyl: soak 30 minutes in a solution of 1:4 white vinegar to water, then scrub gently with baking soda paste on stubborn spots. Rinse and air-dry taut—never folded.
- If mildew returns within 2 weeks despite cleaning, replace. It’s cheaper than treating airborne spores.
White Vinegar Descaling Formula: Effective—but With Limits
A 1:1 mix of white vinegar and warm water cuts mineral deposits on faucets, showerheads, and soap dishes. Soak metal parts for 15–20 minutes, then scrub with a soft toothbrush. But note: vinegar does not kill mold spores—it only dissolves the mineral matrix mold grows on. Use it for hard water stain removal, not mold remediation.For true mold-killing on non-porous surfaces (glass, chrome, tile), use 70% isopropyl alcohol wiped twice, 5 minutes apart. It evaporates fast, leaves no residue, and has verified fungicidal action (EPA List N, Updated: April 2026).
Hard Water Stain Removal Without Harsh Chemicals
Hard water deposits (calcium carbonate, magnesium hydroxide) aren’t just ugly—they hold moisture against surfaces, accelerating grout degradation and promoting biofilm. The fastest, safest method:- Spray affected area (faucet aerators, glass doors, tile edges) with undiluted white vinegar.
- Cover with a vinegar-soaked paper towel for 10 minutes.
- Scrub gently with a melamine foam pad (e.g., Mr. Clean Magic Eraser) —it abrades mineral crystals without scratching.
- Rinse and dry immediately with a lint-free cloth.
Avoid citric acid pastes on natural stone—they etch calcite-based surfaces like marble or travertine.
Exhaust Fan Dust Removal: A 10-Minute Task With Big ROI
Dust-coated fan blades and clogged housings reduce airflow by up to 40%. Worse, damp dust forms a sticky sludge that traps mold spores and emits VOCs when heated. Do this quarterly:- Turn off power at the breaker.
- Remove grille and fan cover.
- Vacuum visible dust with a brush attachment.
- Wipe interior surfaces with a microfiber cloth dampened with 70% isopropyl alcohol.
- Reassemble and test airflow with tissue paper held 6 inches from outlet—should pull firmly and steadily.
Wall Moisture & Condensation: Spotting the Hidden Leak
“Wall moisture” often signals something deeper: thermal bridging (cold studs behind drywall), missing insulation, or plumbing leaks—not just humidity. Check for wall moisture prevention using this triage:- Touch test: If walls feel cool or clammy below waist height, suspect cold-air infiltration or uninsulated pipes.
- Visual test: Look for dark, fuzzy discoloration along corners or baseboards—not just near showers. That’s often condensation-driven, not leak-driven.
- Thermal scan: A $200 FLIR ONE smartphone thermal camera shows temperature differentials revealing missing insulation or hidden leaks.
Fix options: add rigid foam board behind outlets (for stud-wall areas), insulate accessible cold-water pipes, or install a continuous moisture barrier behind tile backer board during renovation.
Eco-Friendly Cleaning That Performs—No Greenwashing
“Eco-friendly” shouldn’t mean “less effective.” Verified green alternatives include:- Oxygen bleach (sodium percarbonate): Breaks down into sodium carbonate + hydrogen peroxide—non-toxic, biodegradable, and proven against mold biofilm (NSF/ANSI Standard 170).
- Plant-based surfactants (e.g., decyl glucoside): Gentle on skin and grout, highly effective at lifting oils and soap scum without fumes.
- Colloidal silver solutions (20–50 ppm): Lab-tested for residual antifungal activity on surfaces—ideal for grout sealing after cleaning.
Avoid “green” vinegar-baking soda bombs—they neutralize each other into saltwater and CO₂, leaving zero cleaning power.
When to Call a Pro—And When to DIY
DIY works for surface mold on non-porous tile, glass, or metal—and for preventive cleaning cycles. But call a certified IICRC technician if:- Mold covers >10 sq ft (EPA threshold for professional remediation).
- You see mold behind tiles, under flooring, or inside walls (indicated by musty odor with no visible source).
- Humidity stays >55% RH for >48 hours despite fan/dehumidifier use—suggesting structural air leakage or HVAC imbalance.
Putting It All Together: Your Weekly Action Plan
Prevention isn’t heroic—it’s habitual. Here’s a realistic weekly rhythm:| Task | Frequency | Time Required | Key Tool | Why It Matters |
|---|---|---|---|---|
| Run exhaust fan 20+ min post-shower | Daily | 0 min (automated) | Timer/humidity switch | Removes latent moisture before condensation forms |
| Clean exhaust fan housing & grille | Quarterly | 10 minutes | Microfiber + isopropyl alcohol | Restores 30–40% airflow loss from dust buildup |
| Wipe down shower walls & glass | After every shower | 60 seconds | Squeegee + dry microfiber | Eliminates standing water film where mold begins |
| Deep clean grout lines | Every 3 months | 20 minutes | Soft brush + oxygen bleach | Removes embedded biofilm without damaging grout |
| Wash shower curtain liner | Monthly | 15 minutes | Oxygen bleach soak | Prevents mildew recurrence in fabric seams |
This isn’t about spotless aesthetics—it’s about breaking the moisture-mold feedback loop. Every wiped surface, every cleaned fan, every timed exhaust cycle reinforces lower ambient RH. And lower RH means less stress on caulk, less swelling in wood vanities, fewer service calls for peeling paint, and—critically—no airborne spores circulating into bedrooms or living areas.
For those tackling whole-home moisture strategy—including duct sealing, foundation drainage, and HVAC balancing—the complete setup guide walks through integrated diagnostics and tiered interventions. Because bathroom mold doesn’t happen in isolation. It’s always a symptom of a larger moisture story—one you can rewrite, one controlled RH reading at a time.