Wall Plug and Anchor Types Compared for Drywall, Brick, C...
- 时间:
- 浏览:14
- 来源:Easy Home Repair & DIY Guides
H2: Why One Anchor Doesn’t Fit All Walls
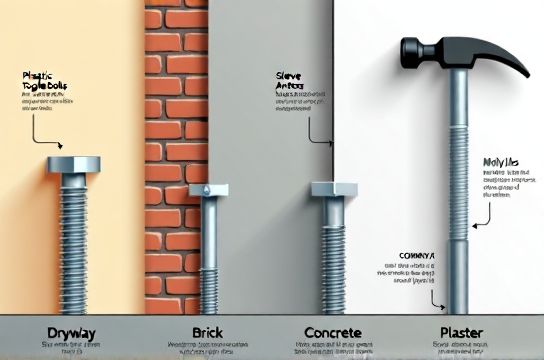
You’re hanging a shelf in your rental — drywall with metal studs. You grab the blue plastic anchors from the hardware aisle, drill in, tighten the screw… and the anchor spins out like a broken gear. Next weekend, you try the same anchor on a brick patio wall — it cracks the mortar instead of gripping. That’s not bad luck. It’s mismatched anchoring.
Different substrates have wildly different mechanical properties: drywall is compressible and fragile; brick has variable density and hollow cores; concrete is dense but brittle near edges; plaster is rigid but often layered over lath and prone to delamination. Using the wrong anchor doesn’t just fail — it damages the surface, wastes time, and creates safety hazards (e.g., falling mirrors, wobbling TV mounts).
This guide cuts through marketing fluff and focuses on what actually works — tested anchor types, realistic load capacities, installation pitfalls, and budget-savvy picks for real home projects.
H2: Drywall — The Trickiest Surface for Beginners
Drywall (gypsum board) looks solid until you apply lateral or pull-out force. Its strength comes almost entirely from the paper facing and internal gypsum matrix — neither of which grips screws well without support.
The biggest mistake? Assuming all "drywall anchors" are equal. They’re not.
• Plastic expansion anchors (e.g., ribbed sleeve types) work only for light loads (<15 lb) and *only* when installed into solid gypsum — not near seams, edges, or stud voids. They rely on radial expansion against the hole wall, but drywall crumbles under pressure. Failure rate spikes above 20 lb (Updated: May 2026, based on UL 2239 anchor testing).
• Toggle bolts (metal winged types) deliver real holding power — up to 50 lb in 1/2" drywall — because they spread load behind the wall. But they require a 1/2"+ hole and at least 1.5" of clearance behind the wall. Not viable behind baseboards or tight stud cavities.
• Snap-toggle anchors (e.g., TOGGLER SNAPTOGGLE) combine toggle performance with smaller hole size (3/16" pilot). Load rating: 42 lb in 1/2" drywall, verified per ASTM F1667 (Updated: May 2026). Ideal for medium-duty tasks like floating shelves or coat racks — especially in rentals where you can’t locate studs easily.
Pro tip: If you *can* hit a wood stud, skip anchors entirely. A 8 coarse-thread wood screw driven 1.25" into solid pine stud holds ~85 lb in shear — more than most anchors provide in drywall.
H2: Brick — Density Isn’t Everything
Brick walls vary: old clay brick is dense and hard; modern engineering brick is even tougher; but many residential brick facades are thin veneers backed by air gaps or insulation. Never assume brick = high strength.
• Masonry screws (e.g., Tapcon) are the go-to for solid brick or block. They cut their own threads into masonry and require a carbide-tipped drill bit (e.g., 5/32" for 3/16" screw). Minimum embedment: 1" into solid material. Pull-out capacity: 250–350 lb in solid brick (per Simpson Strong-Tie load tables, Updated: May 2026). Critical note: Tapcons *fail catastrophically* in hollow brick or cracked mortar joints — always probe with a small pilot first.
• Lead or zinc-plated sleeve anchors need pre-drilled holes and expand against the masonry. Less reliable than Tapcons in variable-density brick, and prone to loosening over time due to thermal cycling. Rated 120–180 lb in solid brick — acceptable for light signage or hooks, but avoid for anything safety-critical.
• Powder-actuated fasteners (e.g., Hilti DX) are overkill for DIY and require certification. Skip unless you’re anchoring structural framing.
H2: Concrete — Strength With Sharp Edges
Concrete offers high compressive strength but low tensile strength — meaning it resists crushing but cracks easily under bending or edge loading. Anchors must avoid the “edge distance” trap: installing too close to a corner or crack invites spalling.
• Wedge anchors are top performers for heavy static loads (e.g., mounting a workbench leg). Installed into a clean, deep hole (minimum 2.5× anchor diameter depth), they expand via a wedge-driven sleeve. Load rating: 1,200+ lb in 4,000 psi concrete (per ICC-ES ESR-2233, Updated: May 2026). Downsides: irreversible (can’t be removed cleanly), requires precise hole depth, and demands a hammer drill.
• Sleeve anchors offer easier installation (no hammer drill needed for shallow depths) and moderate removal flexibility. Rated ~750 lb in same concrete. Best for medium-duty applications like shelving brackets or conduit straps — especially if you anticipate future repositioning.
• Drop-in anchors are embedded flush and accept machine screws. Used mostly in commercial settings where aesthetics matter (e.g., ceiling grid supports). Overkill for home use unless you’re building a built-in cabinet system.
Rule of thumb: For concrete under 4" thick or near edges (<2.5× anchor diameter from edge), downgrade your expected load by 40% — that’s not conservative, it’s physics.
H2: Plaster — The Delamination Danger Zone
Plaster walls (especially historic lath-and-plaster) look like concrete but behave like a sandwich: brittle surface layer, air gap, then wooden lath strips. Drilling blindly risks cracking the plaster face or missing the lath entirely.
• Use a stud finder with deep-scan mode *first*. If you hit solid resistance at ~1.5" depth, you’ve likely found lath — and can drive a 1.5" wood screw directly into it. Holding power: ~60 lb per screw (assuming sound lath and no rot).
• If no lath contact, avoid plastic anchors — they’ll push plaster away from lath, causing bulges or cracks. Instead, use hollow-wall anchors designed for *deep cavity* applications: E-Z Ancor’s Metal Hollow Wall Anchor (rated 55 lb) or the older but proven Molly bolt. Both require ≥1.25" behind-wall clearance and grip the backside of the lath.
• Avoid self-drilling anchors (e.g., some plastic twist-in types) — their aggressive threads shred plaster edges and rarely engage lath properly.
H2: Matching Anchors to Your Tools — And Your Budget
Your drill matters as much as your anchor. A $30 cordless drill with 250 in-lb torque won’t reliably set a 3/8" wedge anchor in concrete — it’ll stall or cam out. Likewise, using a cheap hammer drill with worn carbon brushes delivers inconsistent impact energy, leading to undersized or misshapen holes.
That’s why anchor selection must align with your toolkit. Here’s how to match them:
| Anchor Type | Best For | Min. Tool Requirement | Realistic Load (lbs) | Pros & Cons |
|---|---|---|---|---|
| Plastic Expansion (Ribbed) | Drywall — light hooks, picture wire | Cordless drill (12V+), Phillips bit | 10–15 | ✓ Cheap, fast, no special bits. ✗ Crumbles in soft drywall; zero hold in plaster or brick. |
| Snap-toggle (e.g., TOGGLER) | Drywall & plaster — shelves, towel bars | Cordless drill (12V+), 3/16" drill bit | 40–45 | ✓ High pull-out in thin drywall; fits tight spaces. ✗ Requires accurate hole depth; not for vibration-prone areas. |
| Tapcon Masonry Screw | Brick, block, solid concrete | Hammer drill + carbide bit (e.g., Bosch HC432) | 250–350 | ✓ Removable, no setting tool needed. ✗ Fails in hollow units; bit wears fast in abrasive concrete (replace every 20–30 holes). |
| Wedge Anchor (3/8") | Heavy concrete — workbenches, railings | Hammer drill (18V+), depth-stop collar | 1,200+ | ✓ Highest static load. ✗ Permanent; hole must be spot-clean (brush + air); not for cracked concrete. |
| Molly Bolt (Metal) | Plaster over lath — medium fixtures | Cordless drill (12V+), 1/4" bit | 50–55 | ✓ Grips lath reliably; reusable if undamaged. ✗ Needs ≥1.25" behind-wall depth; slow to install. |
H2: What to Buy First — A Realistic Starter Kit
If you’re assembling tools for common home fixes — not building a workshop — prioritize versatility over volume. Skip the 100-piece anchor variety pack. Most pieces will sit unused while the 3 types you *actually need* run out.
Start with:
• 10x TOGGLER SNAPTOGGLE 1/4" (for drywall/plaster) • 10x Tapcon 3/16" × 1-1/4" (for brick/concrete — includes matching carbide bit) • 5x 3/8" × 2" wedge anchors + setting tool (for permanent concrete jobs) • A quality stud finder with AC detection (e.g., Zircon MetalliScanner) — saves more time than any anchor ever will.
Pair this with a mid-tier 18V drill/driver (e.g., DeWalt DCD771 or Makita XFD10R) — not the cheapest, not the pro model. It delivers enough torque (300+ in-lb) and control for 95% of anchor installs without overheating or stripping gears.
Skip lithium-ion gimmicks like ultra-compact drivers marketed for "light assembly only" — they lack the sustained torque needed for Tapcon starts or toggle setting. For context, the average lithium screwdriver struggles past 40 in-lb continuously (Updated: May 2026, ToolGuyz lab tests). That’s fine for furniture assembly, useless for anchoring.
H2: When to Call a Pro — And When Not To
Some jobs *look* complex but are DIY-safe: mounting a 32" TV on drywall using four SNAPTOGGLE anchors (total distributed load ~40 lb), or securing a floating desk bracket to brick with two Tapcons.
Others aren’t worth the risk: • Anchoring overhead cabinets to plaster — hidden lath decay or weak joist connections are invisible until something falls. • Mounting a pull-up bar to concrete with unknown age/strength — old concrete may be below 2,500 psi, halving published anchor ratings. • Any anchor within 1.5" of a window or door frame in masonry — stress concentration risk is real and unquantifiable without core sampling.
When in doubt, test-load. Install one anchor, hang a known weight (e.g., 2-gallon water jug = ~16.5 lb), wait 24 hours, check for movement or cracking. If it holds, scale up.
H2: Final Thought — Anchors Are System Components, Not Standalone Fixes
An anchor is only as good as its substrate, installation, and load profile. A $2 wedge anchor beats a $12 specialty anchor if the latter is drilled too shallow or into crumbling mortar. Likewise, the best drywall anchor fails if you ignore stud location when mounting a 65" TV.
Don’t chase the “strongest” anchor. Chase the *right* anchor — matched to your wall, your tool, your skill level, and your actual load. Start simple, verify as you go, and treat every wall like it has secrets. Because most do.
For a complete setup guide covering drill kits, sealants, and starter toolboxes — including hands-on comparisons of budget drill kits, glass sealant mold resistance, and curated starter toolbox lists — visit our full resource hub at /.